

Crochet a blanket for beginners

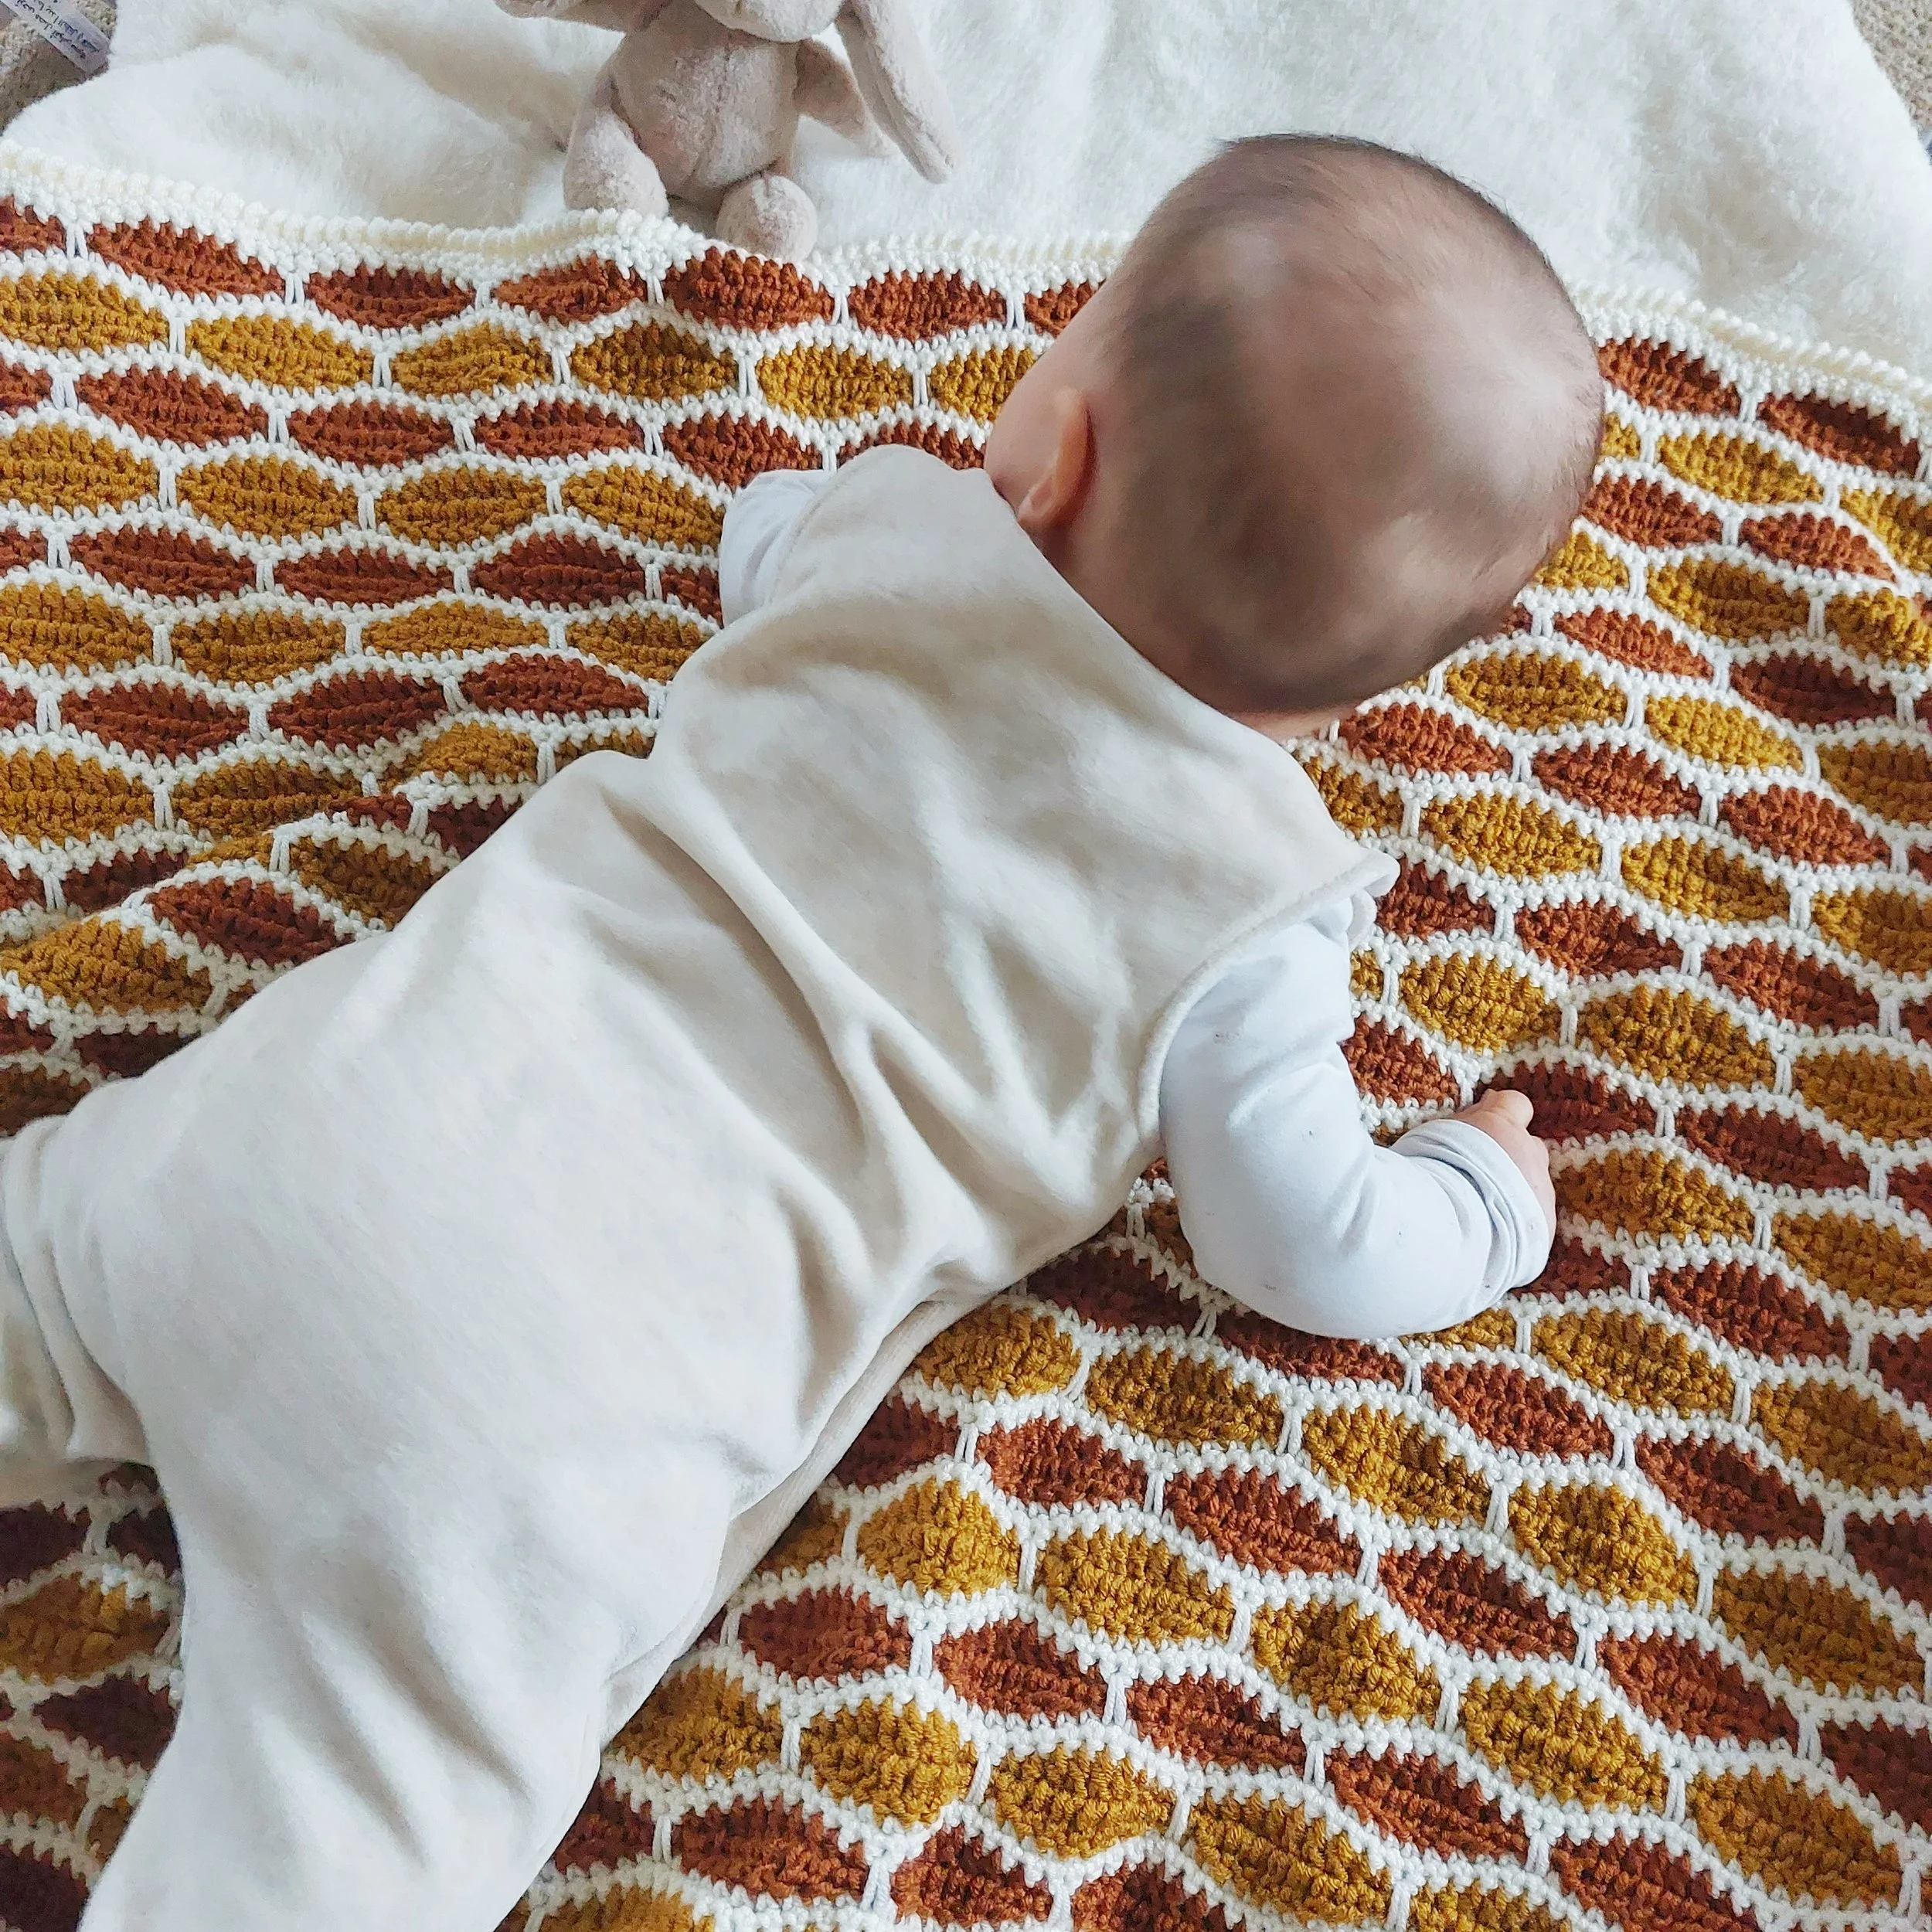
Are you ready to embark on a fun and fulfilling crochet journey? Look no further than "The Brick Lane Blanket" pattern! Whether you're a seasoned crocheter or just starting out, this easy-to-follow pattern is perfect for everyone. With its charming brick-like stitch pattern, you'll create a stunning blanket that adds warmth and character to any room. The use of two rich shades of brown, Cognac and Camel, in soft and cuddly DK acrylic yarn makes it the ideal accessory for the autumn season.
Imagine the inviting atmosphere this blanket will bring to your nursery or living room. It radiates a timeless charm that complements various decor styles, from rustic to modern. Snuggle up with your little ones under this cozy masterpiece, or drape it over your favorite armchair for a touch of homey elegance. The "Brick Lane Crochet Blanket" is not just a project; it's a work of art that will be cherished for years to come.
When you dive into this pattern, you'll not only create a beautiful blanket but also enhance your crochet skills. The detailed instructions and step-by-step photos will guide you through the process, ensuring that you learn and grow as a crocheter along the way. We believe that every stitch you make adds to the joy and satisfaction of creating something truly special.
But that's not all! For those who want even more versatility, we offer an ad-free version of this pattern on our website and Etsy shop. You'll find a total of 12 different sizes to make, each with the exact amount of yarn needed. Whether you're looking to create a baby blanket, a king-sized masterpiece, or anything in between, we've got you covered. Visit our online store and unlock a world of possibilities to crochet your heart out.
So, grab your hooks, gather your yarn, and get ready to crochet your way to coziness and creativity with the "Autumn Bricks Crochet Blanket" pattern. We can't wait to see your beautiful creations! Happy crocheting!
Are you still a beginner and not really sure how to read a pattern? Don’t worry! Here’s the full video tutorial :)
get the brick lane blanket
FREE PATTERN: Keep scrolling for the FREE version of the Brick Lane Blanket + helpful tutorial video.
PRINTABLE PDF: Pick up the beautifully formatted, ad-free PDF version of the Brick Lane Blanket from ETSY or DublinBayCrochet.com
materials
For making this blanket, I recommend using acrylic yarn, as it offers a range of fantastic advantages when crafting your crochet blankets.
First and foremost, it's incredibly affordable, making it an excellent choice for budget-conscious crafters. Additionally, acrylic is easy to find in a wide array of colors, ensuring you can achieve the exact look and style you desire for your project.
Its durability makes it ideal for blankets that will see frequent use, as it stands up well to washing and wear. Furthermore, acrylic yarn is hypoallergenic, making it a great option for those with sensitive skin or allergies.
Finally, its softness and warmth make it perfect for creating cozy, snuggle-worthy blankets that will keep you and your loved ones toasty all year round. So, when it comes to crafting your next crochet masterpiece, consider acrylic yarn for its affordability, versatility, and comfort.
This pattern is written on One size only. You will find the exact amount of stitches and rows for making a Stroller Baby Blanket - 78 x 92 cm // 31 x 36 inches
You will need:
Any DK yarn (I used Kind Feather by Hobbii Yarn,
100% Premium Acrylic; 100 gr= 235 m / 3.5 oz=257 yds)
Off White (02)- color A x 3
*Cognac (24)- colour B x 2
* Camel (23) - colour C x 2
Looking for substitutions?
You can also use Stylecraft Special Dk, 100% Acrylic; DK
Cream- Colour A x 3
Copper - Colour B x 2
Gold- Colour C x 2
Tapestry Needle
stitches and abreviations
Pattern uses American terms (US terms)
Ch- Chain
Ch-sp- Chain space
St/s- Stitch/es
Beg- Beginning
Rnd- Round
RS- Right side
WS- Wrong side
Sc- Single crochet
Hdc- Half double crochet
Dc- Double crochet
Special Stitches:
Spike Stitch (Spike st)- Work sc loosely in indicated st below, allowing strands to stretch over intervening rows.
Crab stitch or reverse single crochet- To start, work 1 ch and insert into the next full stitch to the right, pull up a loop, yarn over and pull through both loops on hook. First crab stitch (reverse single crochet). Continue in the same manner around your entire piece until you reach the beginning.
gauge
17 sts x 15 rows= 10 cm x 10 cm// 4 inches x 4 inches
For making the sample work a chain of 32 and follow rows 1- 8 of pattern twice.
pattern Notes
CONSTRUCTION
This blanket is worked in rows from the bottom up, repeating eight rows in order to create the brick look and turning at the end of each row.
COLOUR WORK
Colours change every two rows, using three colours in total. You will always work in this sequence: Off White (A), Cognac (B), Off White (A), Camel (C), repeating this sequence until the length of the blanket is completed.
After finishing one row, cut the yarn and knot to secure. Then, attach the next colour on the last stitch of the row you just finished, work 1 or 2 chains (depending on the row you are working on) and turn your work to start the next row. The initial 1 and 2 ch do not count as a stitch.
If you would like to avoid having thousands of ends to weave in you can do the following:
After completing a row, do not cut the yarn, instead attach the new yarn using a chain stitch, drop the old colour and continue working with the new colour for the number of rows needed (in this case it will always be two rows) and when you need to use the other colour bring it back and continue working as normal. When you work the border you will be able to hide the yarn left on the sides.
The stitch pattern for this blanket is any number multiple of 10 + 2.
Start here
With colour A and 5 mm crochet hook
For STROLLER size: Chain 132
Working in rows:
Row 1: 1 sc in 2nd ch from hook and in each ch across. 131 sc

Do not cut colour A as you will be using it every 2 rows. Drop colour A (this will be on hold) and join colour B to last sc from previous row and turn.
Rows 2 and 3: 1 ch (does not count as a st here and throughtout), 1 sc in same space, *1 sc in next st, 1 hdc in next st, 1 dc in next 5 sts, 1 hdc in next st, 1 sc in next st**, 1 ch, miss next st, rep from * across, ending last repeat at **, 1 sc in last st, turn. 131 sts including the 1ch-sp


Cut yarn and knot to secure at the end of row 3 or drop colour B and put it on hold to be used in the following rows.
Bring back colour A to last sc from previous row and turn.
Row 4: 1 ch, 1 sc in first 10 sts, *Spike st in sc 3 rows below, 1 sc in next 9 sts, rep from * across, 1 sc in last st, turn. 131 sc


Row 5: 1 ch, 1 sc in each st across. 131 sc

Drop colour A (this will be on hold) and join colour C to last sc from previous row and turn.
Rows 6 and 7: 2 ch ( does not count as st here or throughout), 1 dc in same space, 1 dc in next 2 sts, *1 hdc in next st, 1 sc in next st, 1 ch, miss next st, 1 sc in next st, 1 hdc in next st ** 1 dc in next 5 sts, rep from * across, ending last repeat at **, 1 dc in last 3 sts, turn. 131 sc

Cut yarn and knot to secure at the end of row 7 or drop colour C and put it on hold to be used in the following rows.
Bring back colour A to last sc from previous row and turn.
Row 8: 1 ch, 1 sc in first 5 sts, *Spike st in sc 3 rows below**, 1 sc in next 9 sts, rep from * across, ending last repeat at **, 1 sc in last 5 sts, turn. 131 sc
Rows 9- 136: Repeat rows 1 to 8 sixteen times following the same colour changes for each row.
Border:
The border of the blanket is worked in two rounds without turning, so the right side of your work will be always facing you. When working the vertical sides of the blanket, it won’t be clear enough where to place each stitch so I recommend working 1 sc over 2 rows of single crochet rows, 1 sc over rows 2 and 3 of bricks and 3 sc over rows 6 and 7 of bricks. This way you will achieve a balanced edge.
The border is optional and you can skip it :)
Rnd 1: Attach colour A to bottom right corner of the blanket, 1 ch (does not count as a stitch here and throughout), *3 sc in same corner sp and evenly distribute each sc along the vertical side edge (try to keep your tension loose when working the vertical sides of the blanket, otherwise it can shrink), 3 sc in next corner sp, work 1 sc in each sc available along the horizontal edge* repeat from * once more, join with sl st to 1st sc from beg of rnd. Cut colour A.
Repeat row 1 if you would like to make the border thicker.
Rnd 2: Attach colour B to any corner space 2nd sc from corner, 1 ch, *1 reverse sc or crab st in every sc from previous round, 3 reverse sc in next corner space* repeat from * to * across the entire blanket until you reach the first sc of the round, 1 sl st to 1st sc of round.
Cut yarn and weave in ends. Steam block your blanket to straighten the sides and achieve a smoother look.

congratulations! You are done! i hope you enjoy making this project :)
Tag me @leonela.diy or use the #bricklaneblanket so I can see all your amazing blankets!