

Easy Crochet Bandana- free pattern and tutorial

Hello there! Thank you so much for stopping by! Summer is here and what could be a better way to welcome it than with a cool new project? Well, I’ve got the perfect one for you :) Even if you’re a newbie in crochet, this pattern is going to be a breeze!
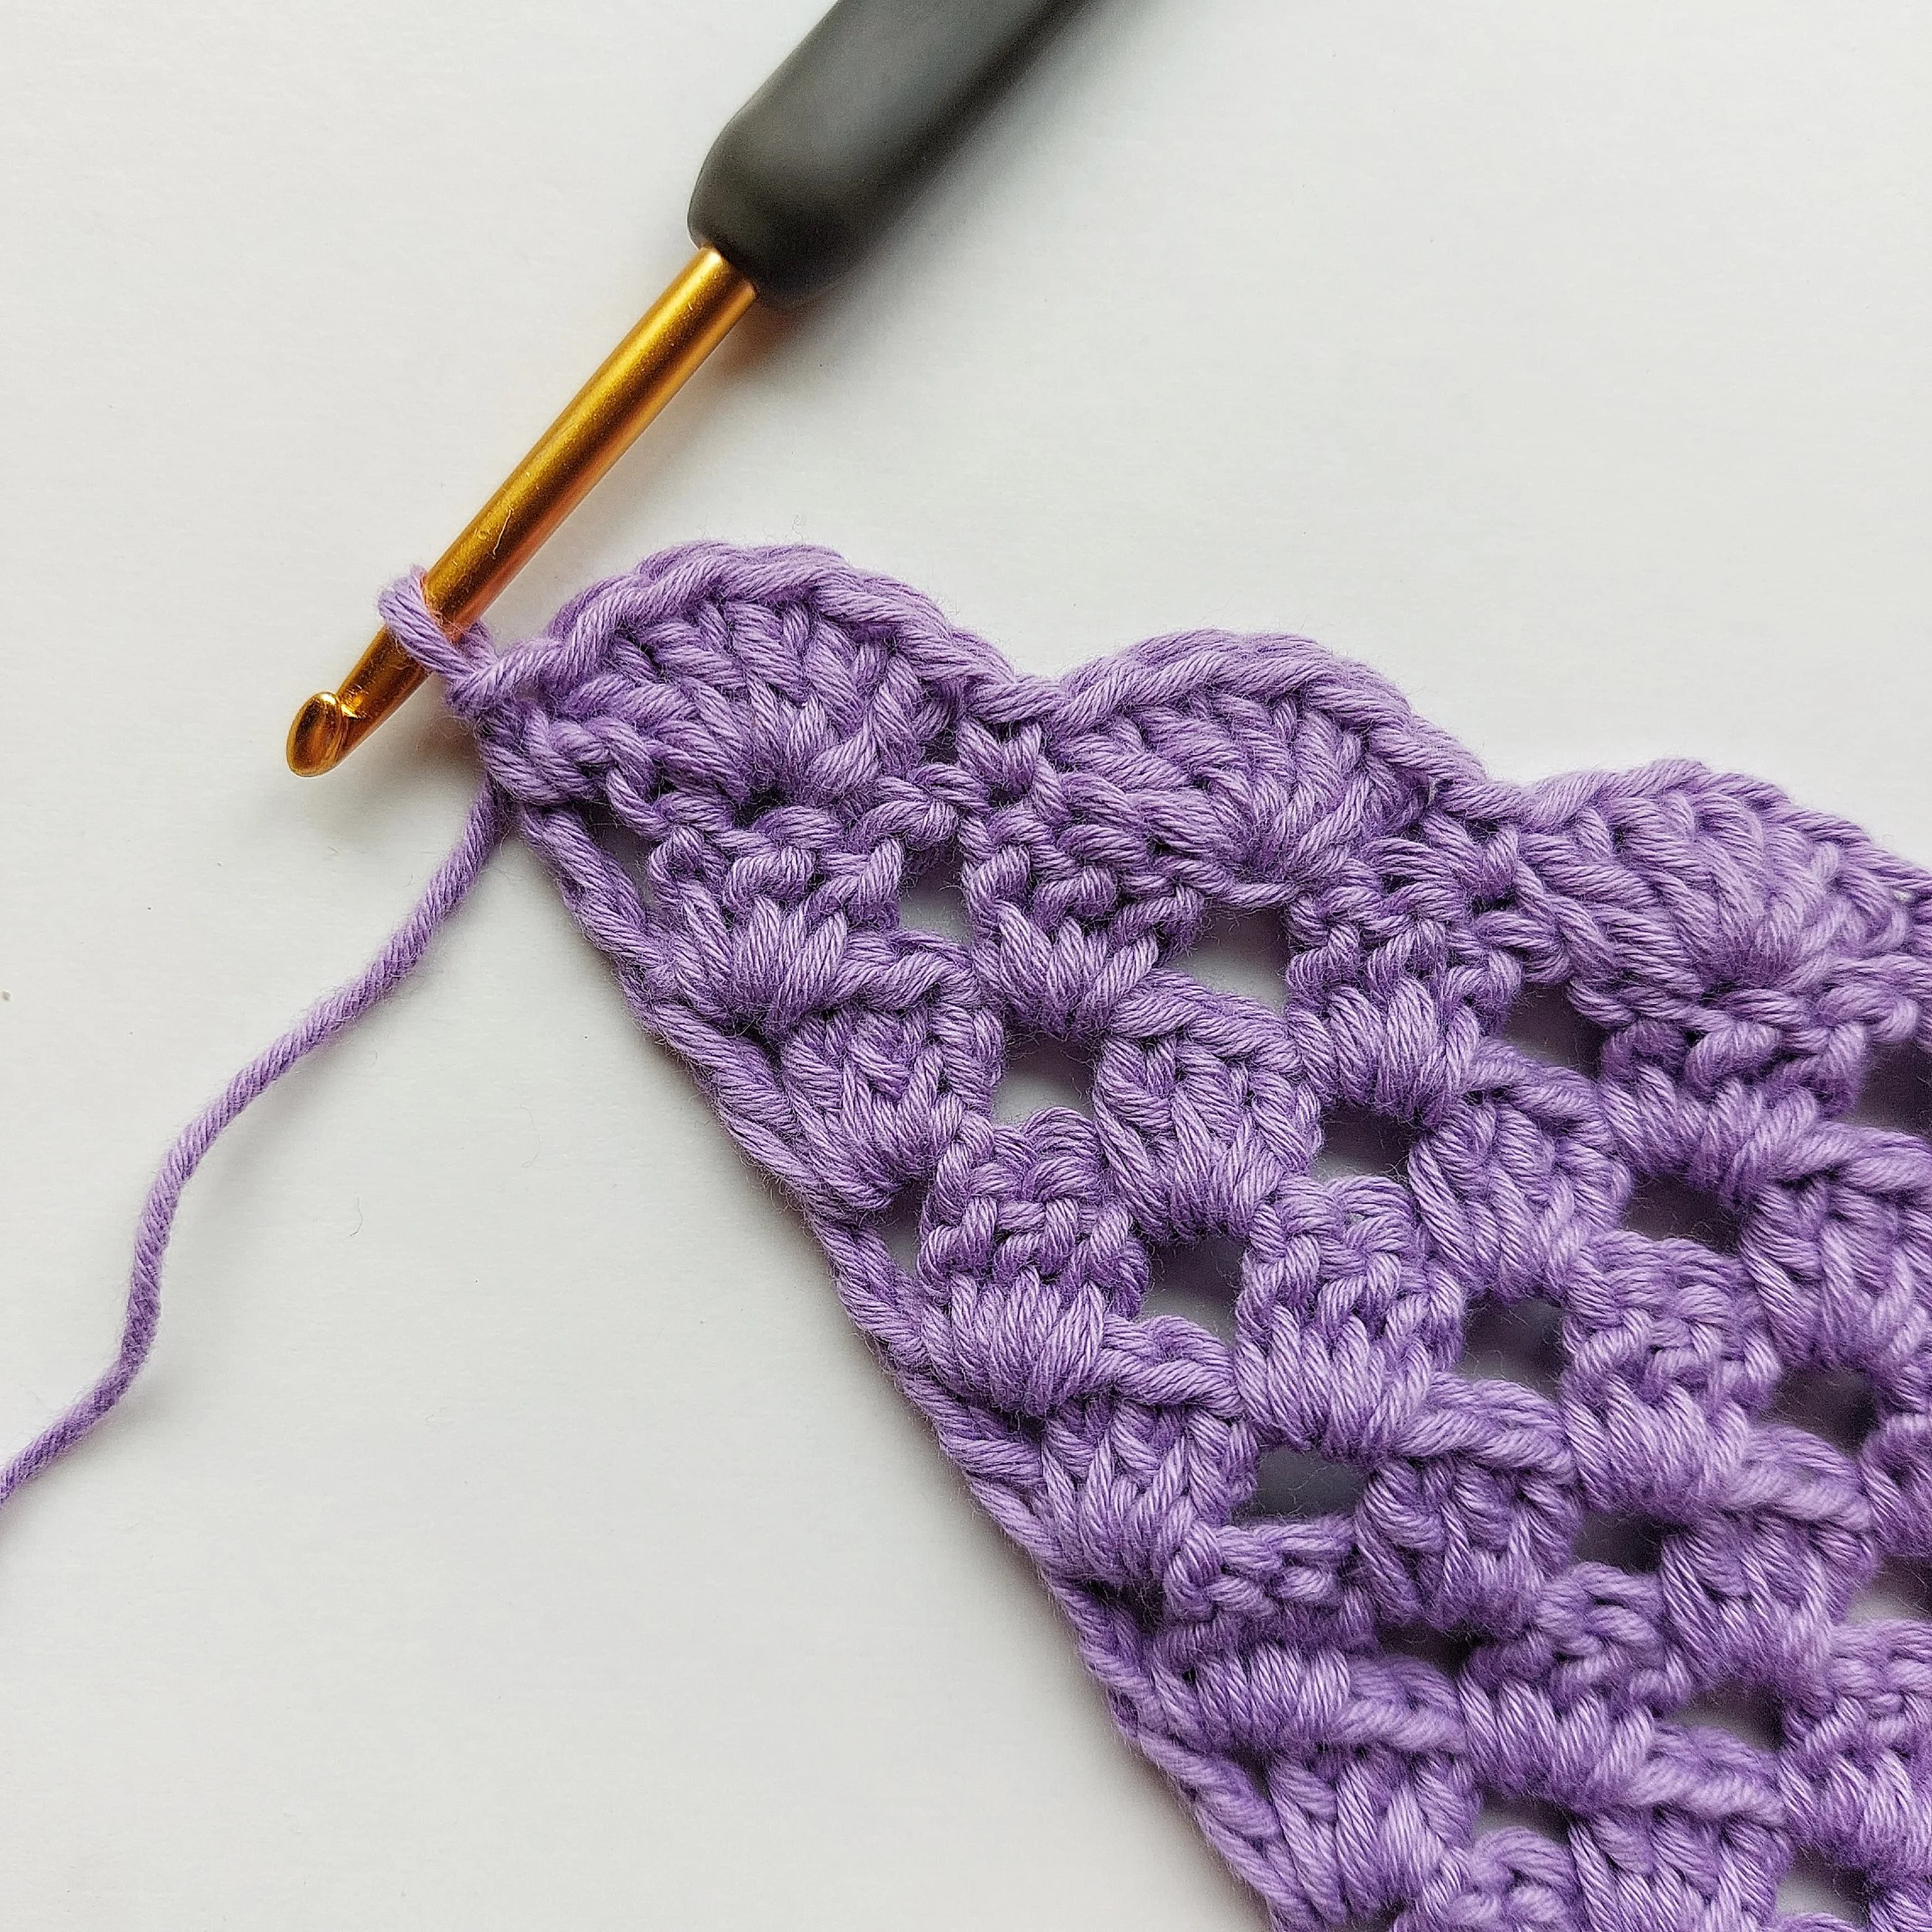
I’m going to walk you through a super fun and easy project—creating your very own stylish bandana using the granny stitch. It's perfect for those sunny summer days, whether you're heading to a festival, a picnic, or just soaking up the rays in your backyard. This bandana is not only a fantastic way to show off your burgeoning crochet skills but also a practical accessory to keep that summer sun at bay.
Ready to jump in? Let's start this crochet adventure together! Trust me, by the time you're done, you'll have a gorgeous handmade bandana and a new stitch to create new projects. So grab your crochet hooks, pick out your favorite yarn colors, and let's get started on this beginner-friendly crochet tutorial!

MATERIALS
Whats the best type of yarn for a bandana?
And the answer is: MERCERIZED COTTON.
Mercerized cotton is a unique type of cotton that undergoes a treatment process involving sodium hydroxide, otherwise known as caustic soda or lye. This treatment, known as mercerization, leads to significant improvements in the properties of cotton fibers, making them more lustrous, stronger, absorbent, and resistant to mildew and shrinkage. Additionally, mercerization enhances the dye uptake and color brightness of cotton, making it a popular choice among crocheters and fashion enthusiasts alike.
Improved Strength and Durability:
Mercerization not only enhances the luster but also improves the strength and durability of cotton garments. It becomes stronger and more resistant to wear and tear. This increased strength allows the fabric to withstand the stress of daily use without breaking or tearing easily.
Mercerization also helps to minimize shrinkage in cotton garments. This means that even after multiple washes, the garments maintain their original shape and fit, ensuring longevity and durability.
Increased Absorbency:
Mercerized cotton fibers have a higher affinity for water and moisture, making them absorb liquid more efficiently compared to untreated cotton.
The increased absorbency of mercerized cotton allows for better air circulation through fibers, resulting in improved breathability and comfort when worn.
Now you know that if you want to create THE perfect summer bandana, mercerized cotton is the yarn to go.
Are you still a beginner and not really sure how to read a pattern? Don’t worry! Here’s the full video tutorial :)
**Disclosure: As an Amazon Associate, I want to be transparent with our readers and let you know that I may earn a small commission from qualifying purchases made through the links below.
My recommendation of these products is solely based on their suitability for the pattern and not on the commission I may receive. I have personally used and found these products to be the best option for this particular project.
Using these links greatly supports our work at Dublin Bay Crochet. We appreciate your consideration and continued support. Thank you!**
You will need DK cotton and here’s the one I’ve used:
Muskat Cotton Yarn by Drops 1 ball
STITCHES + ABBREVIATIONS
This pattern is written in American terms.
Ch- Chain
Ch-sp- Chain space
St/s- Stitch/es
Beg- Beginning
Sl st- Slip stitch
Sc- Single crochet
Dc- Double crochet
SHELL- Work 5 dc in designated space
GAUGE
Work a small triangle, following rows 1-4 and this should measure: 6 cm/2.32 inches tall x 13.5 cm/5.30 inches width.
MEASUREMENTS
Width without the ties: 39 cm/ 15.35 inches
Length including the border: 20 cm/ 8 inches
Ties: 28 cm/ 11 inches
You can make your bandana bigger by adding extra rows and the ties longer by working extra chains :)
PATTERN NOTES
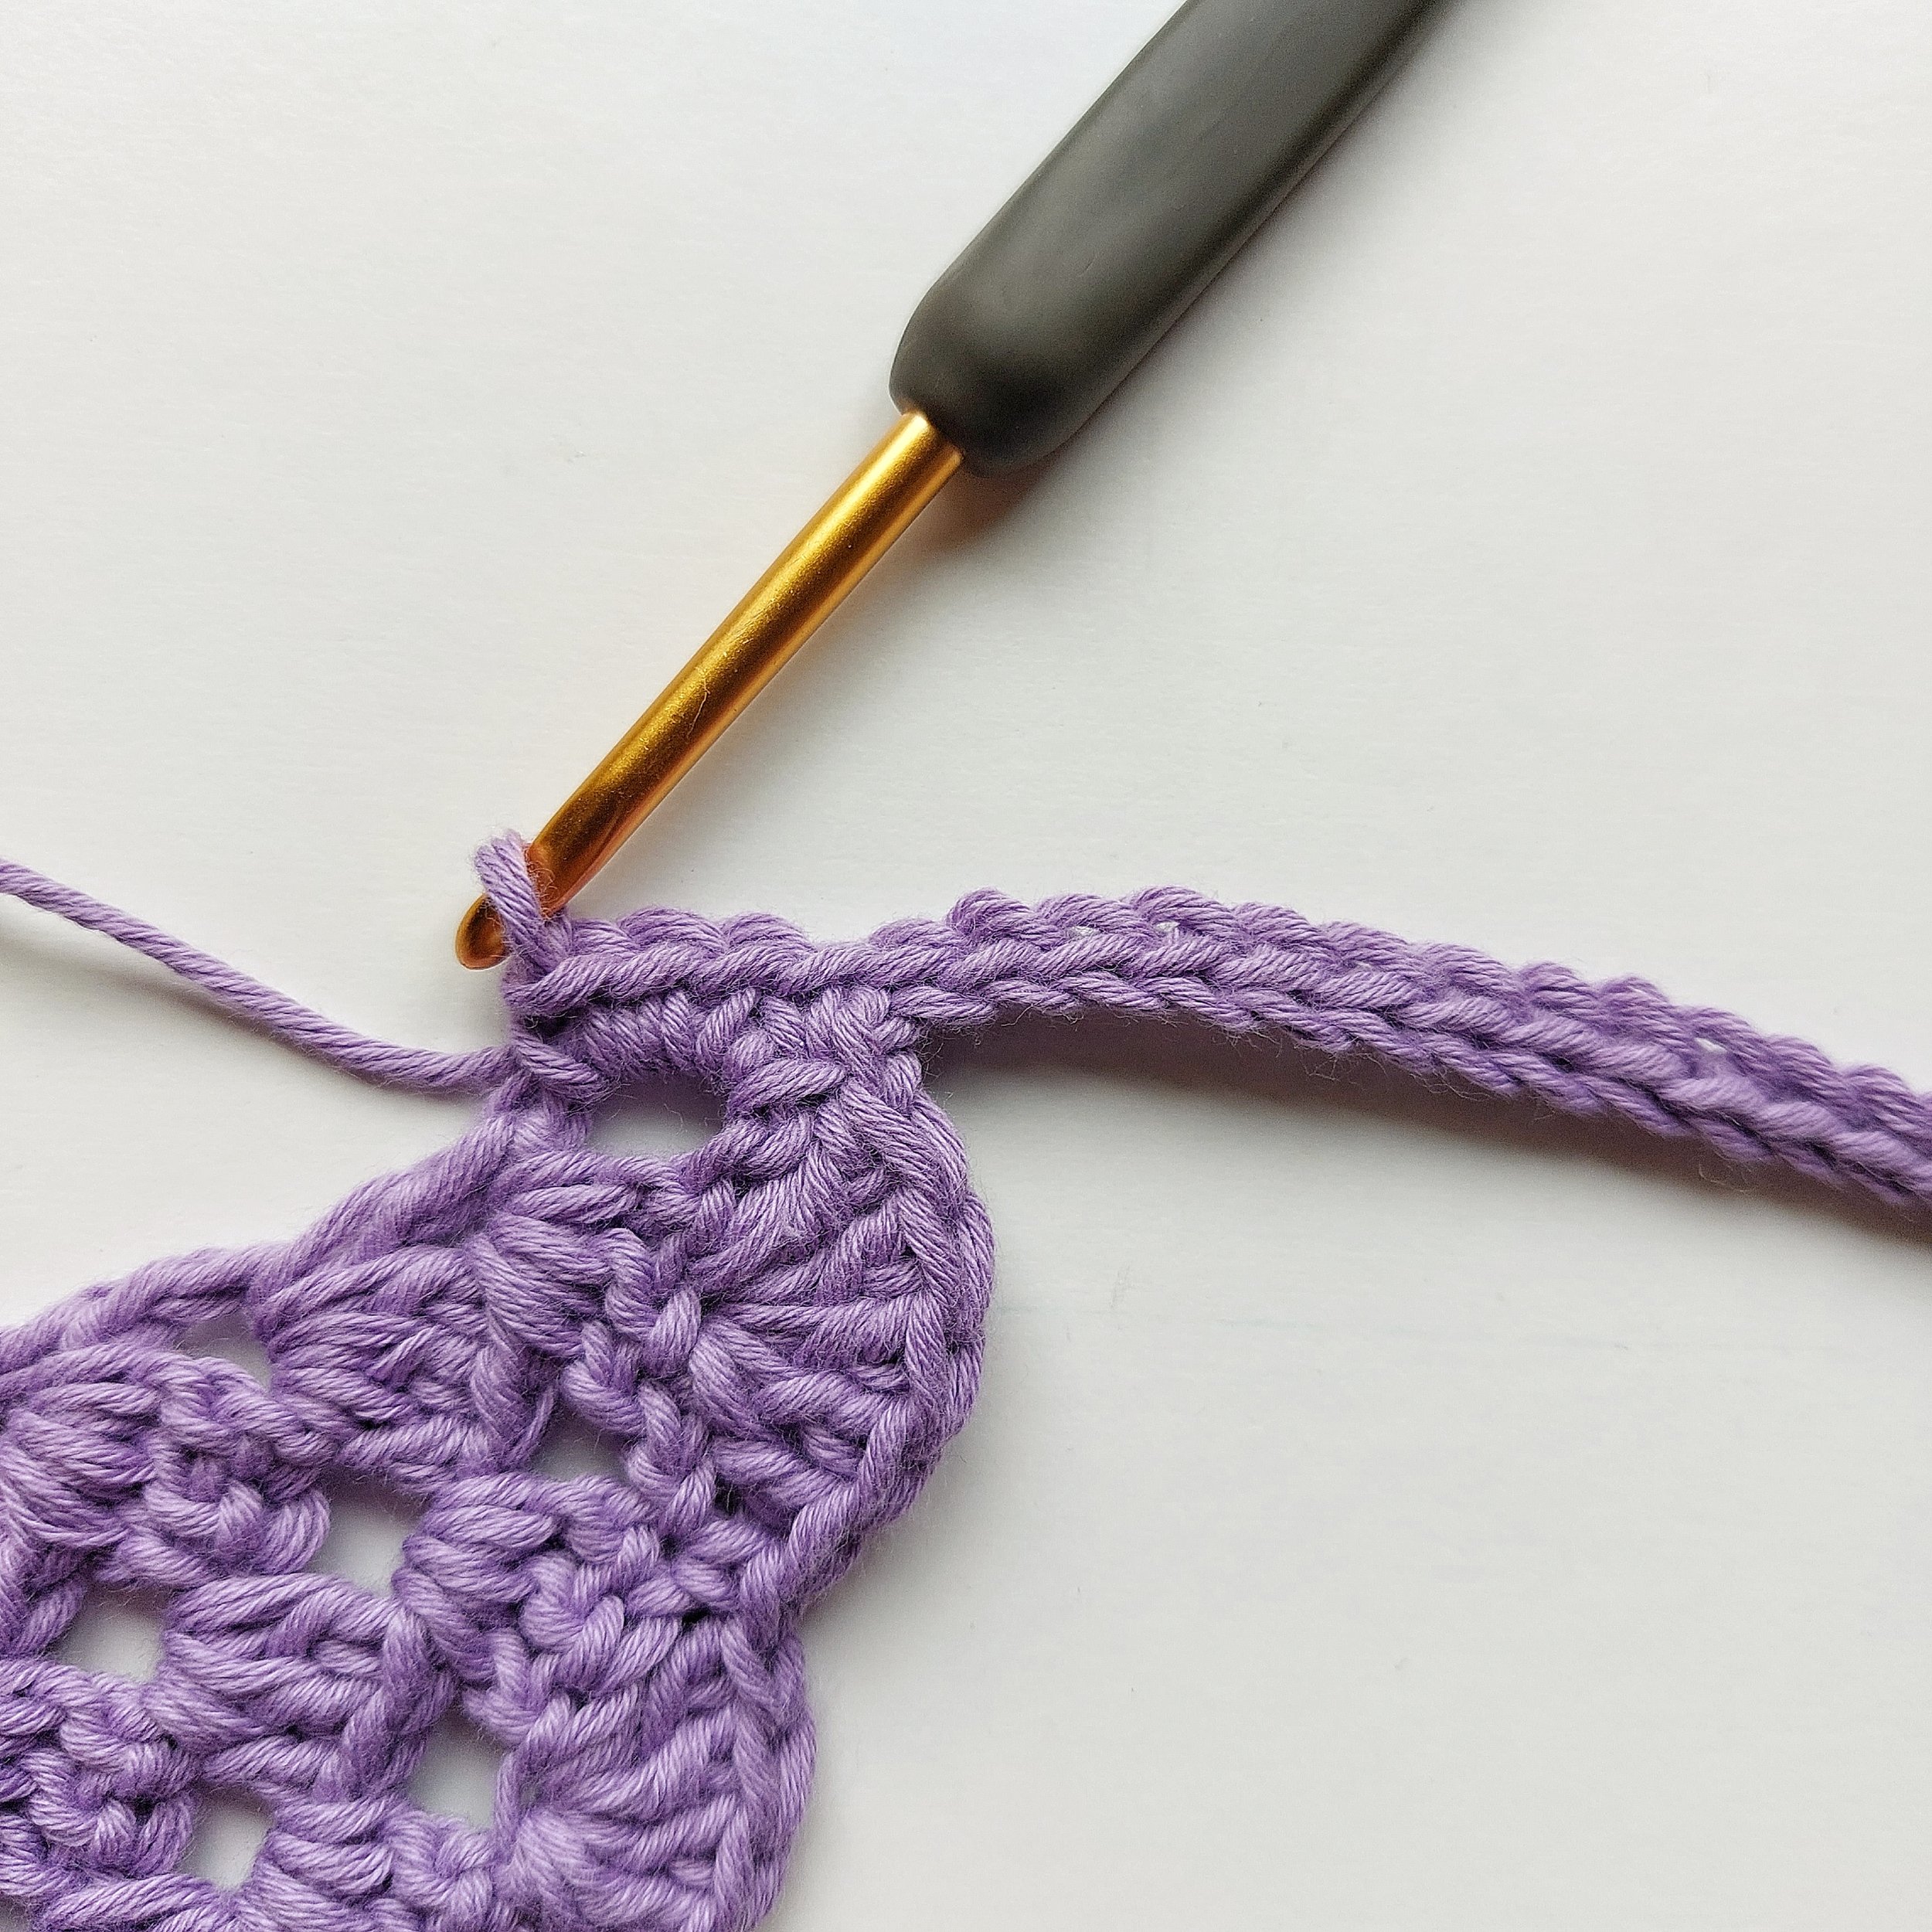
You should always have 4 chains (ch) at the beginning of each row and 1 chain (ch) and 1 double crochet (dc) at the end. To create a top corner space, make 3 double crochet (dc), 2 chains (ch), and 3 double crochet (dc).
The Bandana is worked in rows, turning at the end of each row, from the bottom up. Once you have completed the main body of the bandana, proceed to work on the border and the ties.
Finally, to achieve a better look, you can steam block your project after finishing.
START HERE
Start with a magic ring.
Row 1: 4 chains (count as 1st dc and 1 ch-space here and in each row), (3 dc, 2 ch, 3 dc), 1 ch, 1 dc. Pull the yarn tail to close the ring. 4 ch and turn your work
Row 2: 3 dc into 1ch-sp from previous row, 1 ch, (3 dc, 2 ch, 3 dc) in top corner space of the triangle, 1 ch, 3 dc into last 1ch-space, 1 ch, 1 dc into same ch-sp, 4 ch and turn your work. 1 group of 3 dc on each side of the triangle and 1 top corner space
Row 3: [3 dc into 1ch-sp from previous row, 1 ch] repeat the steps between [...] until you reach the top corner space, (3 dc, 2 ch, 3 dc) in top corner space of the triangle, [1 ch, 3 dc into 1ch-sp from previous row] repeat the steps between [...] until the last ch-space, 3 dc in last 1ch-sp, 1 ch, 1 dc into the same ch-space, 4 ch and turn your work. 2 groups of 3 dc on each side of the triangle and 1 top corner space
You will repeat row 3 until you have 12 rows or the number of rows needed to fit the head size you’re making it for.
Below, I will write how many groups of 3 dc there are in each row, but keep in mind that each row increases by 2 groups of 3 dc, 1 group on each side of the triangle.
Row 4: 3 groups of 3 dc on each side of the triangle and 1 top corner space.
Row 5: 4 groups of 3 dc on each side of the triangle and 1 top corner space.
Row 6: 5 groups of 3 dc on each side of the triangle and 1 top corner space.
Row 7: 6 groups of 3 dc on each side of the triangle and 1 top corner space.
Row 8: 7 groups of 3 dc on each side of the triangle and 1 top corner space.
Row 9: 8 groups of 3 dc on each side of the triangle and 1 top corner space.
Row 10: 9 groups of 3 dc on each side of the triangle and 1 top corner space.
Row 11: 10 groups of 3 dc on each side of the triangle and 1 top corner space.
Row 12: 11 groups of 3 dc in each side of the triangle and 1 top corner space.

BORDER
After working the last row of the bandana, make 1 ch and turn.
Row 1: 1 sc in same space, miss two stitches from previous row, SHELL in next st, miss 2 sts, [1 sc, miss two sts, SHELL in next one, miss 2 sts] repeat the steps between [...] until you reach the top corner space, 1 sc in the last st before the corner space, SHELL in top corner space, [1 sc in next st, miss 2 sts, SHELL in next one, miss 2 sts] repeat the steps between brackets until there are 2 groups of 3 dc left, miss 2 sts, 1 sc in next st, miss 2 sts, SHELL In next st, miss 1 st and 1 sc in last ch-sp


Do not cut the yarn. We’re going to work on the ties now.
Work 51 ch, loosely sl st in 2nd ch from hook and in each ch across.


When you reach the main body of the bandana (this will be the long horizontal side) work 1 sc in each row across the top to achieve a straight edge.
There is not an exact way to place your stitches but here’s what I did:
Work 1 sc in the last sc from the border- you will see this sc horizontally- and work 3 sc around each dc from previous rows until you reach the beginning of the bandana, that is the magic ring, 1 sc into this space, 3 sc around the 4 ch space from previous rows until you reach the last horizontal space, work 2 sc and 1 sc into 1st sc of the border.
When you reach the other side of the bandana, work 51 ch, loosely sl st in 2nd ch from hook and in each ch across.
SL ST into the top corner of the bandana and tie off yarn. Weave in ends.
