

Crochet Laptop Case (free pattern)
Learn how to crochet a laptop sleeve with this free pattern and step-by-step tutorial. The complete free Basic Laptop Case pattern is below or you can purchase the ad-free, printable PDF here.

Crochet Laptop Case Tutorial: Beginner-Friendly Pattern with No Sewing Required
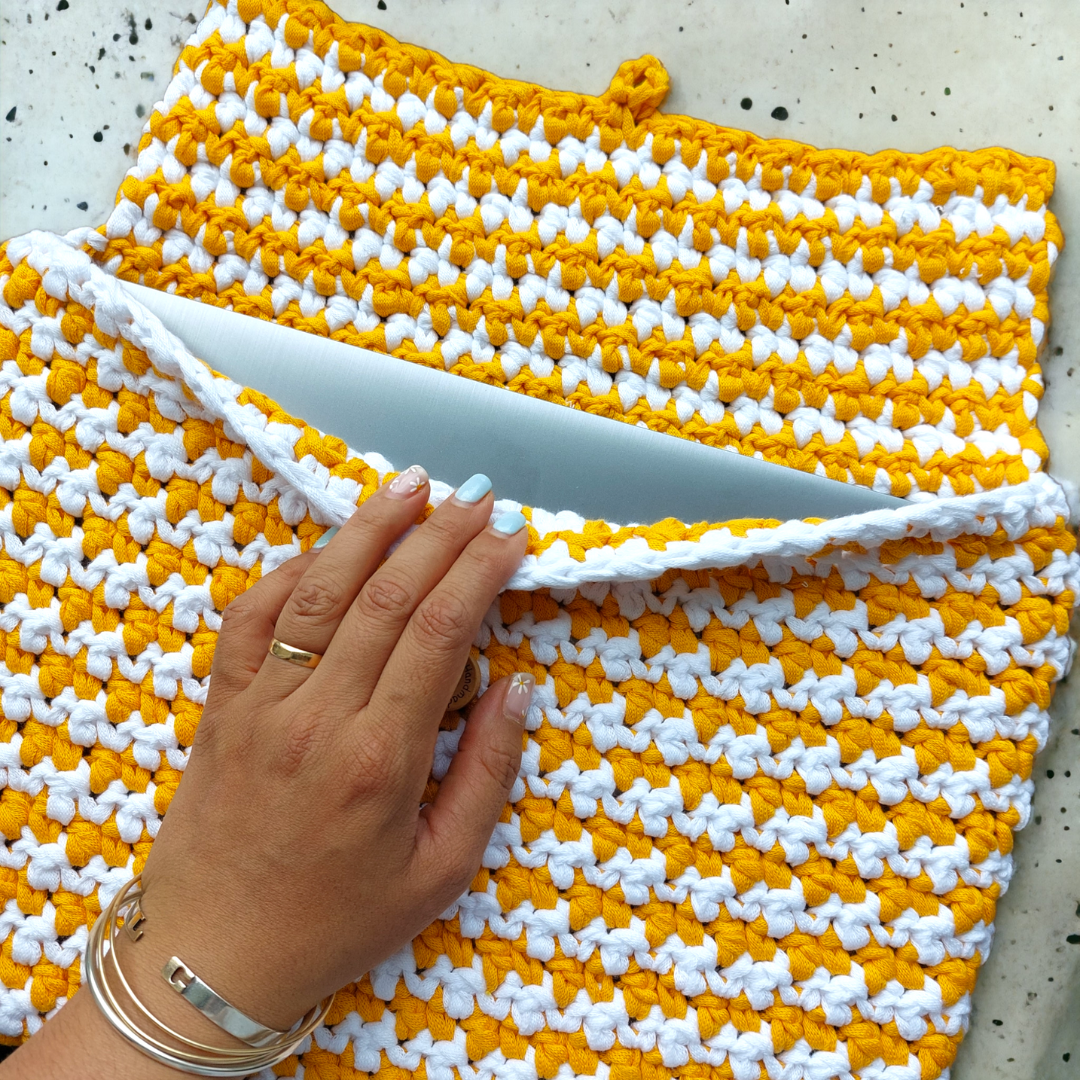
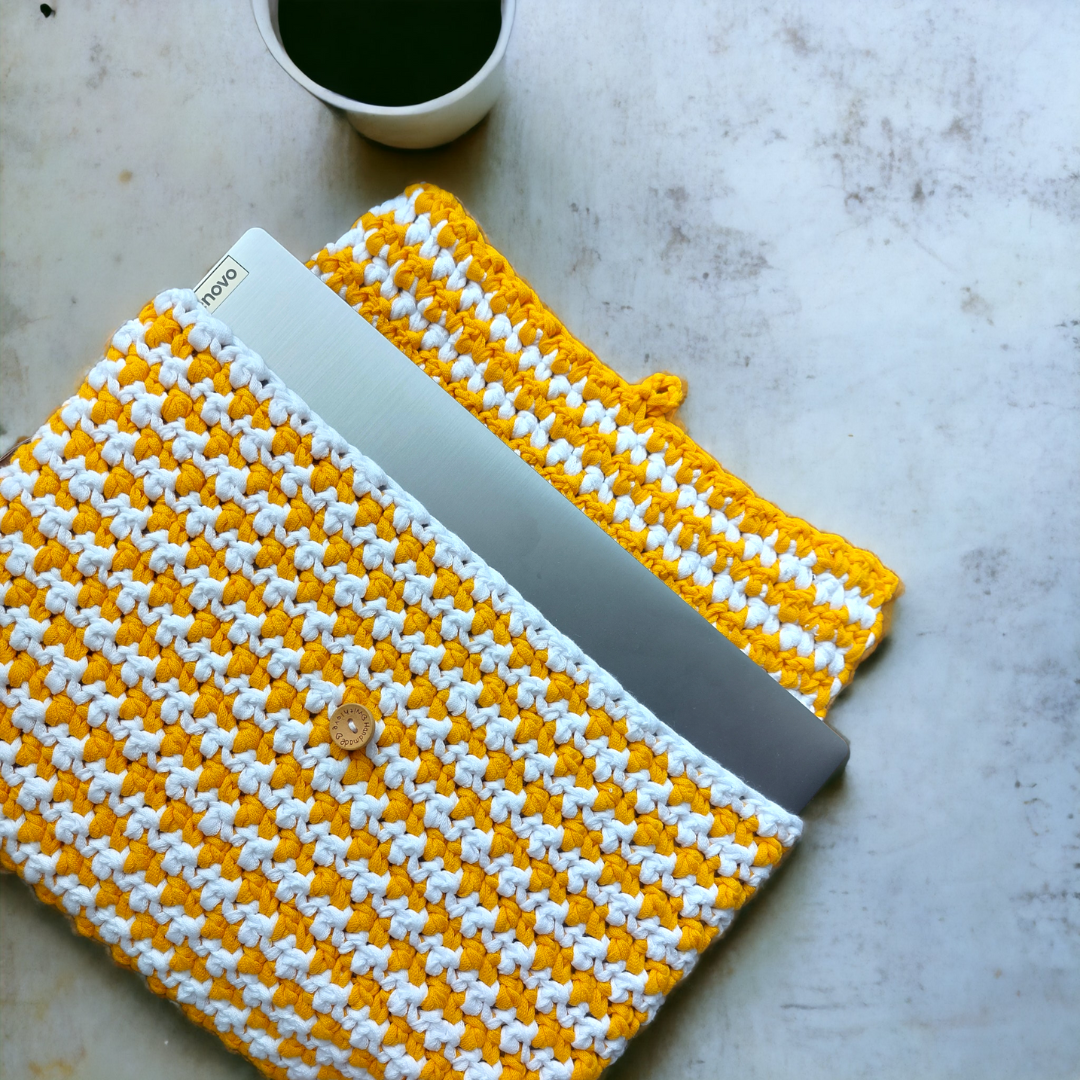
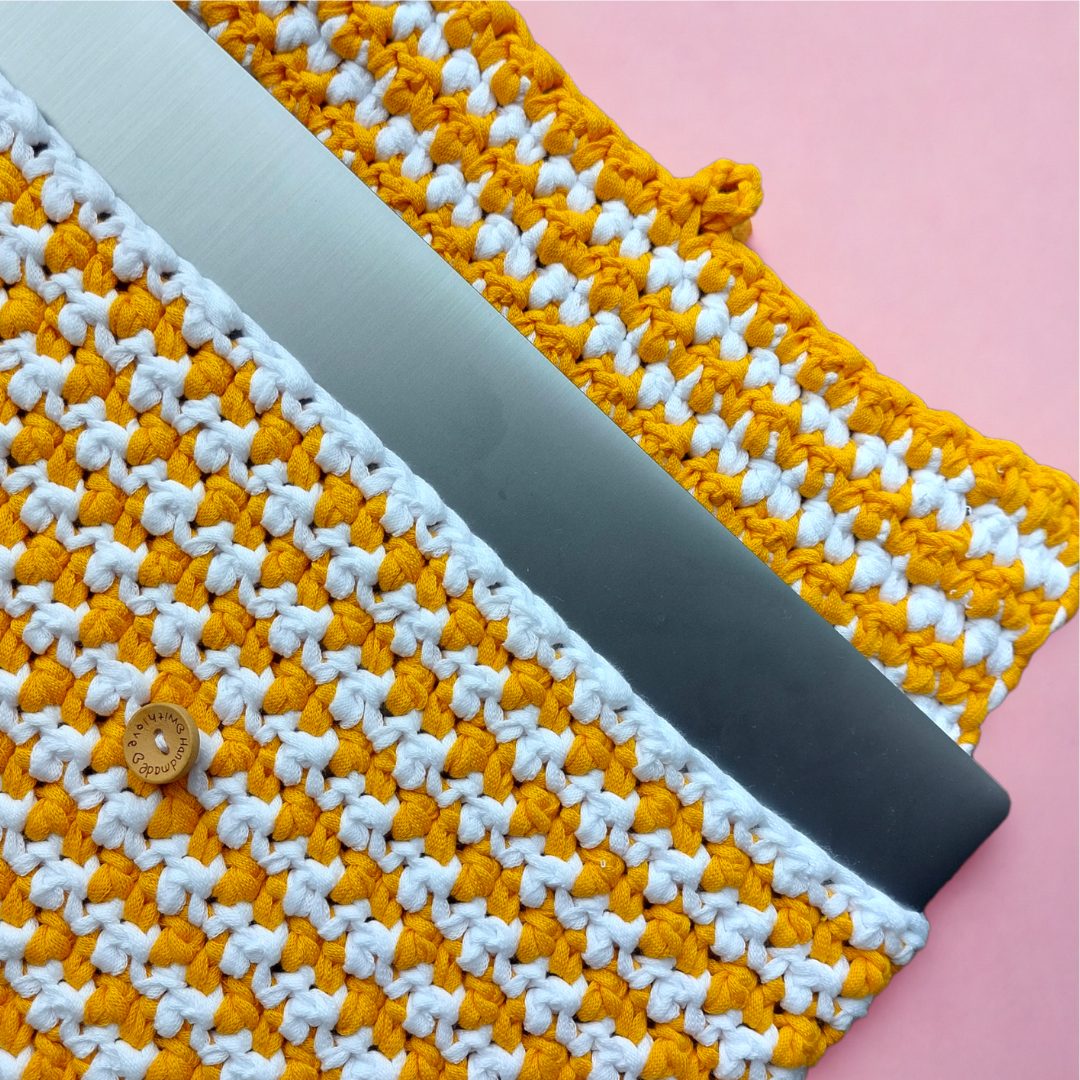
Say Hi! to my new crochet design to make a quick and easy crochet laptop sleeve. I’ve recently got a new laptop and straight after I thought it needed some crochet love. I wasn’t sure what kind of case I wanted but I did know I wanted something quick and easy and after a lot of trial and error I came up with this fun crochet case. This design is made in ONE piece only, meaning there’s NO SEWING involved at all! and the stitch pattern is only one row repeat of single and double crochets making it very easy to follow.
STITCH PATTERN + tips
The houndstooth stitch is a classic crochet technique that produces a distinctive checkered pattern, celebrated for its timeless and versatile design. This pattern is created by alternating single and double crochets in a specific sequence, giving it a sophisticated yet straightforward texture.
When it comes to the houndstooth crochet stitch, color selection plays a crucial role in achieving the desired effect. This pattern truly shines when you pair two highly contrasting colors, such as a very dark shade with a very light one. In this tutorial l will demonstrate how to work this stitch in rounds (the whole body of the case), and in rows (the flap). The primary difference when working in rounds is that there's no need to carry the non-working color behind your work. Instead, you can simply drop the non-working color and pick it up again when you return to that section, making the process a bit more streamlined.
If you work this stitch in rows and using two contrasting colors, you will need to cut the yarn at the end of each row and dealing with all the yarn ends can be a bit tedious. However, there are a few strategies to minimize the amount of weaving you'll need to do.
One option is to crochet around the contrasting color throughout the entire piece. This method does add some bulk to the fabric, as you're effectively incorporating an extra layer of yarn. It will also require more yarn, but it’s a great choice if you want to avoid weaving in ends or are short on time. To offset the added density, consider using a slightly larger hook size.
Let’s talk about the yarn
What makes this pattern even more appealing is its speed and simplicity. You can complete it quickly, making it an ideal project for those weekends when you want to create something beautiful and functional in no time. The use of ribbon yarn is a key feature here—it not only enhances the durability of the case but also provides a sturdy, cushioned texture that helps protect your laptop from everyday wear and tear.
Ribbon created by Hobbii Yarn is made from 100% cotton and It consists of a flat, knit tube that looks amazing when it’s knit or crocheted. This yarn is nice to work with but also has enough volume and firmness to make the final shape of the project stable and keep its shape.
Ribbon is durable and easy to work with. It can be used for all kinds of interior projects like bags, blankets, pillows, baskets, pot holders, and much, much more.
If you can’t find this yarn, don’t worry—you can use any other yarn you have at home! I recommend using two strands of DK yarn, or one strand of chunky and one of DK, to create an even sturdier fabric.

This pattern isn't just limited to laptops. It's versatile enough to be adapted for various devices like Kindles, books, and tablets, offering a stylish and practical solution for keeping all your gadgets safe. Whether you’re making it for yourself or as a thoughtful handmade gift, this project combines style, function, and ease of construction. The result is a durable, attractive case that you’ll be proud to use or give to someone special.
PRINT AND CROCHET OFFLINE!
Love to crochet on the couch? You can always find a low-cost printable PDF version of all my free patterns. Perfect for printing out or viewing offline on your tablet or phone. This beautifully formatted PDF includes the step-by-step pictures and it’s easy to read. I’ve also included a print-friendly version of the pattern so it is easier and cheaper to print! The printable pdf is a super useful upgrade that makes it even easier to crochet.
crochet along with me here:
Before you start
Skill Level:
Advanced Beginners
You will need:
Any Bulky yarn (I used Ribbon by Hobbii Yarns
100 % cotton; 250 g (8.8 oz) = 125 m (137 yds)
*Egg Yolk (36)- Color A (1 ball)
*Natural White (02) (1 ball)
You can also use two strands of DK cotton held together to achieve the same weight yarn I'm using.
Other yarn options:
Permissions + Copyright:
Please do not publish or share this pattern as your own. You may make items to sell with this pattern. In exchange, please link back this post. Do NOT use our photos as your own sales photos.
TENSION:
10 sts x 9 rows= 10 x 10 cm (4 x 4 inches)
Abbreviations American terms:
Ch- Chain
Ch-sp- Chain space
St/s- Stitch/es
Beg- Beginning
Rnd- Round
RS- Right side
WS- Wrong side
Sl st- Slip stitch
Sc- Single crochet
Dc- Double crochet
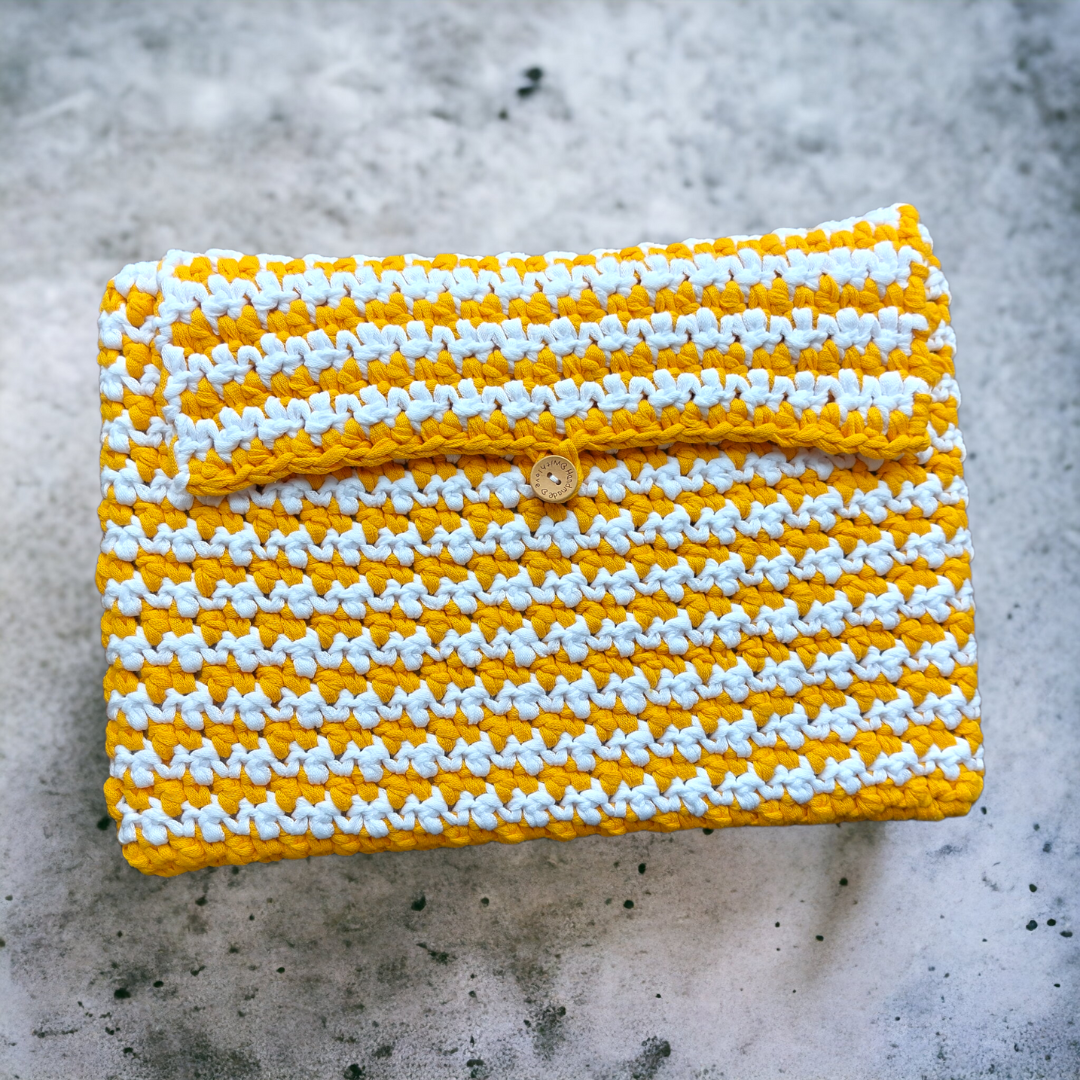
SIZE
One Size but I also show you can adapt the pattern to any size.
MEASUREMENTS
Width: 36 cm (14 inches)
Length without flap: 26 cm (10 inches)
Length with flap: 37 cm (14.50 inches)
CONSTRUCTION
This case is worked in one piece and in rounds so there's no need to sew pieces together. The starting chain will determine the finished size of you case, so I recommend working a chain that is smaller than the actual width of your device. This is important if you want your laptop or kindle to fit snugly on the case. If you are using the yarn listed on the pattern, the chain should be between 4 or 5 cm smaller. However, if you are using a different kind of cotton, this should be 3 cm approximately. This is completely customizable as you can work the first 3 rounds of the pattern and try on your device.
You will start by creating a chain and a row of single crochet, after that you will work on the opposite side of the stitches in order to create the base and from there you will start working on the round, turning at the end of each round.
COLOUR COMBINATIONS AND YARN
In order to create more texture on your work, you will need to use two colors, alternating each colour in every round. After you finish one round, attach the new colour working one chain, and turn your work. I recommend making this chain really tight so the change of colors is not noticeable. Do not cut the yarn at end of each round as you will

START HERE
With colour A and 6.50 mm crochet hook
Start by making 33 ch
Working in the back bump of the chain (see picture 1 & 2)
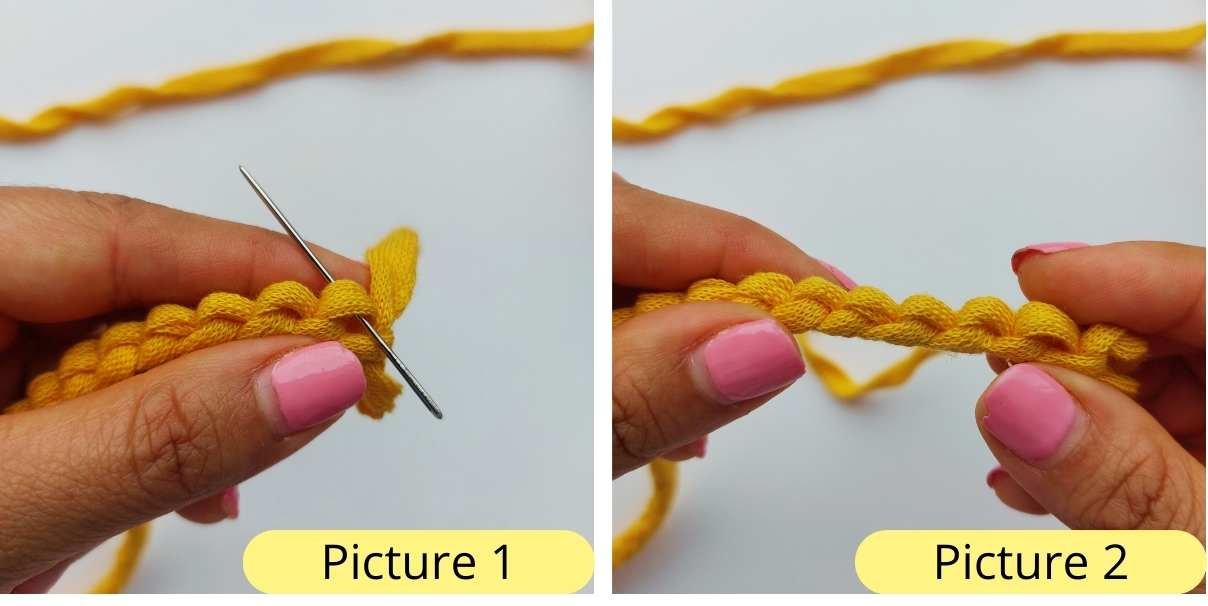
Rnd 1: 1 sc in 2nd from hook (place a st marker here), 1 sc in next 30 ch or until there is one chain left, (See pictures 3 to 6)
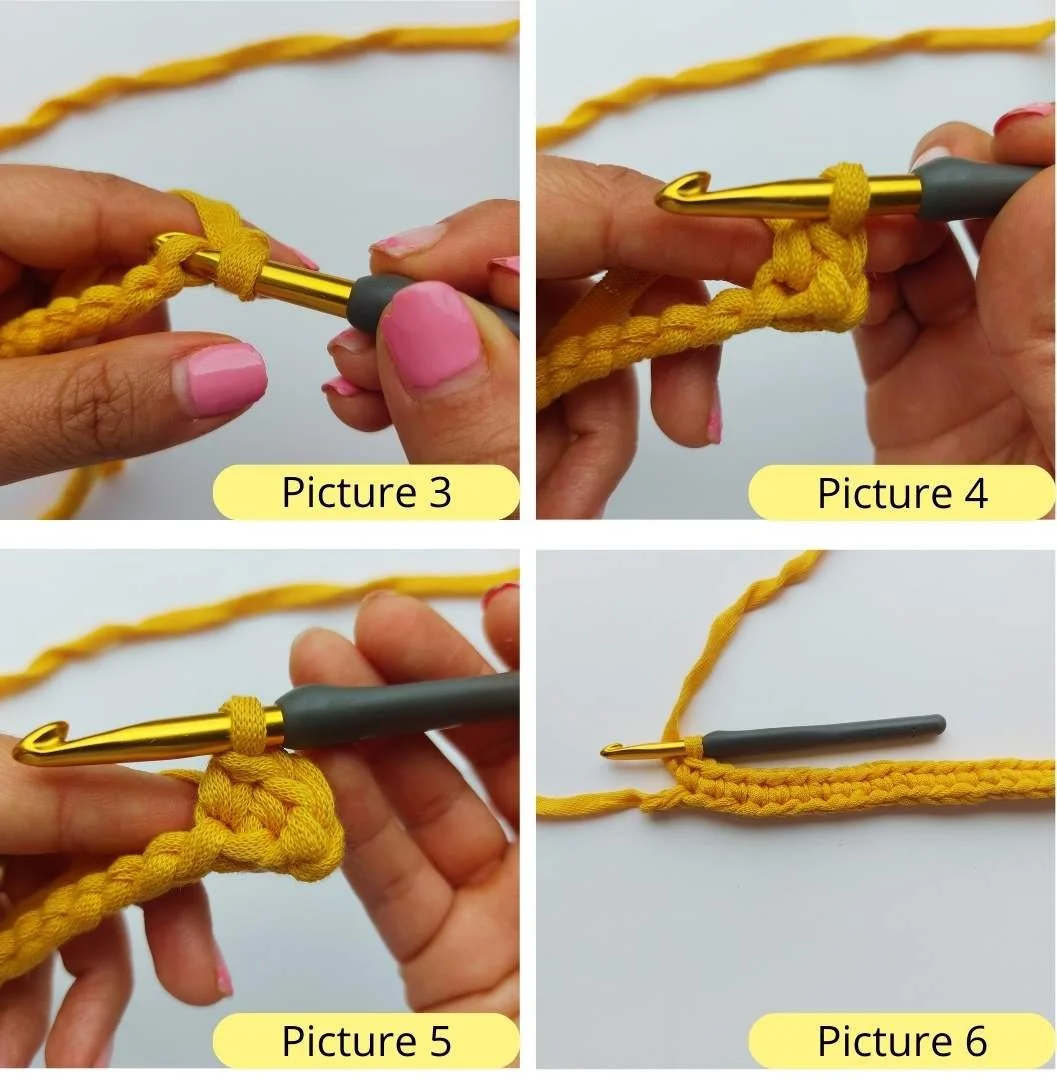
3 sc in last ch, turn your work 90 degrees to start working on the opposite side of the sc just worked (this would be the base of the stitches), 1 sc in next 30 sts or in each st available until you reach the last st, 2 sc in last st (place a st marker in last sc), sl st to 1st sc of rnd. 66 sc in total (See pictures 7 to 9)

Rnd 2: 1 ch (does not count as st here or throughtout), 1 sc in same sp, 1 dc in next st, [1 sc in next st, 1 dc in next st] repeat the steps between [...] until the end of the rnd,the last st you work should be a dc, sl st to 1st sc of rnd, drop colour A, do not cut this colour as you will use it in the following rnd, attach colour B by making 1 ch and turn your work. 66 sts in total
You will now be working on the WS of your work
Rnd 3: 1 sc in last dc of previous rnd, 1 dc in next sc, [1 sc in next dc, 1 dc in next sc] repeat the steps between [...} until the end of the rnd, the last st should be 1 dc, sl st to 1st sc of rnd, drop colour B, do not cut this colour as you will use it in the following rnd, attach colour A by making 1 ch and turn your work. 66 sts in total
Rnds 3 to 22: Repeat rnds 2 and 3 ten times in total. 66 sts in total
MAKING THE FLAP
The flap is worked in rows and turning at the end of each row. To avoid having to cut the yarn at the end of each row you will carry the color you are not working with, so you can make the switch when starting a new row.
Row 1: 1 sc in last dc of previous rnd, 1 dc in next sc, [1 sc in next dc, 1 dc in next sc] repeat the steps between [...] fifteen times, leaving the the rest of the stitches unworked, drop colour A and attach color B by making 1 ch and turn your work. 32 sts in total.
Row 2: 1 sc in last dc of previous rnd, 1 dc in next sc, [1 sc in next dc, 1 dc in next sc] repeat the steps between [...] fifteen times, leaving the the rest of the stitches unworked, drop colour A and attach color B by making 1 ch and turn your work. 32 sts in total.
Rows 3 to 9: Repeat rows 1 and 2 three times.
Row 10: 1 sc in last dc of previous rnd, 1 dc in next sc, [1 sc in next dc, 1 dc in next sc] repeat the steps between [...] 7 times,
Now we’ll make the buttonhole
4 ch, 1 sl st on top of the last dc, (buttonhole created)
Now continue working on the flap
[1 sc in next dc, 1 dc in next sc] repeat the steps between [...] 8 times. Cut yarn and weave in ends.
Sew in the button in the middle of the case in about row 14 (See picture below)


That was fun!! Thank you so much for following my pattern and I hope we can stay connected. Here’s how:
Share your work on Instagram or Facebook: Tag @leonela.diy or and use #leonela.diy or #dublinbaycrochet to show us your work!
Leave a comment: Say hello and share your feedback below.
Pin this post: Save this to your Pinterest crochet board so you can easily find it again.
Invitation To Our Facebook Group
Come discuss crocheting granny square bag patterns and lots of other crochet projects and techniques in our Dublin Bay Crochet Facebook group. This is only a new group but I hope you join and have fun sharing your work with this beautiful crochet community :) Come join us here.
