

How To Crochet a Simple V-neck Vest
**You can purchase an INEXPENSIVE AD-FREE PDF of this pattern on Etsy HERE . This beautifully formatted PDF includes the step-by-step instructions and pictures to create this beautiful vest. Thank you so much for supporting my work :)

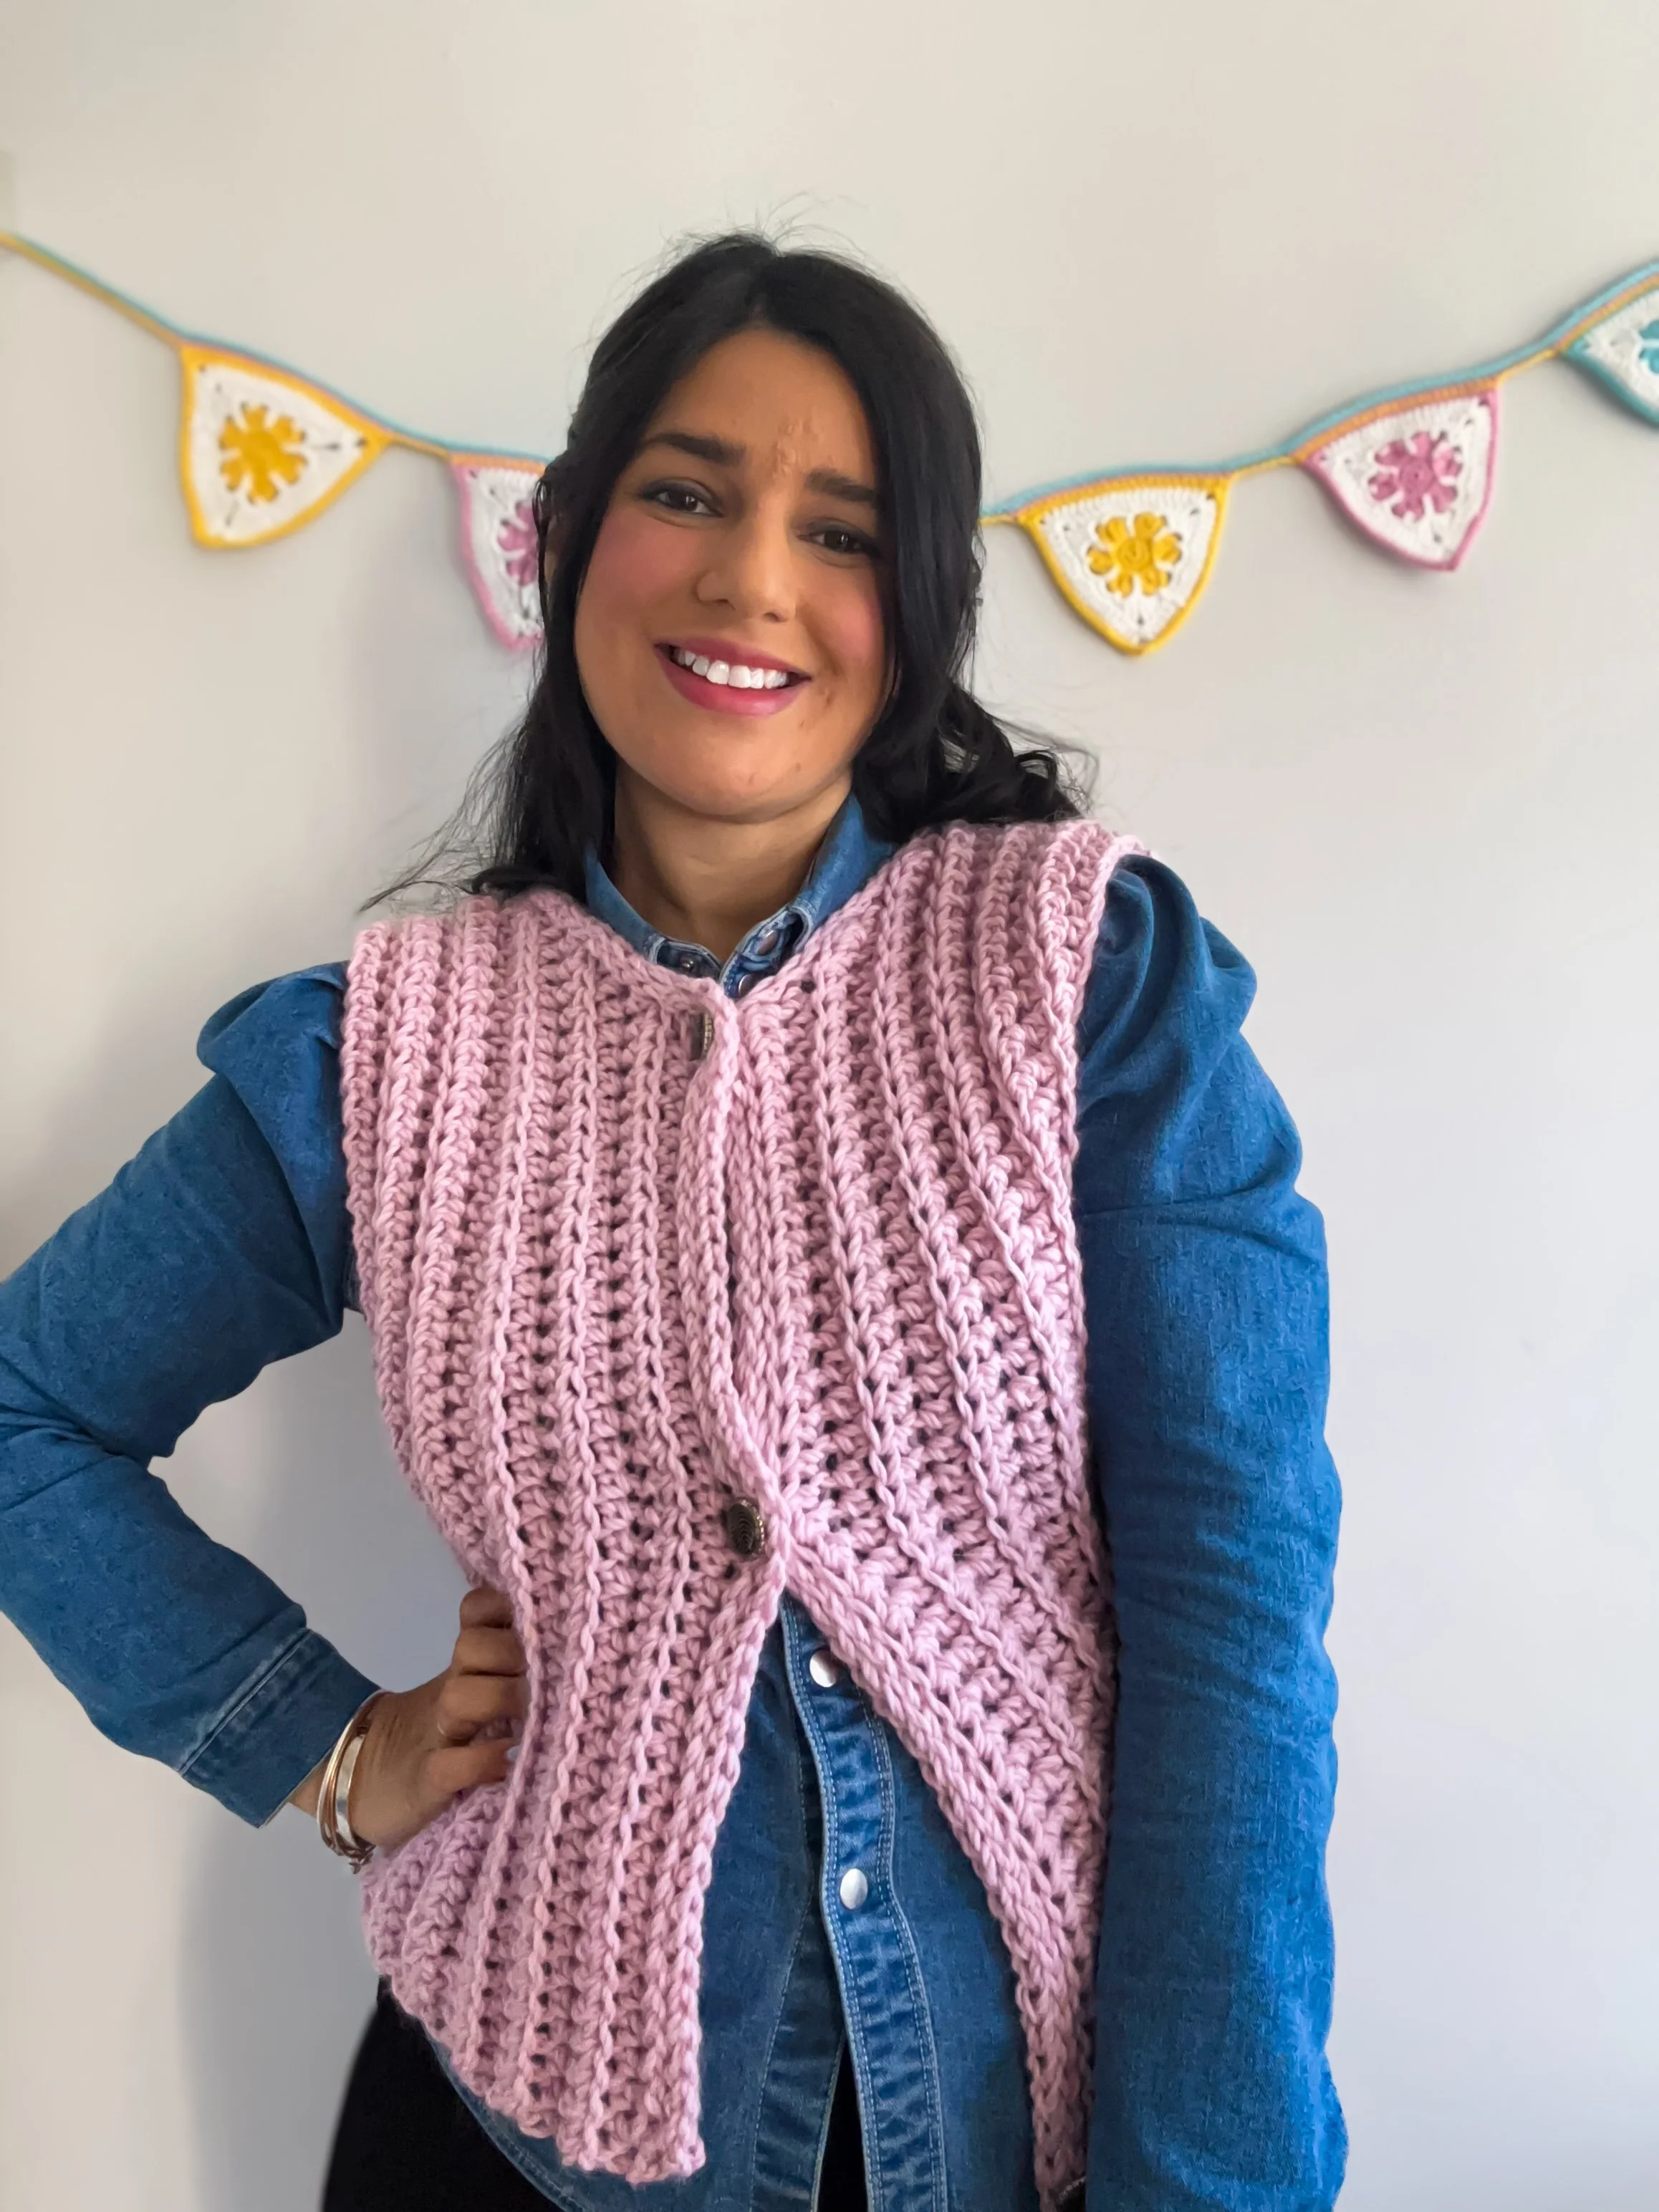
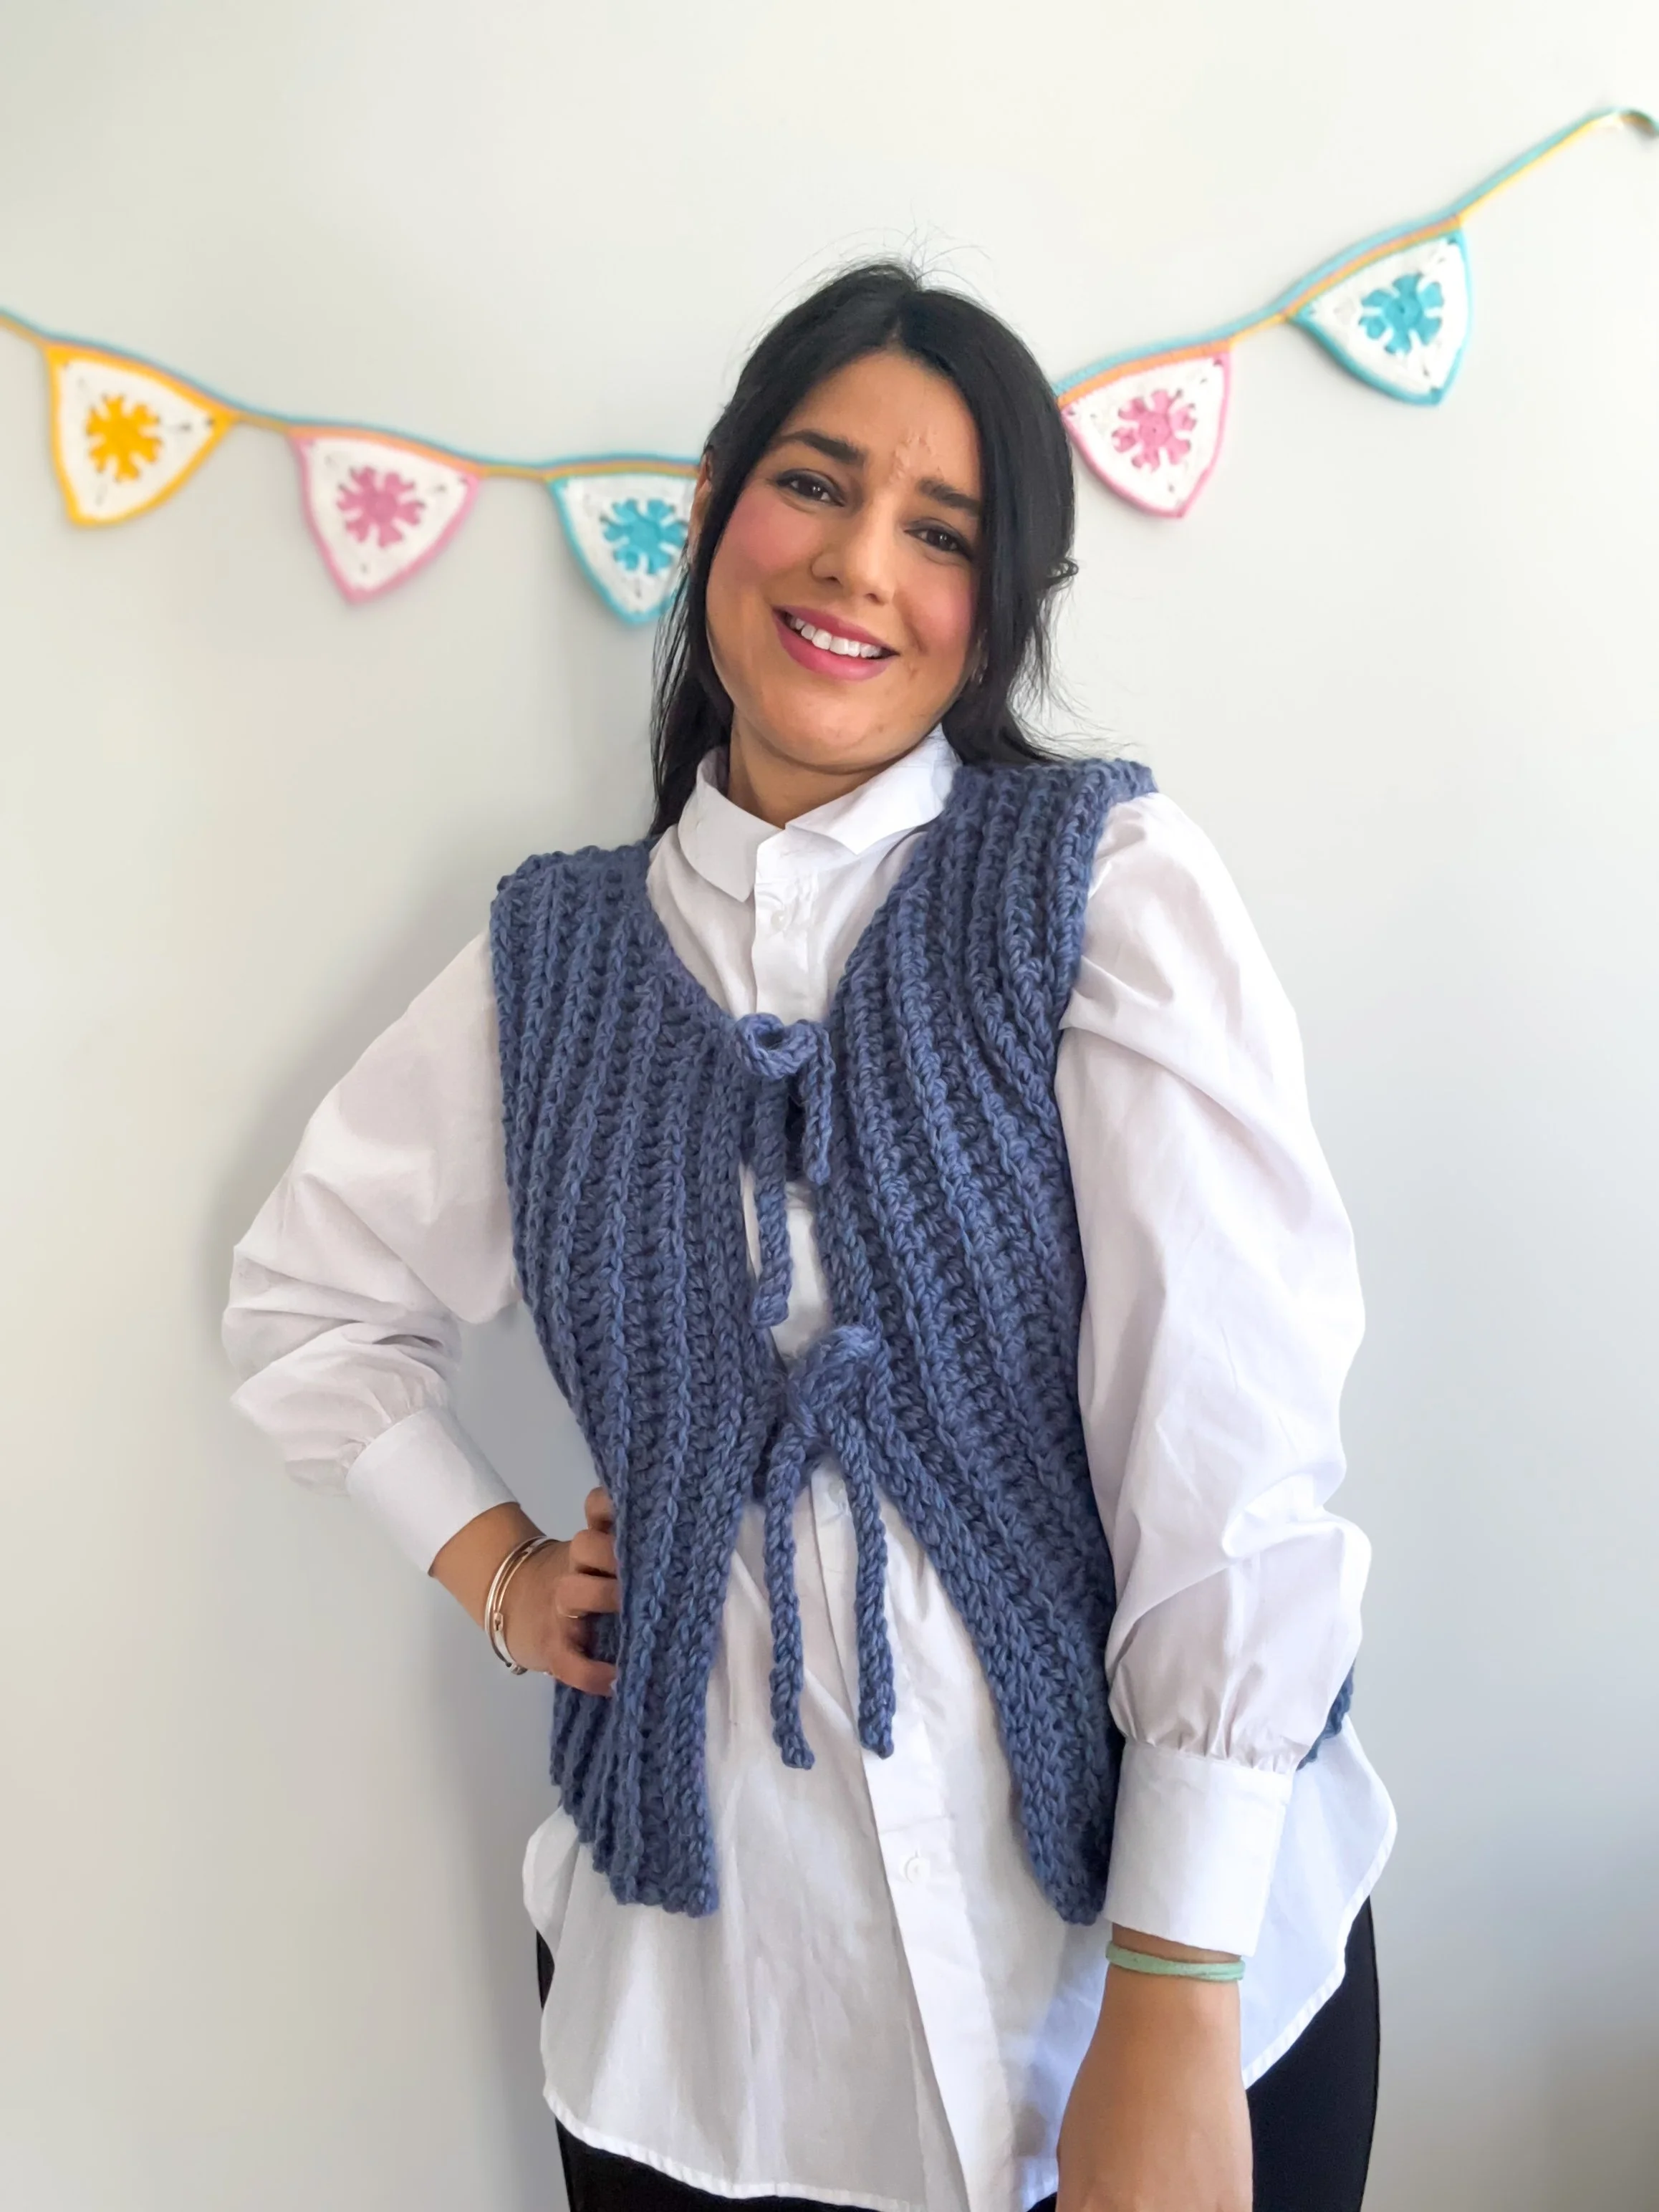
The Chunky Vest – Your New Favorite Spring Layer!
Hey crochet friends! 💕 I’m so excited to share my latest pattern with you — the Chunky Vest! This cozy little number has quickly become one of my go-to wardrobe staples, and I think you’re going to love it just as much as I do.
If you're looking for something quick, beginner-friendly, and super wearable, this is it. The Chunky Vest works up in just two hours (yes, really!) and only uses 4 balls of super chunky yarn — I used ANDES by Drops for that extra softness and warmth.
Even if you're just starting out, this pattern is simple to follow and full of support — perfect for building your confidence.
The Inspiration Behind the Vest
This design came to life during one of those in-between seasons — when it's not quite winter, but not yet full-on spring. I wanted to make something that felt like a warm hug without being too bulky or heavy. I pictured a piece you could throw on with ease, style up or down, and finish in a single sitting. The result? A chunky, cozy vest that works up quickly and wears beautifully. It's comfort, style, and simplicity all wrapped into one!
Beautiful Texture with Simple Stitches
One of my favorite things about this beautiful vest is undoubtedly the gorgeous texture, and the best part? It’s created using basic stitches only! The main stitch is the half double crochet worked in the back loop only, which gives the fabric a soft, ribbed look that adds a delightful visual interest without introducing any extra complexity. It’s truly one of those rare pieces that looks much more intricate than it really is — a total win if you ask me, especially for those who enjoy a blend of style and simplicity in their handmade creations!
🩷PRINT AND CROCHET OFFLINE!🩷
Love to crochet on the couch? You can always find a low-cost printable PDF version of all my free patterns. Perfect for printing out or viewing offline on your tablet or phone.This beautifully formatted PDF includes the step-by-step instructions to create your own chunky vest. The printable pdf is a super useful upgrade that makes it even easier to crochet.
Perfect for Springtime Layering
This vest is truly an absolute dream for the much expected spring season. It’s wonderfully light enough to wear casually over a simple t-shirt, yet it still provides that cozy layer you need when the crisp breeze kicks in unexpectedly. You can easily pair it with your favorite jeans, a charming dress, or even comfortable leggings — it’s undeniably cute, blissfully comfy, and effortlessly stylish, making it a versatile addition to your spring wardrobe.
Customize Your Look: Buttons or Ties
Want to make your vest extra cute and uniquely yours? You’ve got some great options to choose from! ✨
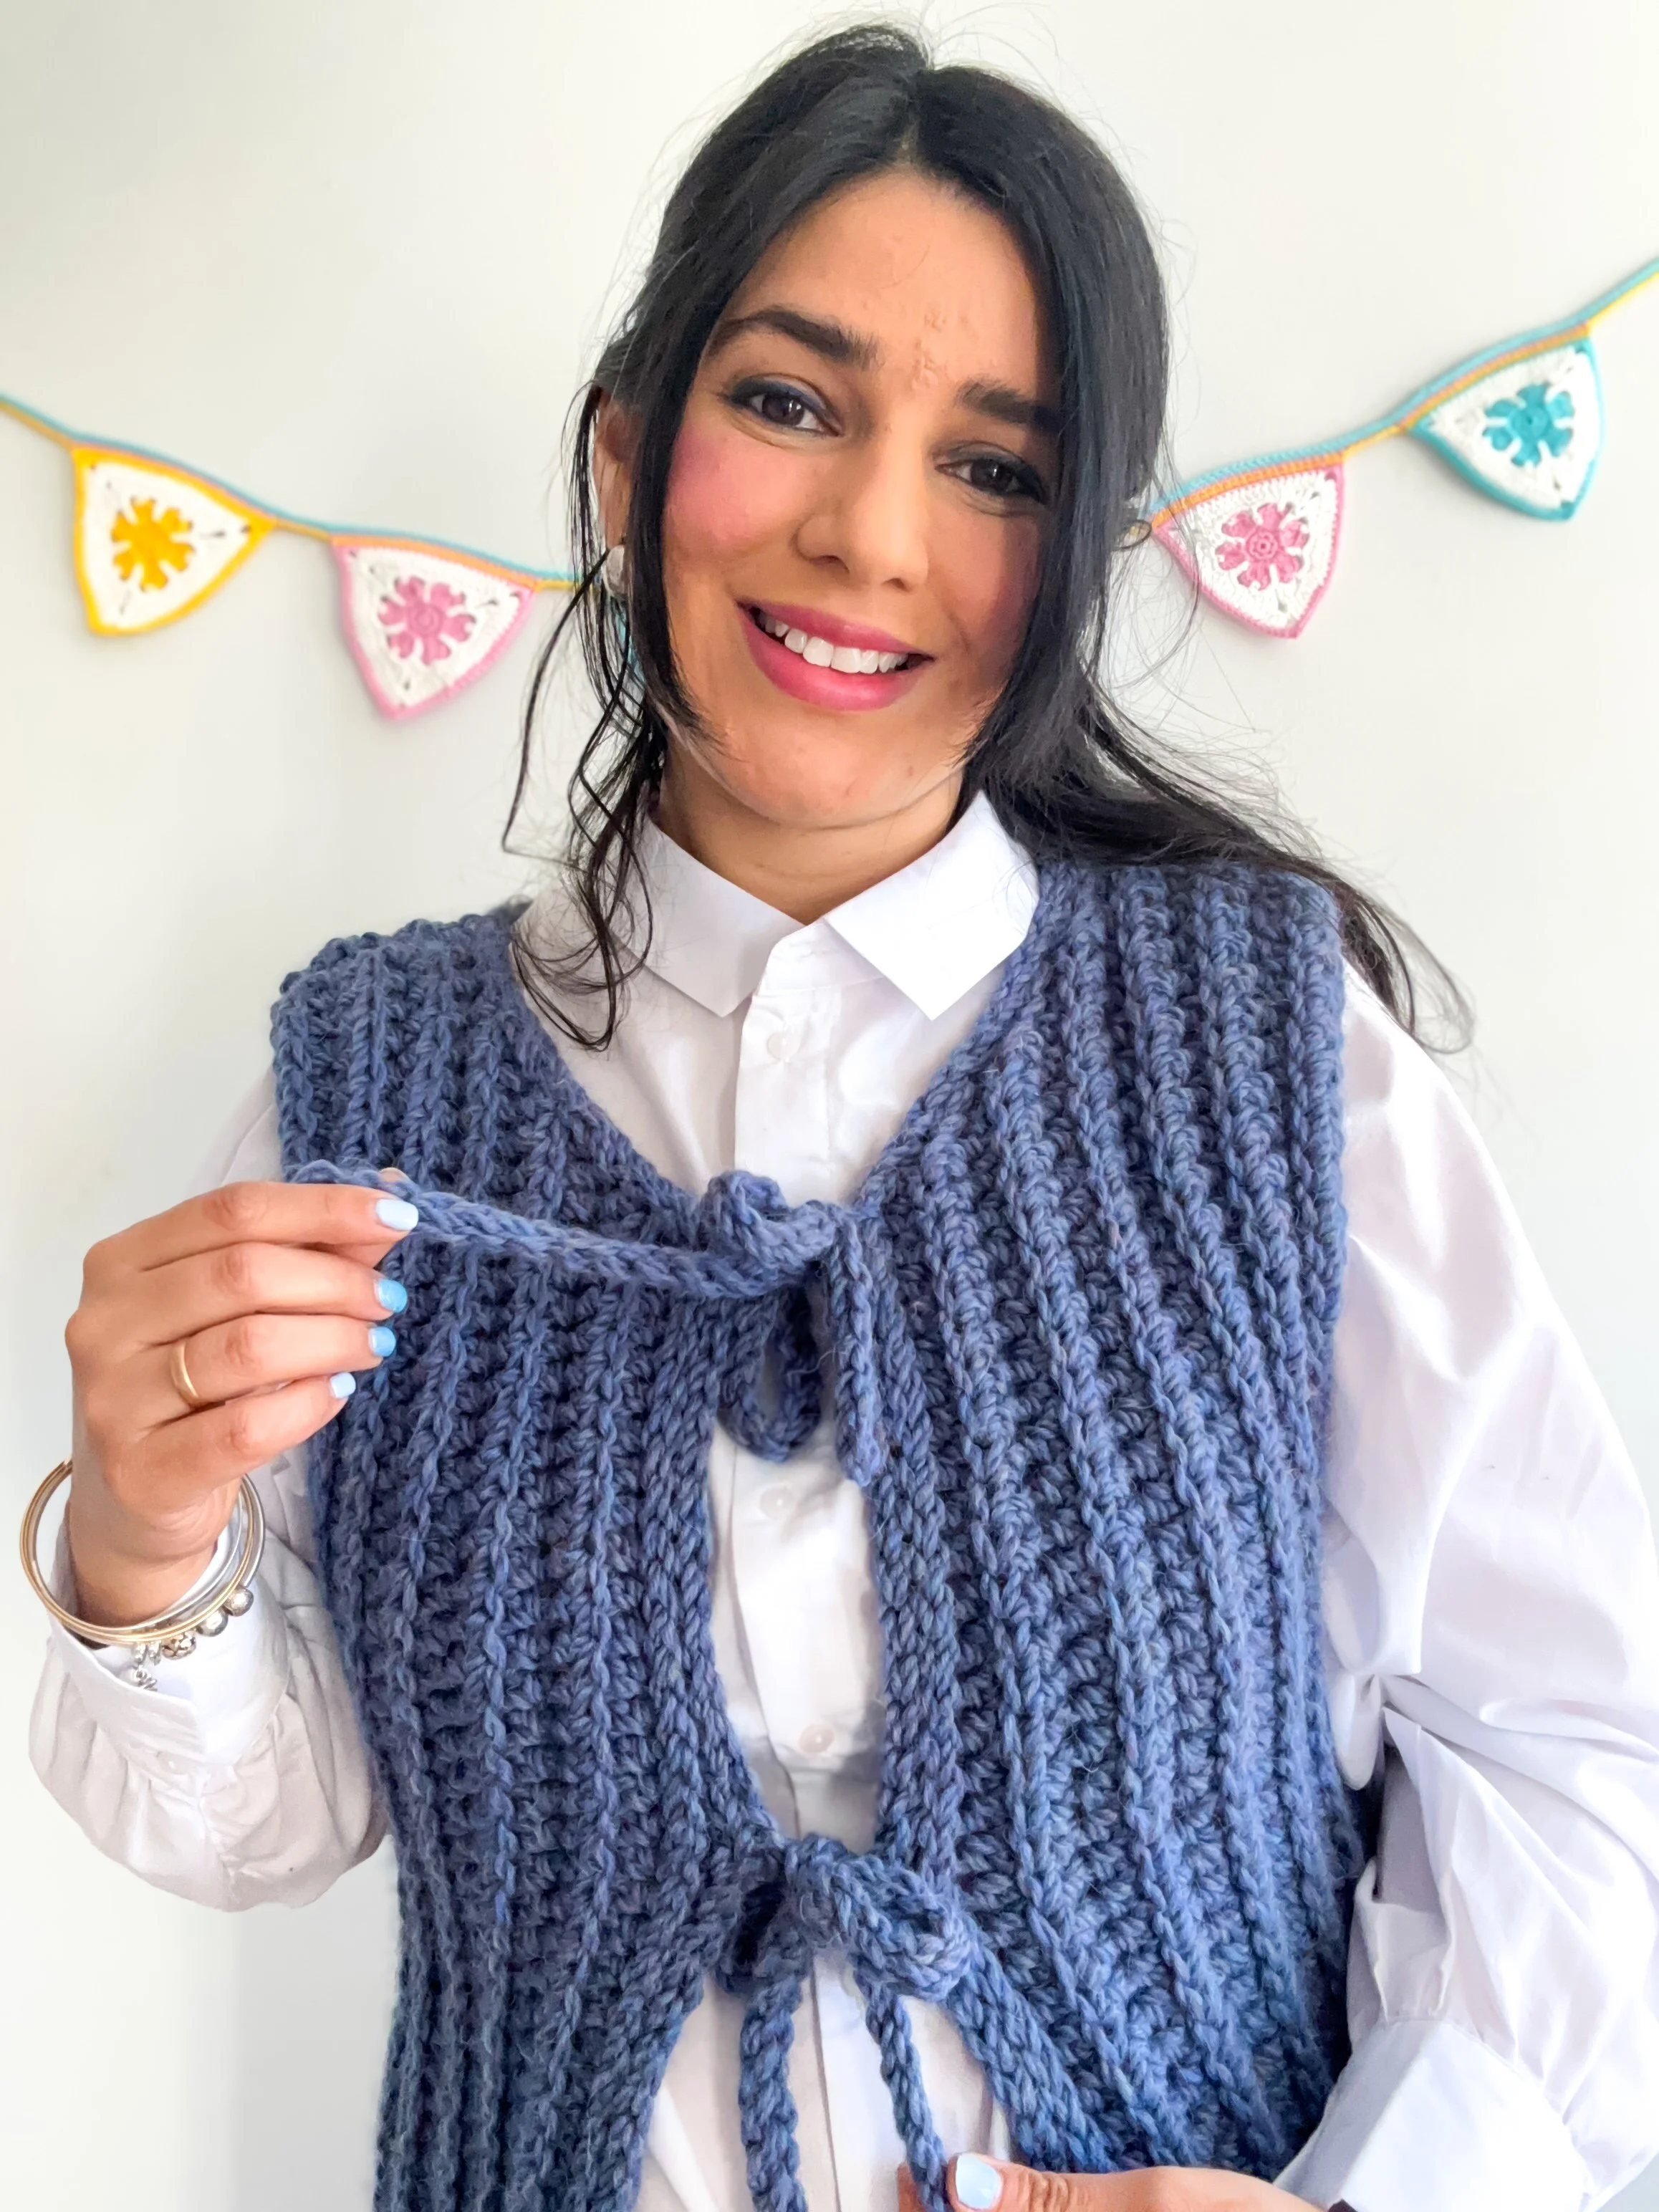
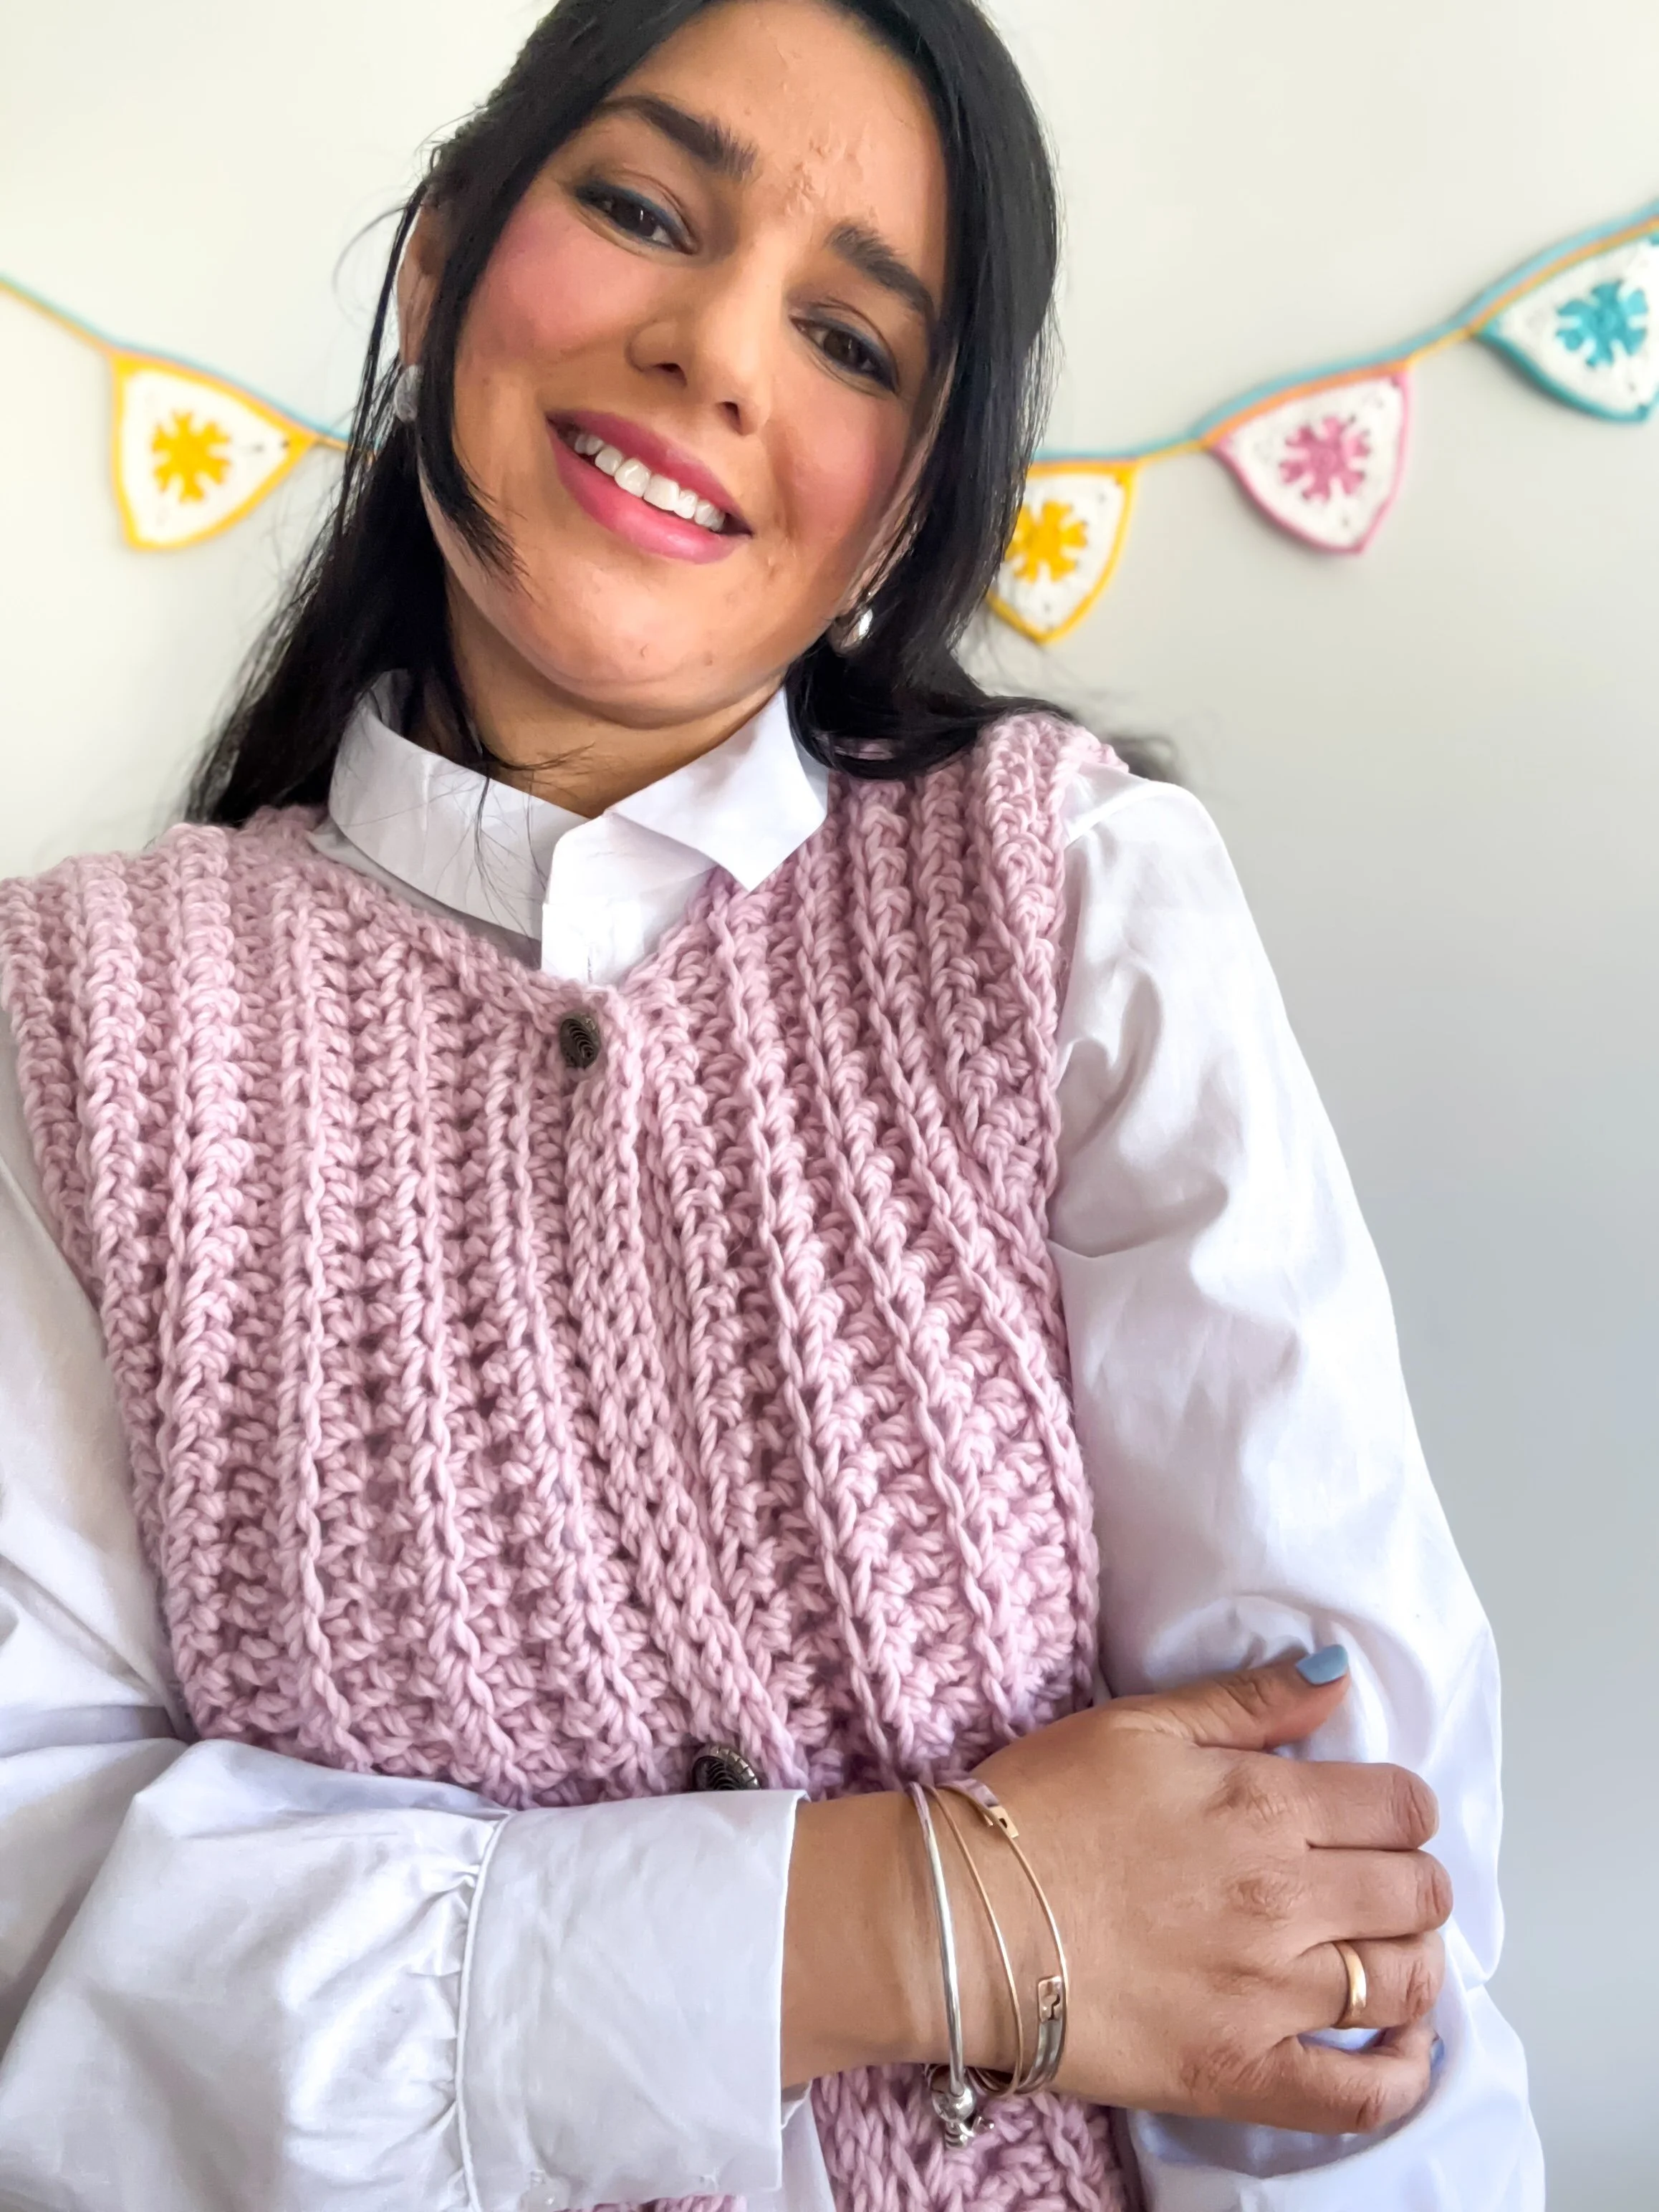
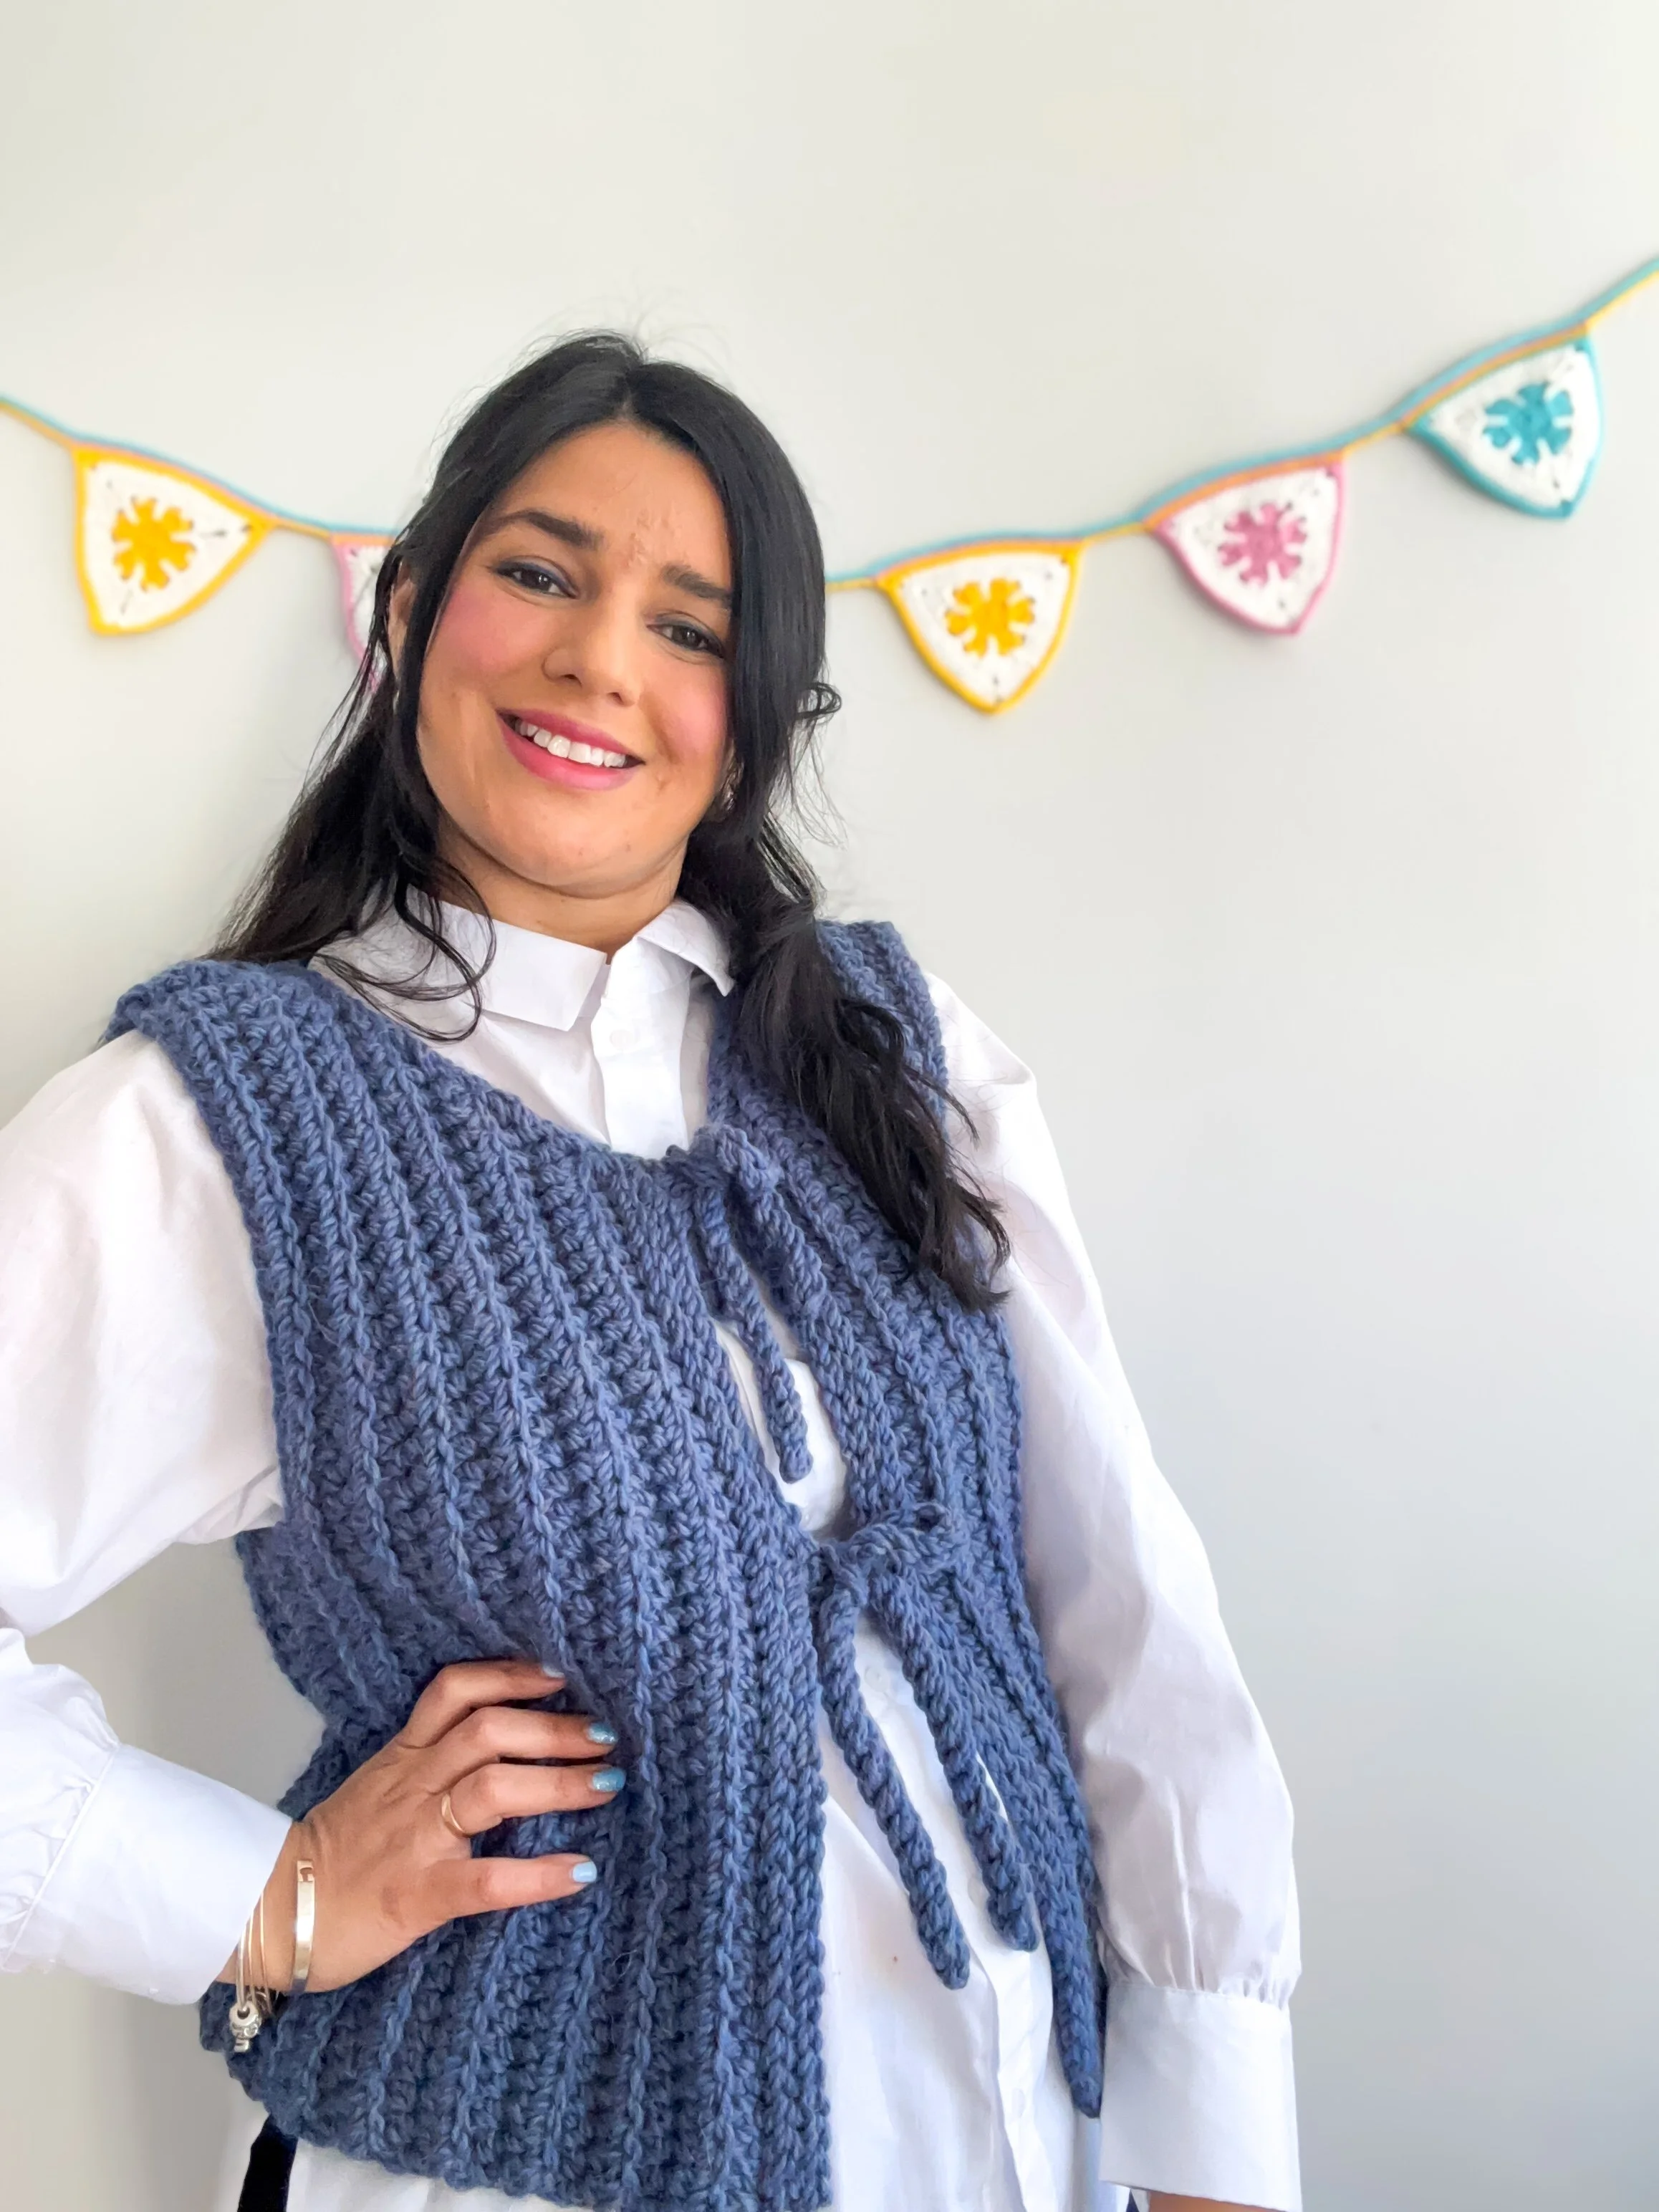
Go classic with elegant buttons — they’re perfect for achieving a polished, structured look that exudes timeless charm. Or opt for something playful with cute crocheted ties — they add a relaxed, handmade feel and allow you to experiment with the fit in a fun way. Both options are clearly explained in the pattern, so you can truly make this special piece your own and showcase your personal style.
🌞 A Sneak Peek at Summer 🌞
I’m already working on a summer version of this vest, and I can’t wait to share it with you! This new version will be made with lighter yarn, more breathable stitches, and a slightly more open neckline — perfect for warmer days ahead.
Think of it as the Chunky Vest’s breezy little sister — just as stylish, but made for picnics in the park, coastal walks, music festivals, or layering over your favorite summer dress. I’m experimenting with cotton blends for that soft, airy feel and considering some fun design details like lace-inspired panels or a cropped length.
Whether you’re heading to the beach or just want a cute topper for your tank tops, the summer vest will be your new go-to. And don’t worry — it’ll still be easy and beginner-friendly, with the same clear instructions and video support.
Keep an eye on my Instagram for sneak peeks and tester calls — it’s coming your way very soon! You can also subscribe to my Newsletter so you don’t miss it!
Step-by-Step Tutorial Included
To make things even easier for everyone interested in crochet, I’ve included a comprehensive full step-by-step video tutorial that will guide you through every stage of the process. Whether you're a visual learner, prefer to follow along with a demonstration, or simply want a bit of extra help with seaming and shaping, the tutorial is there to walk you through it all in a clear and enjoyable manner.
So whether you’re brand new to crochet or just looking for a quick, satisfying make, the Chunky Vest is a must-try. Grab your yarn, pick your favorite color, and let’s get stitching!
Materials
You will need:
Any super chunky yarn (I used ANDES by Drops
Wool (65%), Alpaca (35%); 100 g (3.5 oz) =90 m (98 yds)
*Twilight blue (mix 6343) - colour A - 3 (4, 4, 5, 6, 7) balls or
*Powder Pink (3145)
You can easily substitute with a similar yarn — I recommend Alpacino Merino from Wool and the Gang if you want that same warm, fluffy texture and luxe finish. Just make sure to check your gauge so everything fits just right!
9 mm crochet hook or size needed to obtain gauge.
Tapestry needle
Scissors and Measuring Tape
Tension:
8 sts x 5.5 rows= 10 x 10 cm (4 x 4") in stitch pattern.
Abbreviations- Pattern is written using American terms
Ch- Chain
Ch-sp- Chain space
St/s- Stitch/es
Beg- Beginning
Rnd- Round
RS- Right side
WS- Wrong side
Sl st- Slip stitch
Hdc- Half double crochet
Hdc BLO- Half double crochet in back loop only.
Pattern Notes
SIZING
This vest is written in 6 different sizes as follows: XS (S, M, L, XL, XXL). Make sure to follow the instructions for your size only. It is recommended that you go through the pattern and highlight the numbers pertaining to your size before beginning.
CONSTRUCTION
This design is worked in three panels: 2 Fronts+ 1 Back. This design is worked side to side, beginning with the first shoulder section. From there, you'll shape the neckline by decreasing stitches and then continue working the main body of the front panel. The Back panel is worked in the same way but without any decreases. You will then sew the three pieces together and work the border. You can add buttons like the pink version or work ties like the blue vest.
ADJUSTMENTS
If you would like to adjust your pattern, before you begin, check the measurements of each section and adjust them to fit your shape. A couple of easy ways to do this:
1. Width - if you think the bust is too large for your size, go down one size or reduce the number of rows for the front and back panel.
2. Length - if you’d like the top to be longer just increase the initial number of chains to the body for the front and back panel.
3- Armhole Depth: If you prefer a more closed or snug armhole, add a few extra stitches when working the “widening the sides” section. This will reduce the depth and create a more tailored fit.
Note: 1 ch at the beginning of each row does NOT count as a stitch.
Measurements:
Tip: A full schematic with detailed sizing information is included in the printable version of the pattern — perfect for helping you choose the right size and make any custom adjustments!
Finishes Bust Measurement: 87 (94, 102, 110.5, 124, 131) cm // 34 (37, 40, 43.5, 48.5, 51.5) inches.
Vest is designed to be worn with approx. 4-13 cm/ 1.5- 5 inches of positive ease. When choosing a size, find the bust measurement in this chart that equals approx. 4-13 cm/ 1.5- 5 inches larger than your actual bust measurement and make this size. For example, model has 92 cm/ 36 inches bust and is wearing a size M with finished bust measurement of 102 cm/ 40 inches.
Start here…
FRONT PANEL
With yarn A and 9 mm crochet hook
Chain 42 (42, 45, 45, 48, 48)
Working in rows:
Row 1: Starting in 2nd ch from hook, 1 hdc in each ch available until the end, 1 ch and turn. 41 (41, 44, 44, 47, 47) hdc.
Row 2: 1 hdc BLO in each st across, 1 ch and turn. 41 (41, 44, 44, 47, 47) hdc.
Rows 3 to 5 (5, 6, 6, 7, 8): Repeat row 2. 41 (41, 44, 44, 47, 47) hdc.
Shaping the NECKLINE
Row 6 (6, 7, 7, 8, 9): 1 hdc BLO in each st across until there are 2 hdc left, 1 ch and turn leaving the last 2 hdc unworked. 39 (39, 42, 42, 45, 45) hdc.
Row 7 (7, 8, 8, 9, 10): 1 hdc BLO in each st across. 39 (39, 42, 42, 45,4 45) hdc.
Row 8 (8, 9, 9, 10, 11): 1 hdc BLO in each st across until there are 2 hdc left, 1 ch and turn leaving the last 2 hdc unworked. 37 (37, 40, 40, 43, 43) hdc.
Row 9 (9, 10, 10, 11, 12): 1 hdc BLO in each st across. 37 (37, 40, 40, 43, 43) hdc.
Row 10 (10, 11, 11, 12, 13): 1 hdc BLO in each st across until there are 2 hdc left, 1 ch and turn leaving the last 2 hdc unworked. 35 (35, 38, 38, 41, 41) hdc.
Row 11 (11, 12, 12, 13, 14): 1 hdc BLO in each st across. 35 (35, 38, 38, 41, 41) hdc.
BORDER
We’ll now create the border by working rows of sl st BLO.
Row 1: 1 sl st BLO in each st across the front of the vest, (place a st marker on the last sl st of the edge)
You will now work 1 sl st in each sp available of the neckline in order to even the sides:
*1 sl st in next 2 hdc lying horizontally, 1 sl st BLO in next 2 hdc (these will be the 2 hdc left unworked in the previous rows)* repeat from * to 3 times in total, 1 ch and turn - there are 12 sts in the neckline + 35 (35, 38, 38, 41, 41) sts on the edge of the front panel= 47 (47, 50, 50, 53, 53) sts in total.
Row 2: 1 sl st BLO in each st across the neckline (12 sts) remove st marker and work 1 sl st BLO in each st across the edge of the vest *- 35 (35, 38, 38, 41, 41) sts, 1 ch and turn. 47 (47, 50, 50, 53, 53) sts in total.
*Place st marker after working the 1st st of the edge.
Row 3: 1 sl st BLO in each st across the edge, leaving the sts on the neckline unworked, 1 ch and turn. 35 (35, 38, 38, 41, 41) sts.
Row 4: Repeat row 3. Cut yarn and weave in ends.
After completing the border, evenly distribute 3 buttons along the front edge of the vest. Place one button at the top and another at the very bottom. Next, position the remaining button in between, ensuring the spacing between each button is proportional for a balanced look.

FRONT 2
With yarn A and 9 mm crochet hook
Chain 42 (42, 45, 45, 48, 48)
Working in rows:
Rows 1 to 11 (11, 12, 12, 13, 14): Repeat the same steps for Front 1.
Border with Buttonholes
Row 1: 1 sl st BLO, 1 ch, miss 1 st, *1 sl st BLO in next 15 (15, 16, 16, 18, 18) sts, 1 ch, miss 1 st* repeat from * to * one more time, 1 sl st BLO in last st of the edge,
*When working the second repeat for sizes M and L, work 17 sl st BLO instead of 16.
You will now work 1 sl st in each sp available of the neckline in order to even the sides:
*1 sl st in next 2 hdc lying horizontally, 1 sl st BLO in next 2 hdc (these will be the 2 hdc left unworked in the previous rows)* repeat from * to 3 times in total, 1 ch and turn - there are 12 sts in the neckline + 35 (35, 38, 38, 41, 41) sts on the edge of the front panel= 47 (47, 50, 50, 53, 53) sts in total.
Row 2: 1 sl st BLO in each st across the neckline (12 sts) remove st marker and work 1 sl st BLO in each st across the edge of the vest and 1 sl st into each 1ch-sp of the buttonholes *- 35 (35, 38, 38, 41, 41) sts, 1 ch and turn. 47 (47, 50, 50, 53, 53) sts in total.
*Place st marker after working the 1st st of the edge.
Row 3: 1 sl st BLO in each st across the edge, leaving the sts on the neckline unworked, 1 ch and turn. 35 (35, 38, 38, 41, 41) sts.
Row 4: Repeat row 3. Cut yarn and weave in ends.
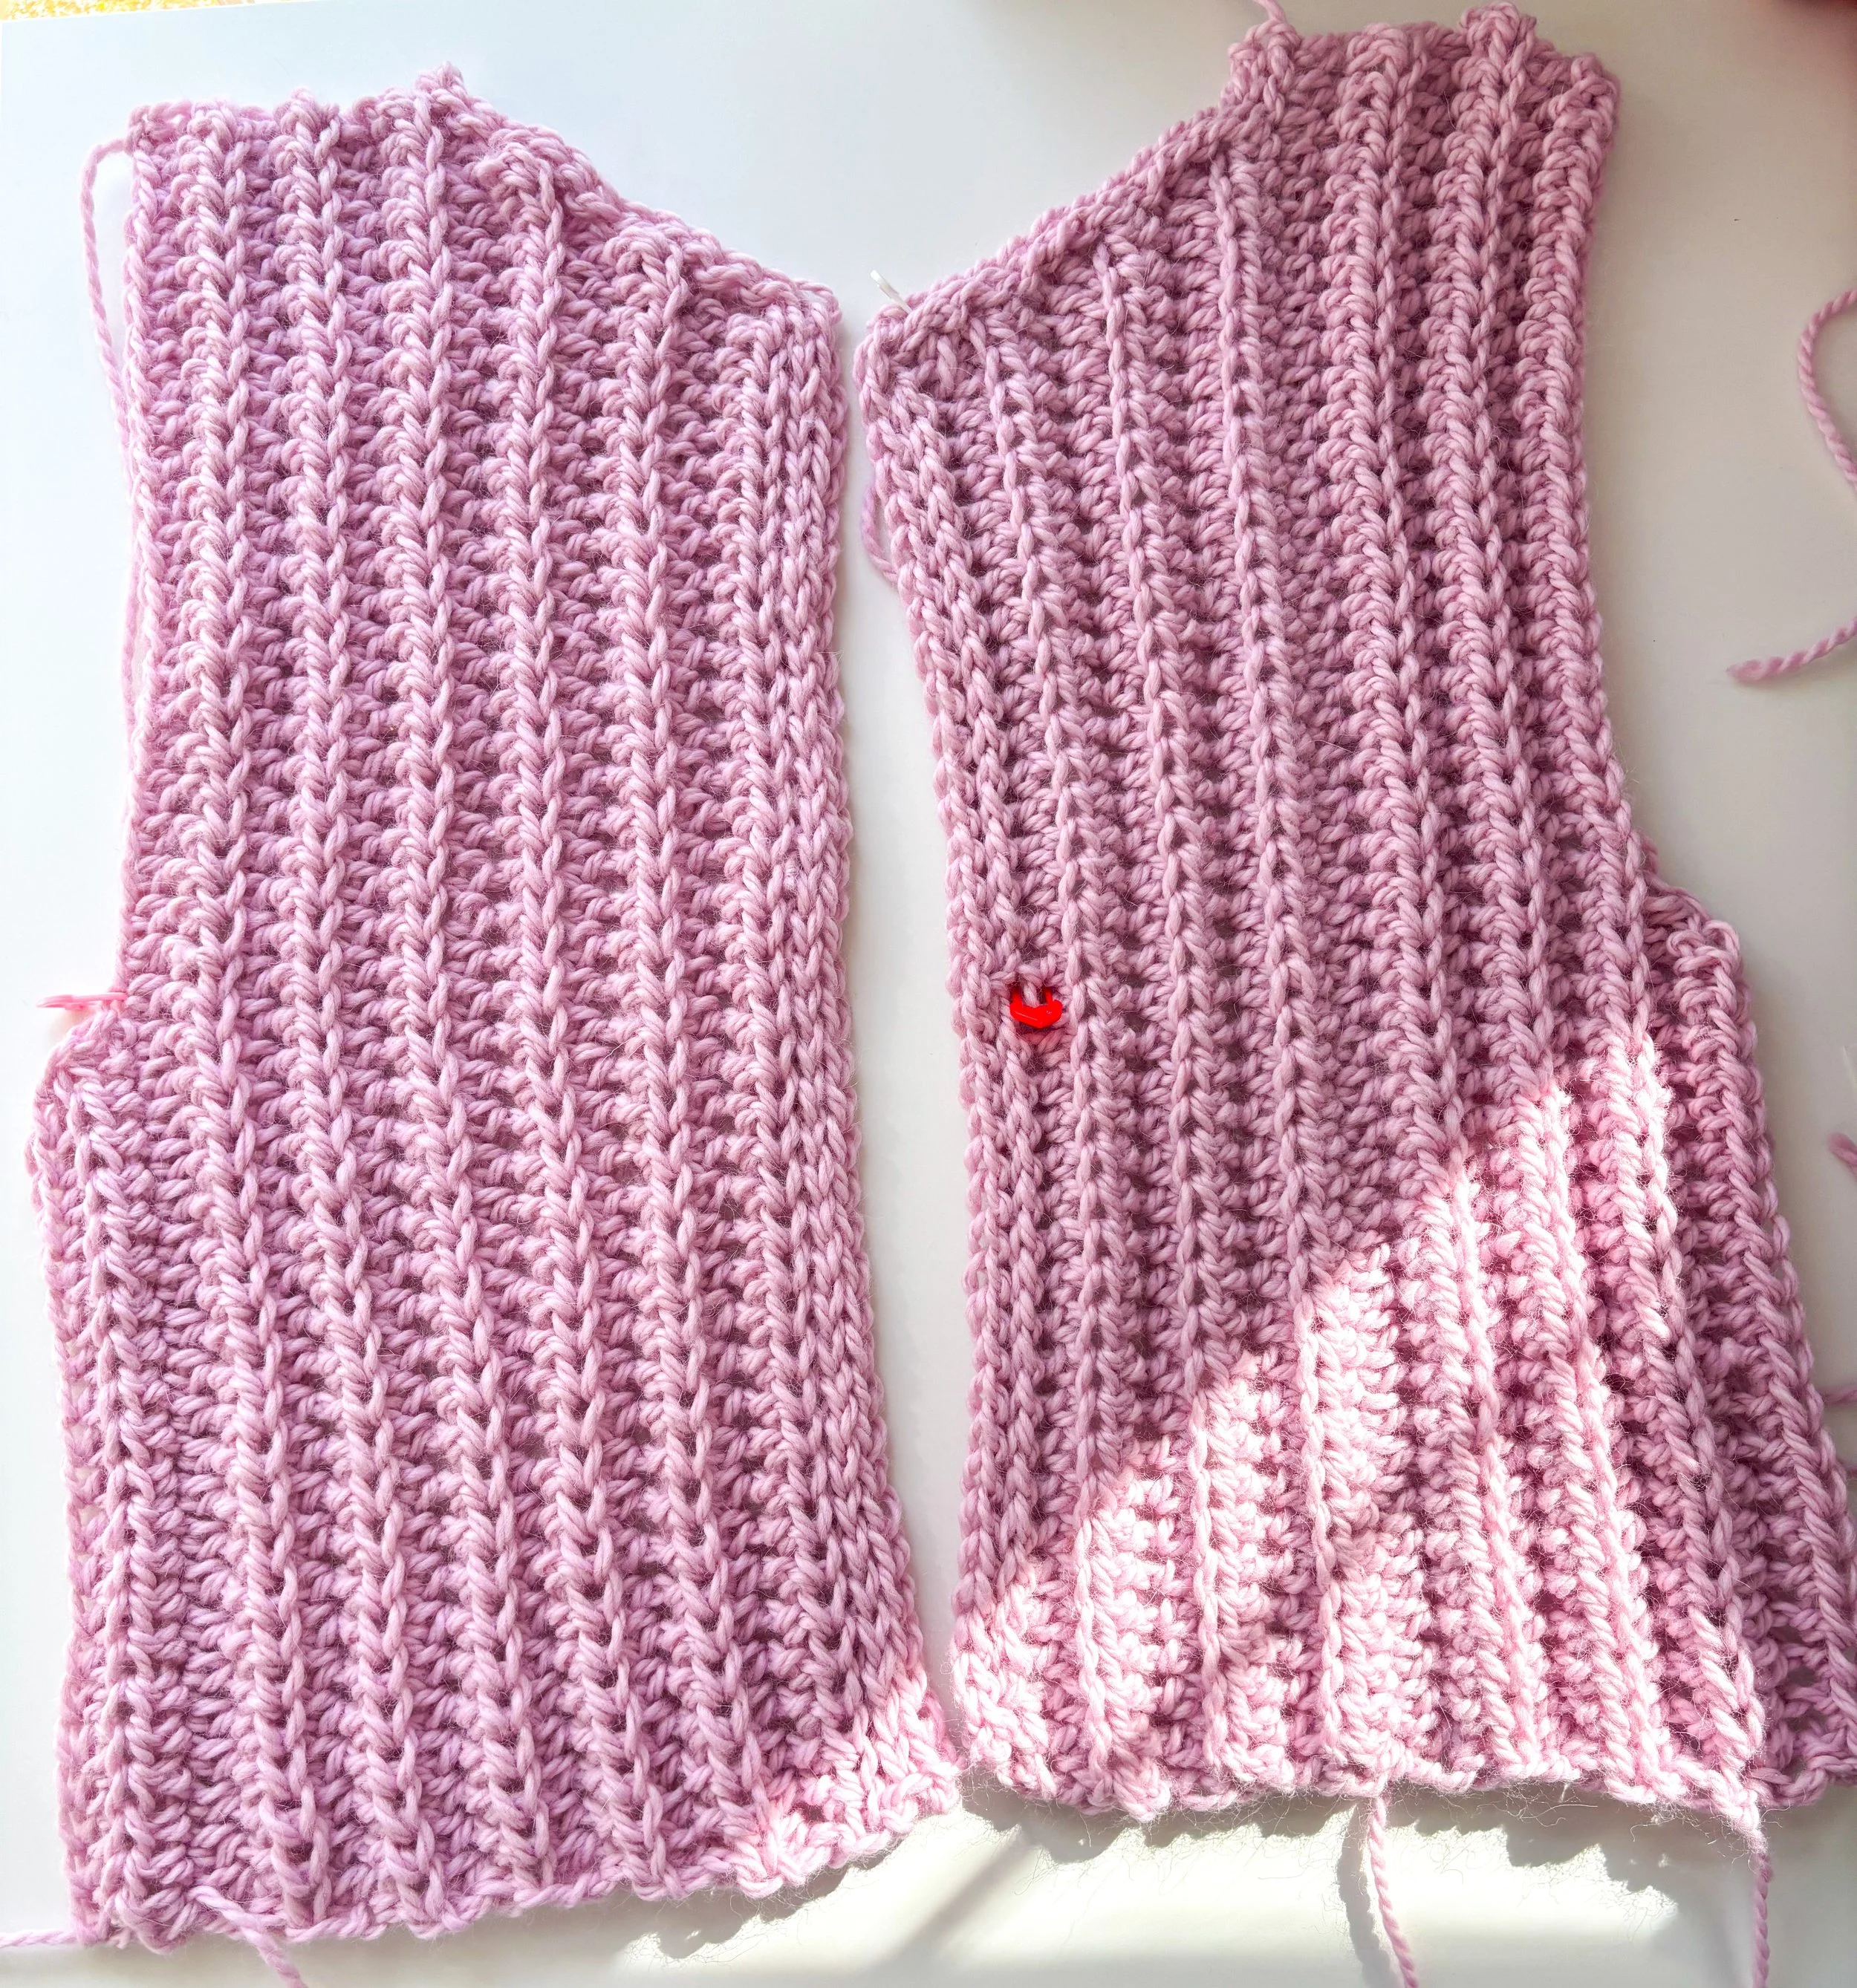
Two Front panels completed
If you prefer to use ties instead of buttons, follow these steps to create them on the border of Front 1:
Attach yarn to the first stitch along the border edge and chain 31. Starting in 2nd chain from hook, work 1 sl st in each chain across. Sl st into the same stitch where the yarn was originally attached to join the tie, 1 ch and and fasten off. Weave in ends.
Skip the next 17 stitches along the border, then reattach the yarn to the 18th stitch and repeat the steps above to create a second tie.
Repeat the same process on the opposite side of the garment to create two matching ties.
Back Panel
With yarn A and 9 mm crochet hook
Chain 42 (42, 45, 45, 48, 48)
Working in rows:
Row 1: Starting in 2nd ch from hook, 1 hdc in each ch available until the end, 1 ch and turn. 41 (41, 44, 44, 47, 47) hdc.
Row 2: 1 hdc BLO in each st across, 1 ch and turn. 41 (41, 44, 44, 47, 47) hdc.
Rows 3 to 22 (22, 24, 25, 26, 28): Repeat row 2. Cut yarn and weave in ends.
Widening Sides
With yarn A and 9 mm crochet hook
With the WS of the Back facing you, attach yarn to the bottom edge of the vest and work 1 ch.
Working in rows:
Row 1: (dec) 1 hdc BLO in next 22 (22, 23, 23, 24, 24) hdc, 1 hdc2tog over next 2 sts, 1 ch and turn leaving remaining sts unworked. 23 (23, 24, 24, 25, 25) hdc in total.
This is the end for size XS. Cut yarn and weave in ends. Repeat the same steps on the opposite side of the back panel. 23 hdc in total.
Row 2: (dec) Miss 1st hdc, 1 hdc BLO in each st across. Cut yarn and weave in ends.
This is the end for sizes S and (M). Cut yarn and weave in ends. Repeat the same steps on the opposite side of the back panel. 22 (23) hdc in total.
SIZES L (XL) XXL ONLY
Row 3: 1 hdc BLO in each st across. 23 (24) 24 hdc in total.
This is the end for size L. Cut yarn and weave in ends. Repeat the same steps on the opposite side of the back panel. 23 hdc in total.
SIZES XL (XXL) ONLY
Row 4: 1 hdc BLO in each st across. 24 (24) hdc in total.
Cut the yarn and weave in the ends. Repeat the same steps on the opposite side of the back panel. Then, following the same instructions used for the back, repeat Rows 1 to 3 (or 4, depending on size) on each front panel.
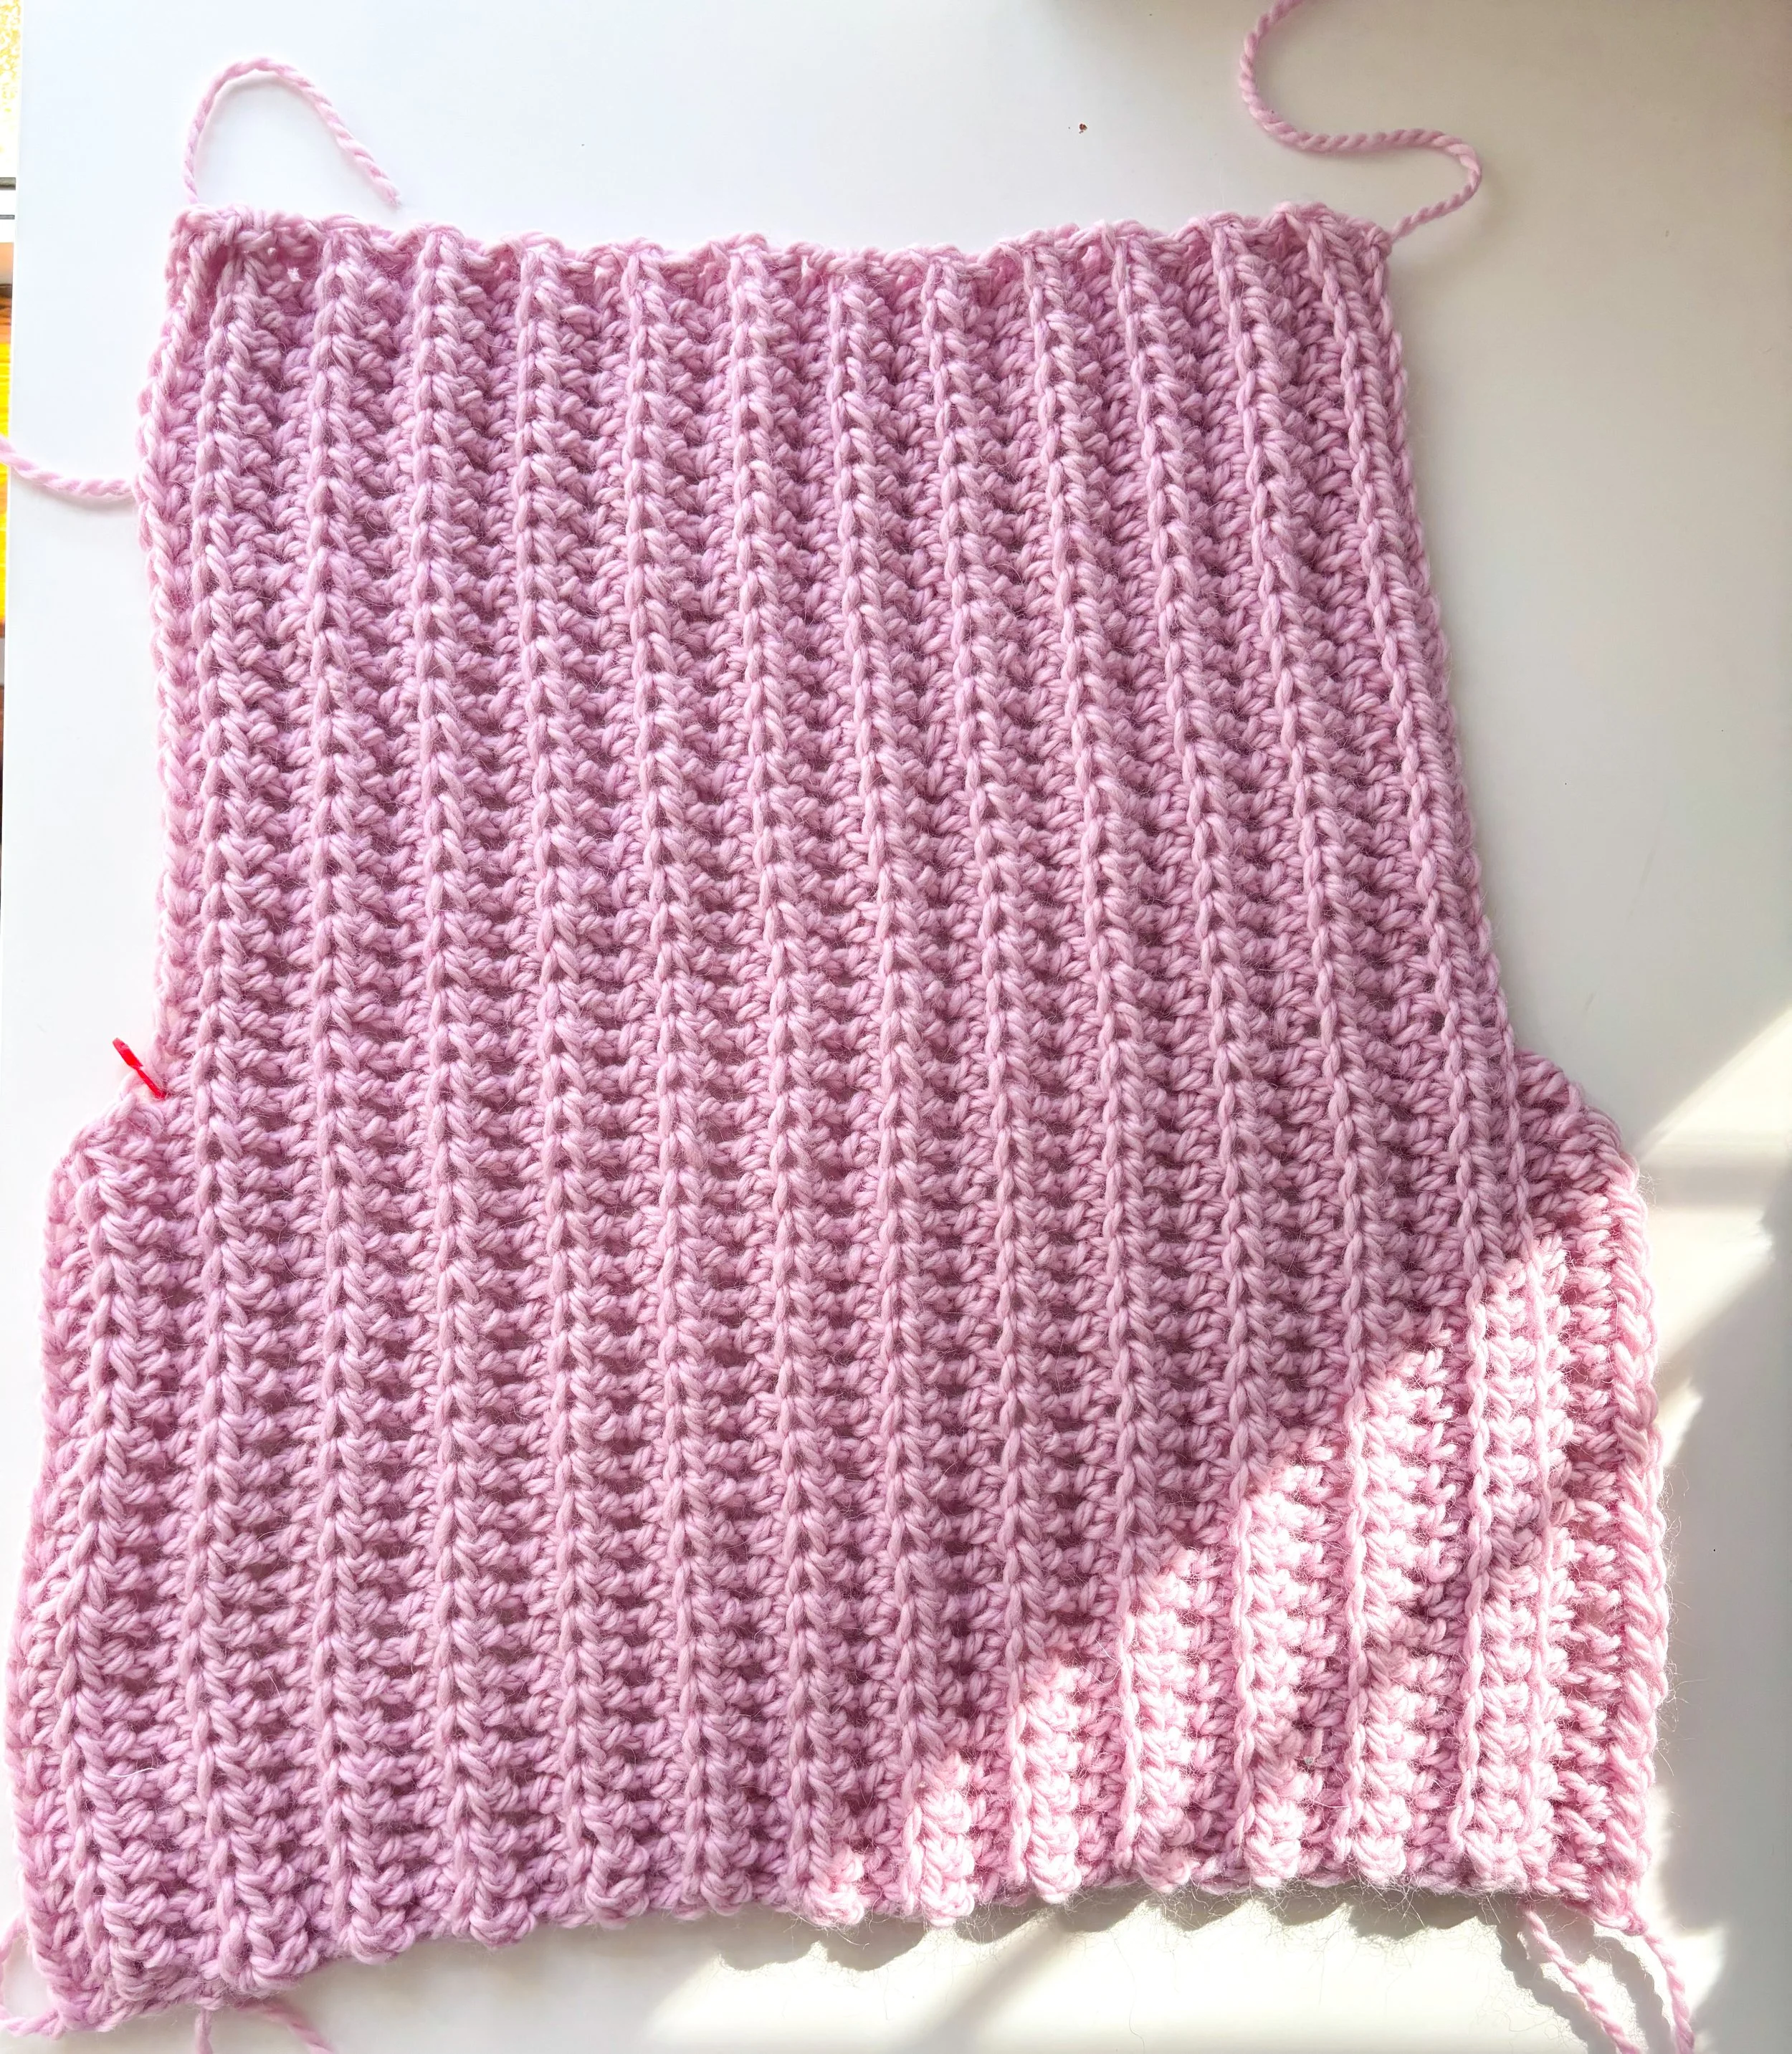
Back Panel Completed
Making Up
Place your front panel on top of your back panel with the wrong sides touching. Using a yarn needle, whip stitch along shoulder seams using the mattress stitch or invisible vertical seaming. You will be working on the right side of the fabric, but the seam will be on the inside if you use the technique above. Repeat the process for the second front panel.
Watch this video to SEW the shoulders: https://www.youtube.com/watch?v=Q75f1mcqSo8
Fold the sweater along the shoulder edge so that the right sides are touching and whip stitch the underarm and side seams.


🌺🌺🌺🌺
Well That Was Fun! What's Next?
📌 PIN THIS POST - Don't lose this project; save it to your Pinterest crochet board so you can quickly come back to it again.
💌 SHARE - Share your yarn choice, in-progress, or finished projects on Facebook or Instagram and use the hashtag #leoneladiy
🥂 JOIN - Join our small community on Facebook: Dublin Bay Crochet