

amazing Star Stitch Crochet Beanie
Welcome! I'm excited to introduce my latest crochet design: The Star Stitch Crochet Beanie. This beginner-friendly hat pattern showcases the popular star stitch to create a beautiful, textured fabric with a knit-like appearance. It’s easy to follow, quick to crochet, and includes clear instructions for multiple sizes—from baby through adult!
Below you'll find everything you need to crochet your own stylish beanie, along with helpful tips to ensure a perfect fit.
Get the star beanie
FREE PATTERN: Keep scrolling for the FREE version of the Illusion Beanie
PRINTABLE PDF: Pick up the beautifully formatted, ad-free PDF version of the ILLUSION Beanie from My Etsy Shop.
Pin it now, crochet it later!

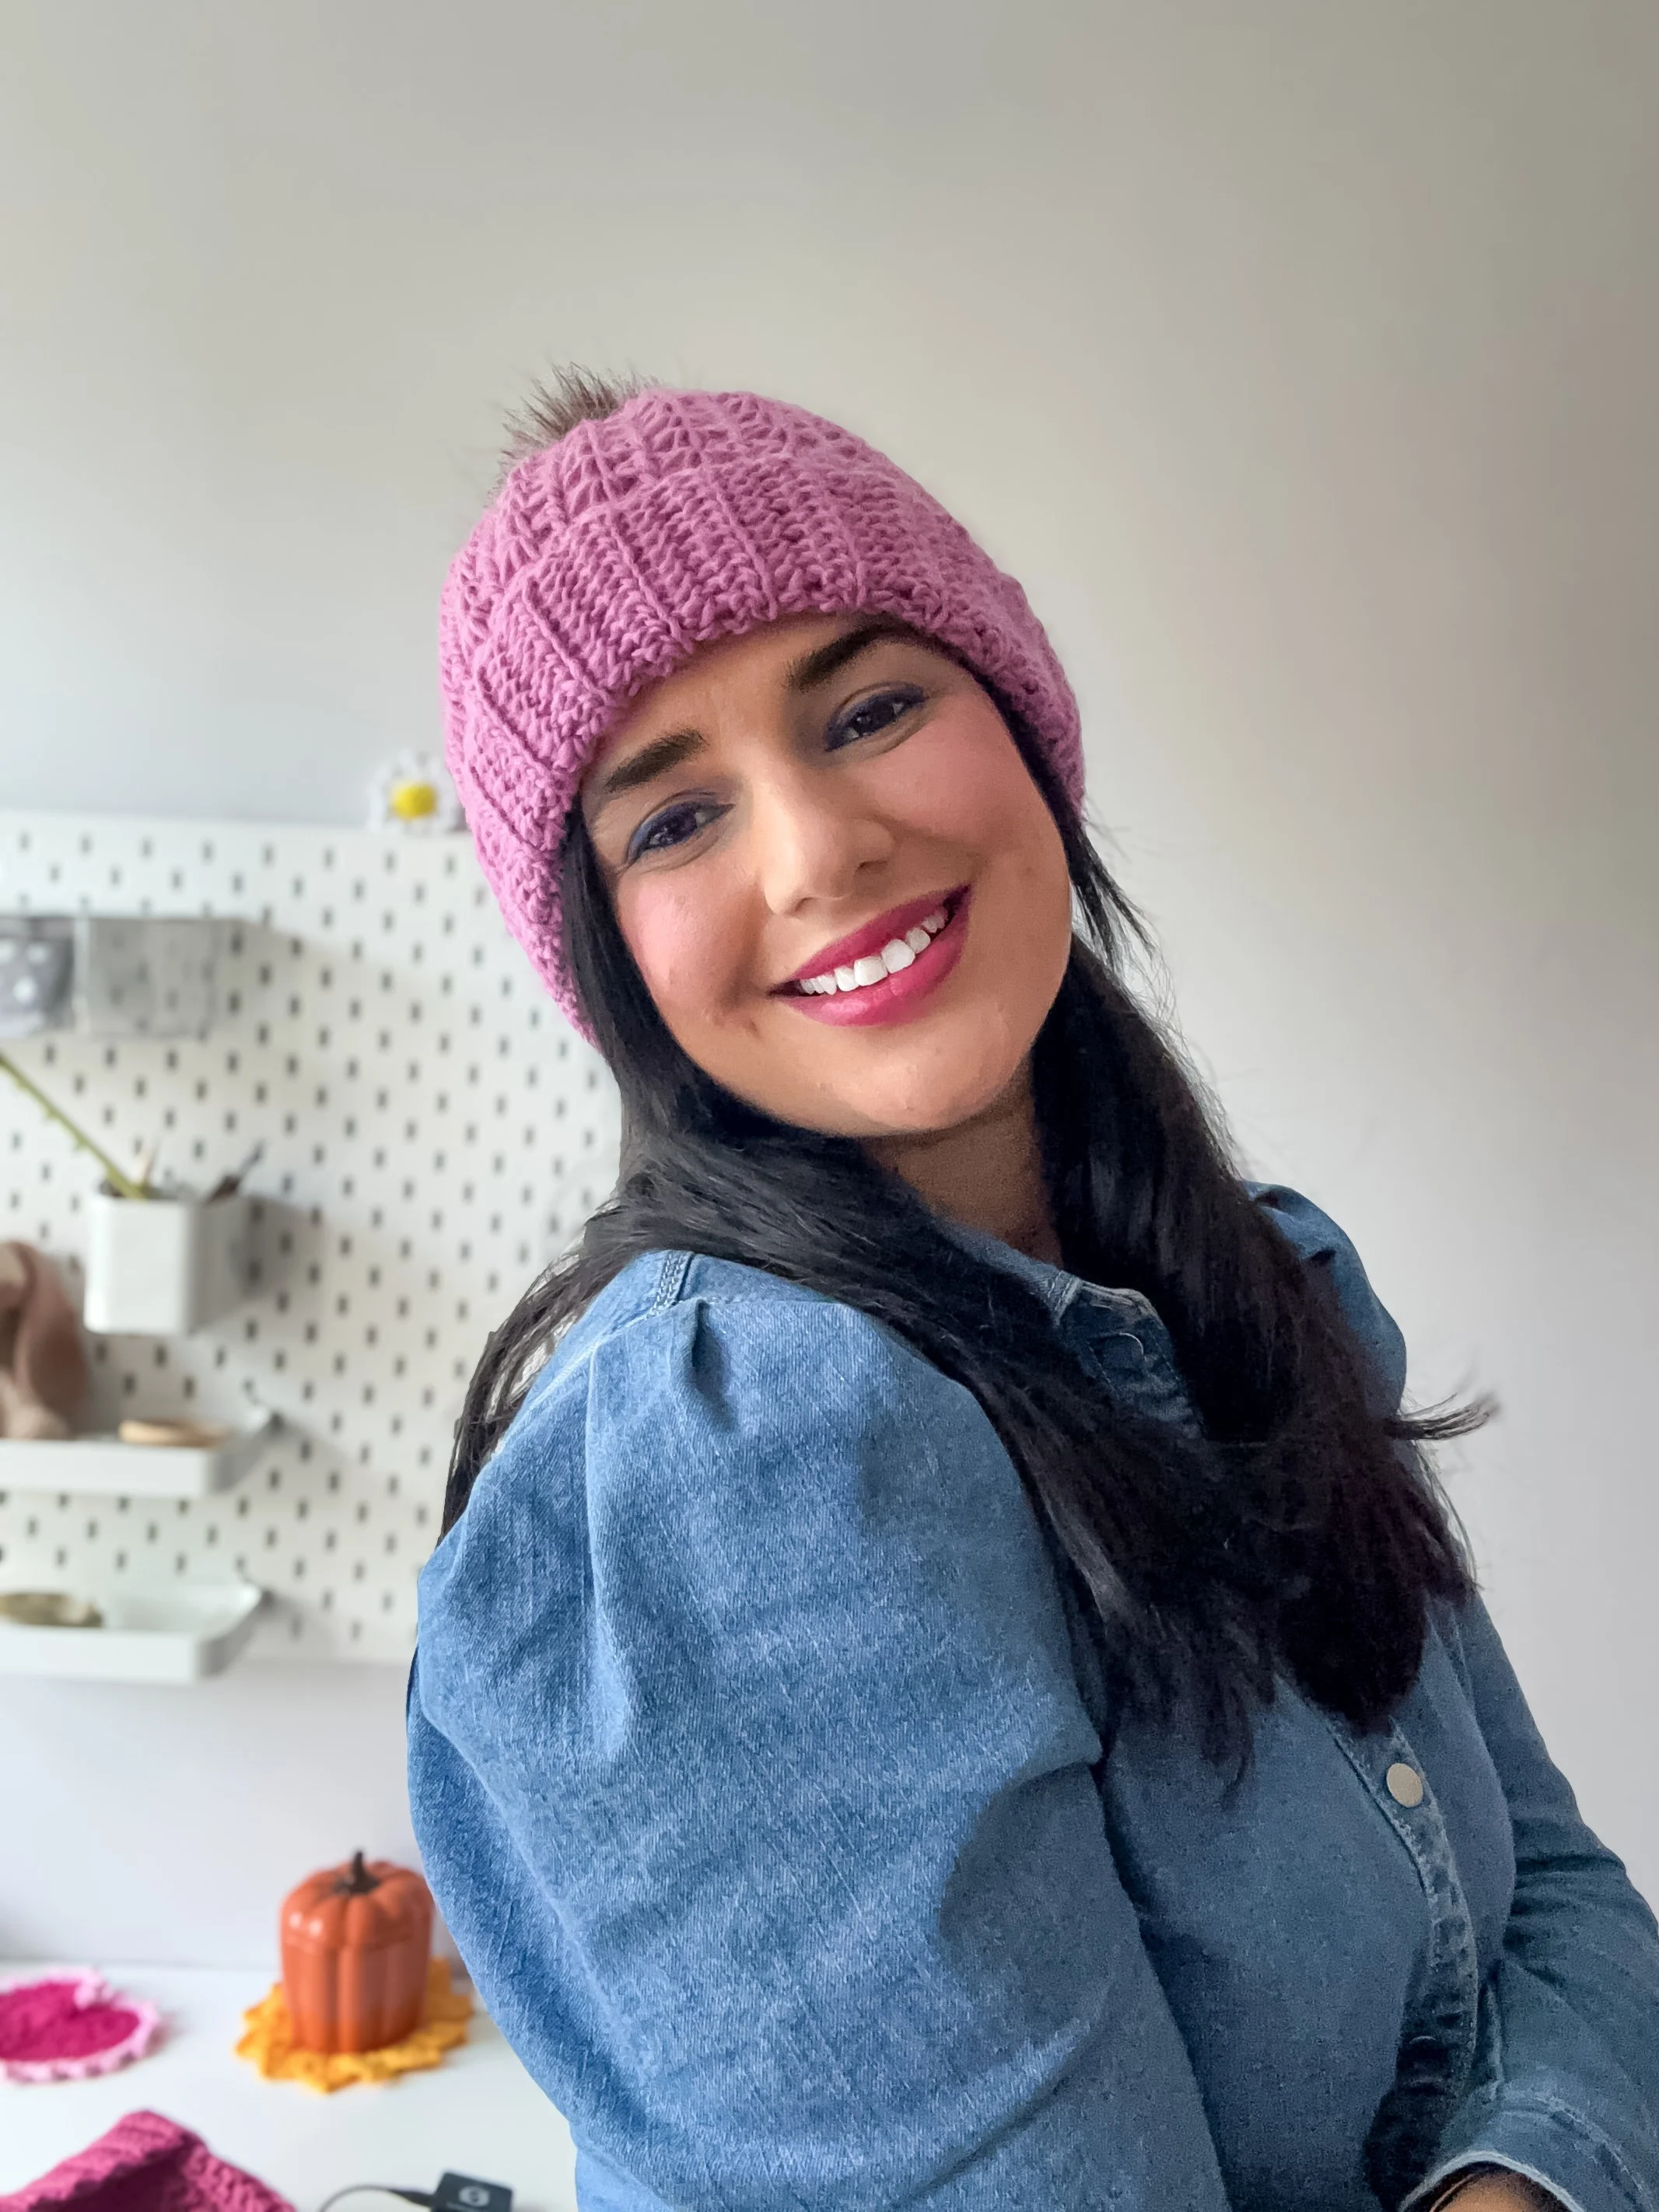
After the fantastic response to my last crochet beanie pattern, I was inspired to design another hat with beautiful texture and a comfortable fit. The Star Stitch has always caught my eye because it looks intricate and knit-like, but it's surprisingly easy to crochet—making it perfect for all skill levels.
If you're looking for a relaxing, quick project that produces beautiful results, you'll love this pattern.
Inspiration for the Star Stitch Beanie:
I created this beanie because I wanted a hat that was cozy, elegant, and versatile enough to make for anyone—babies, kids, teens, and adults alike. The Star Stitch gives this hat a stylish twist, adding subtle texture that pairs beautifully with almost any winter outfit. Plus, working this hat flat means minimal fuss—simply crochet a rectangle, seam it together, and voilà, your hat is ready to wear!
Who Can Crochet This Hat?
Absolutely anyone! Even if you’re brand new to crochet, the clear instructions, video tutorial, and beginner-friendly construction make this a stress-free project. More experienced crocheters will also appreciate the simplicity and the satisfying texture of the stitch pattern.
What Yarn Should You Use?
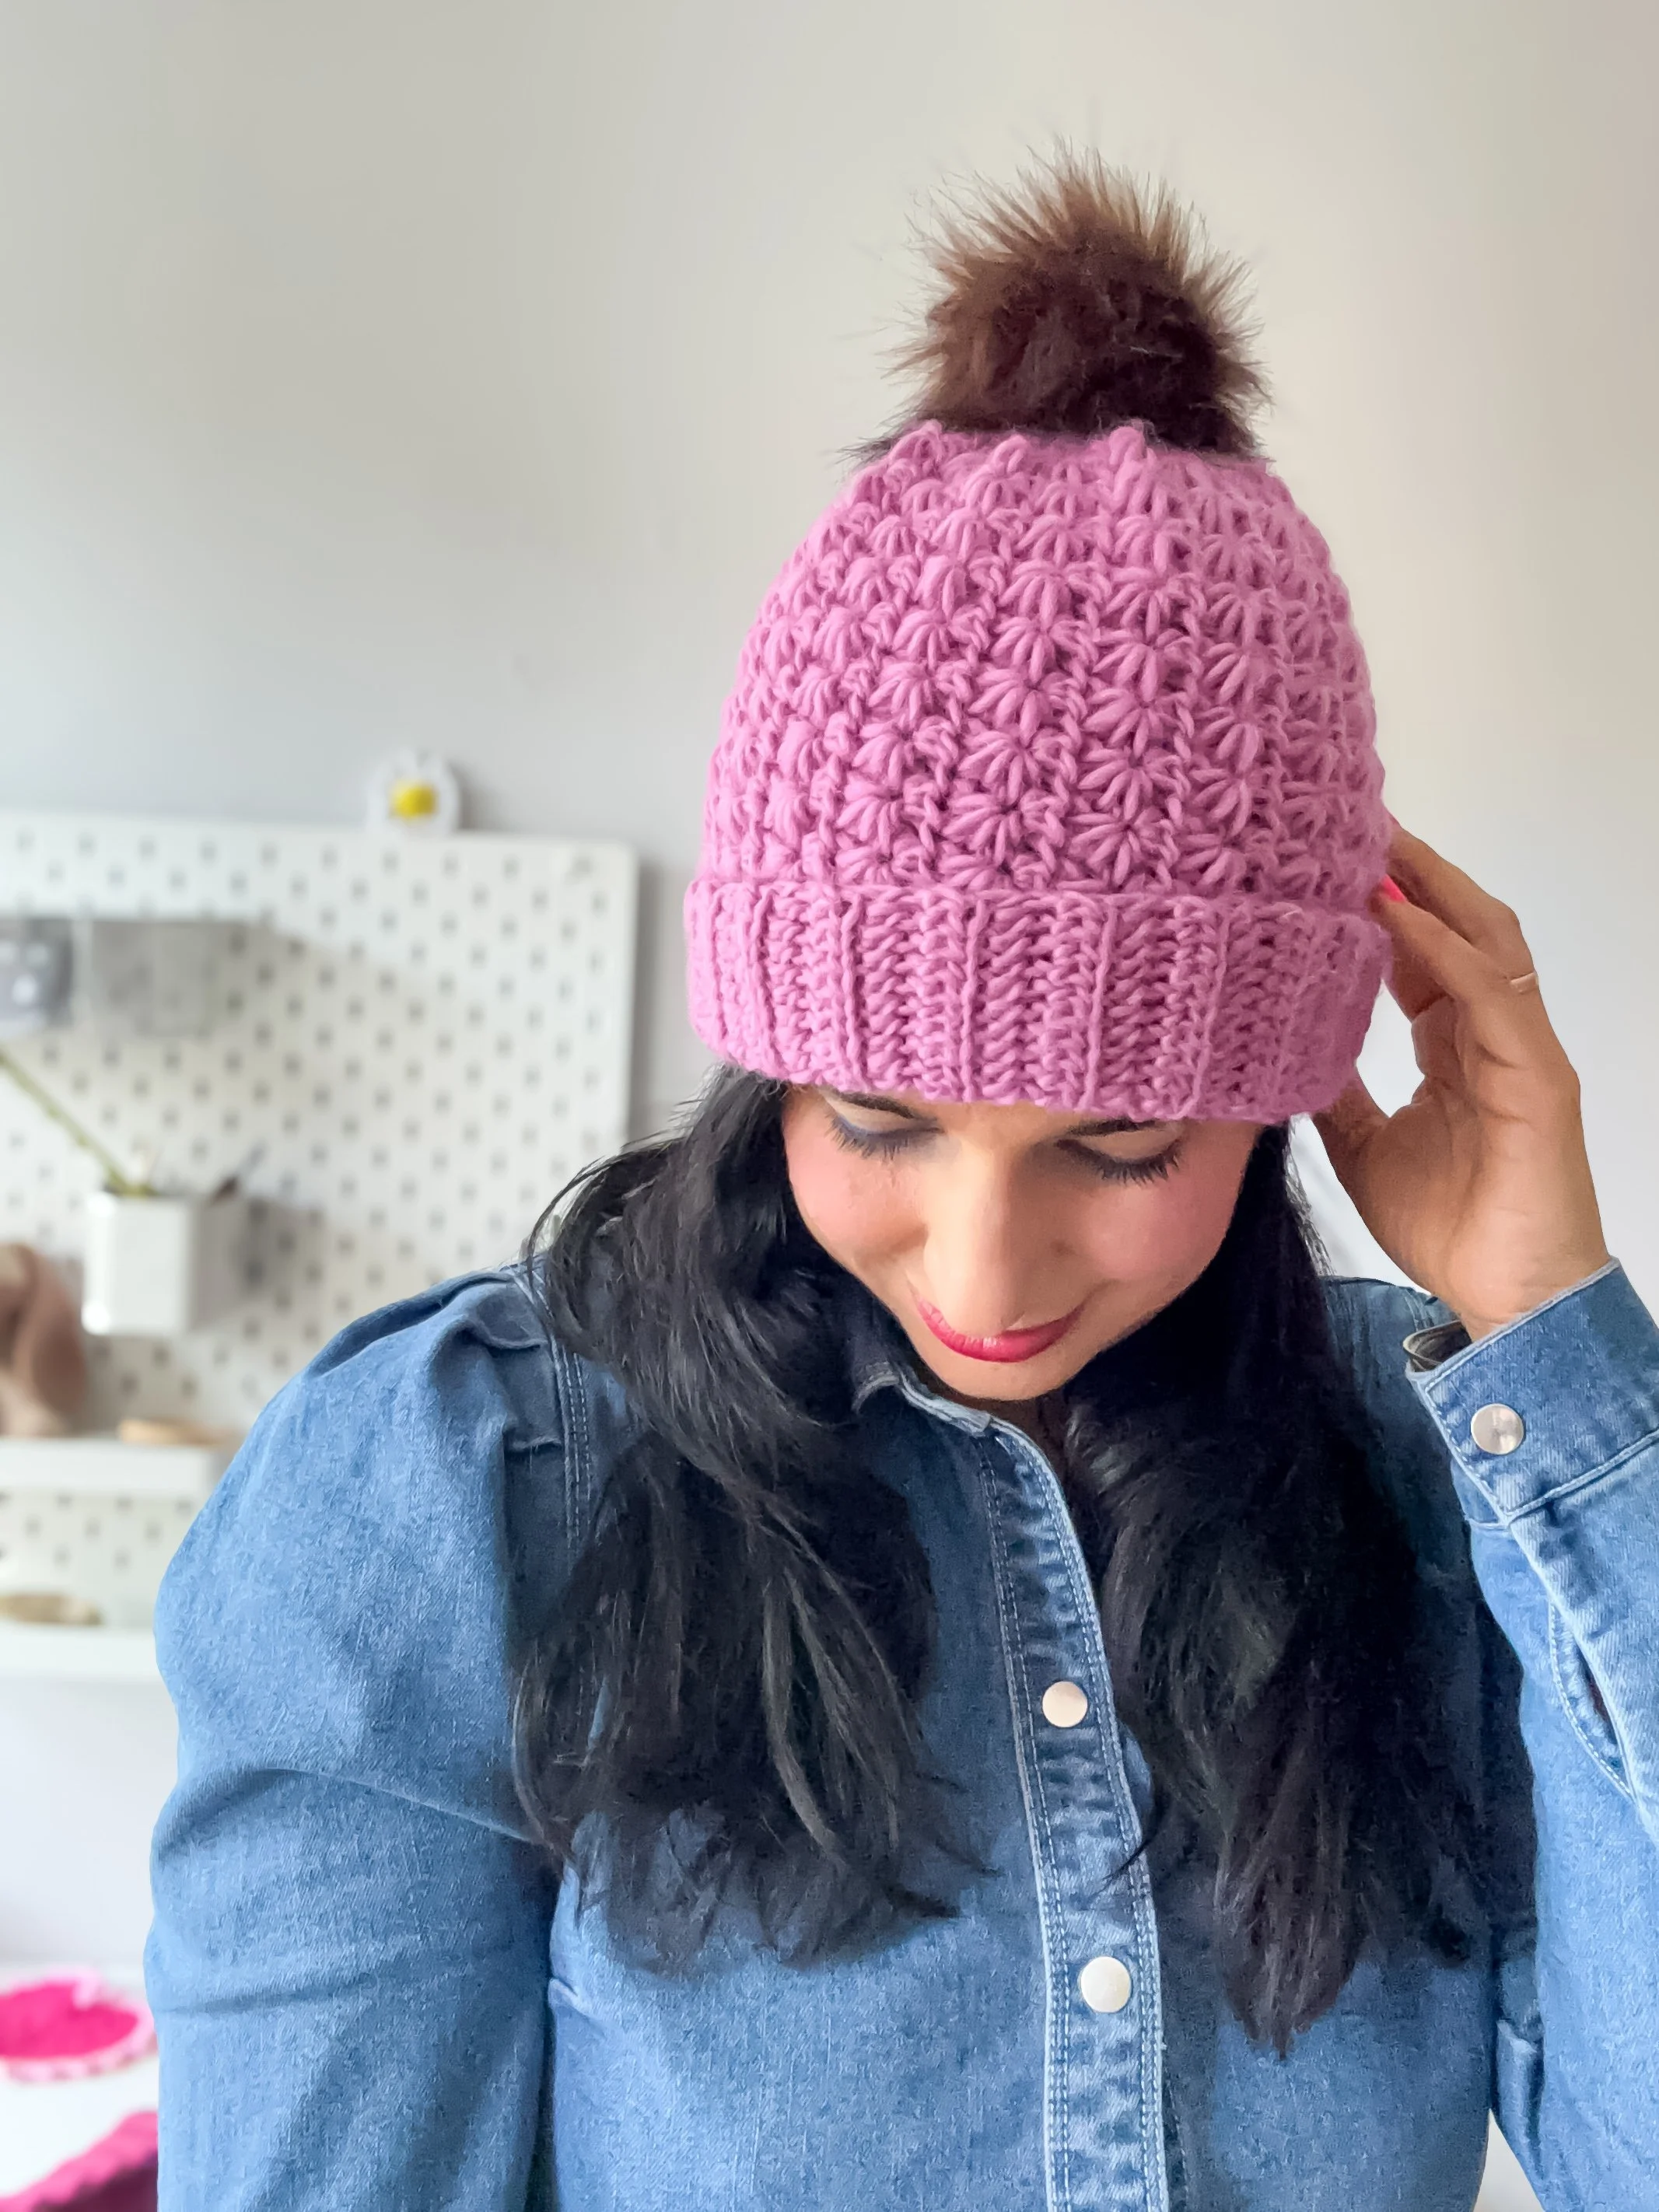
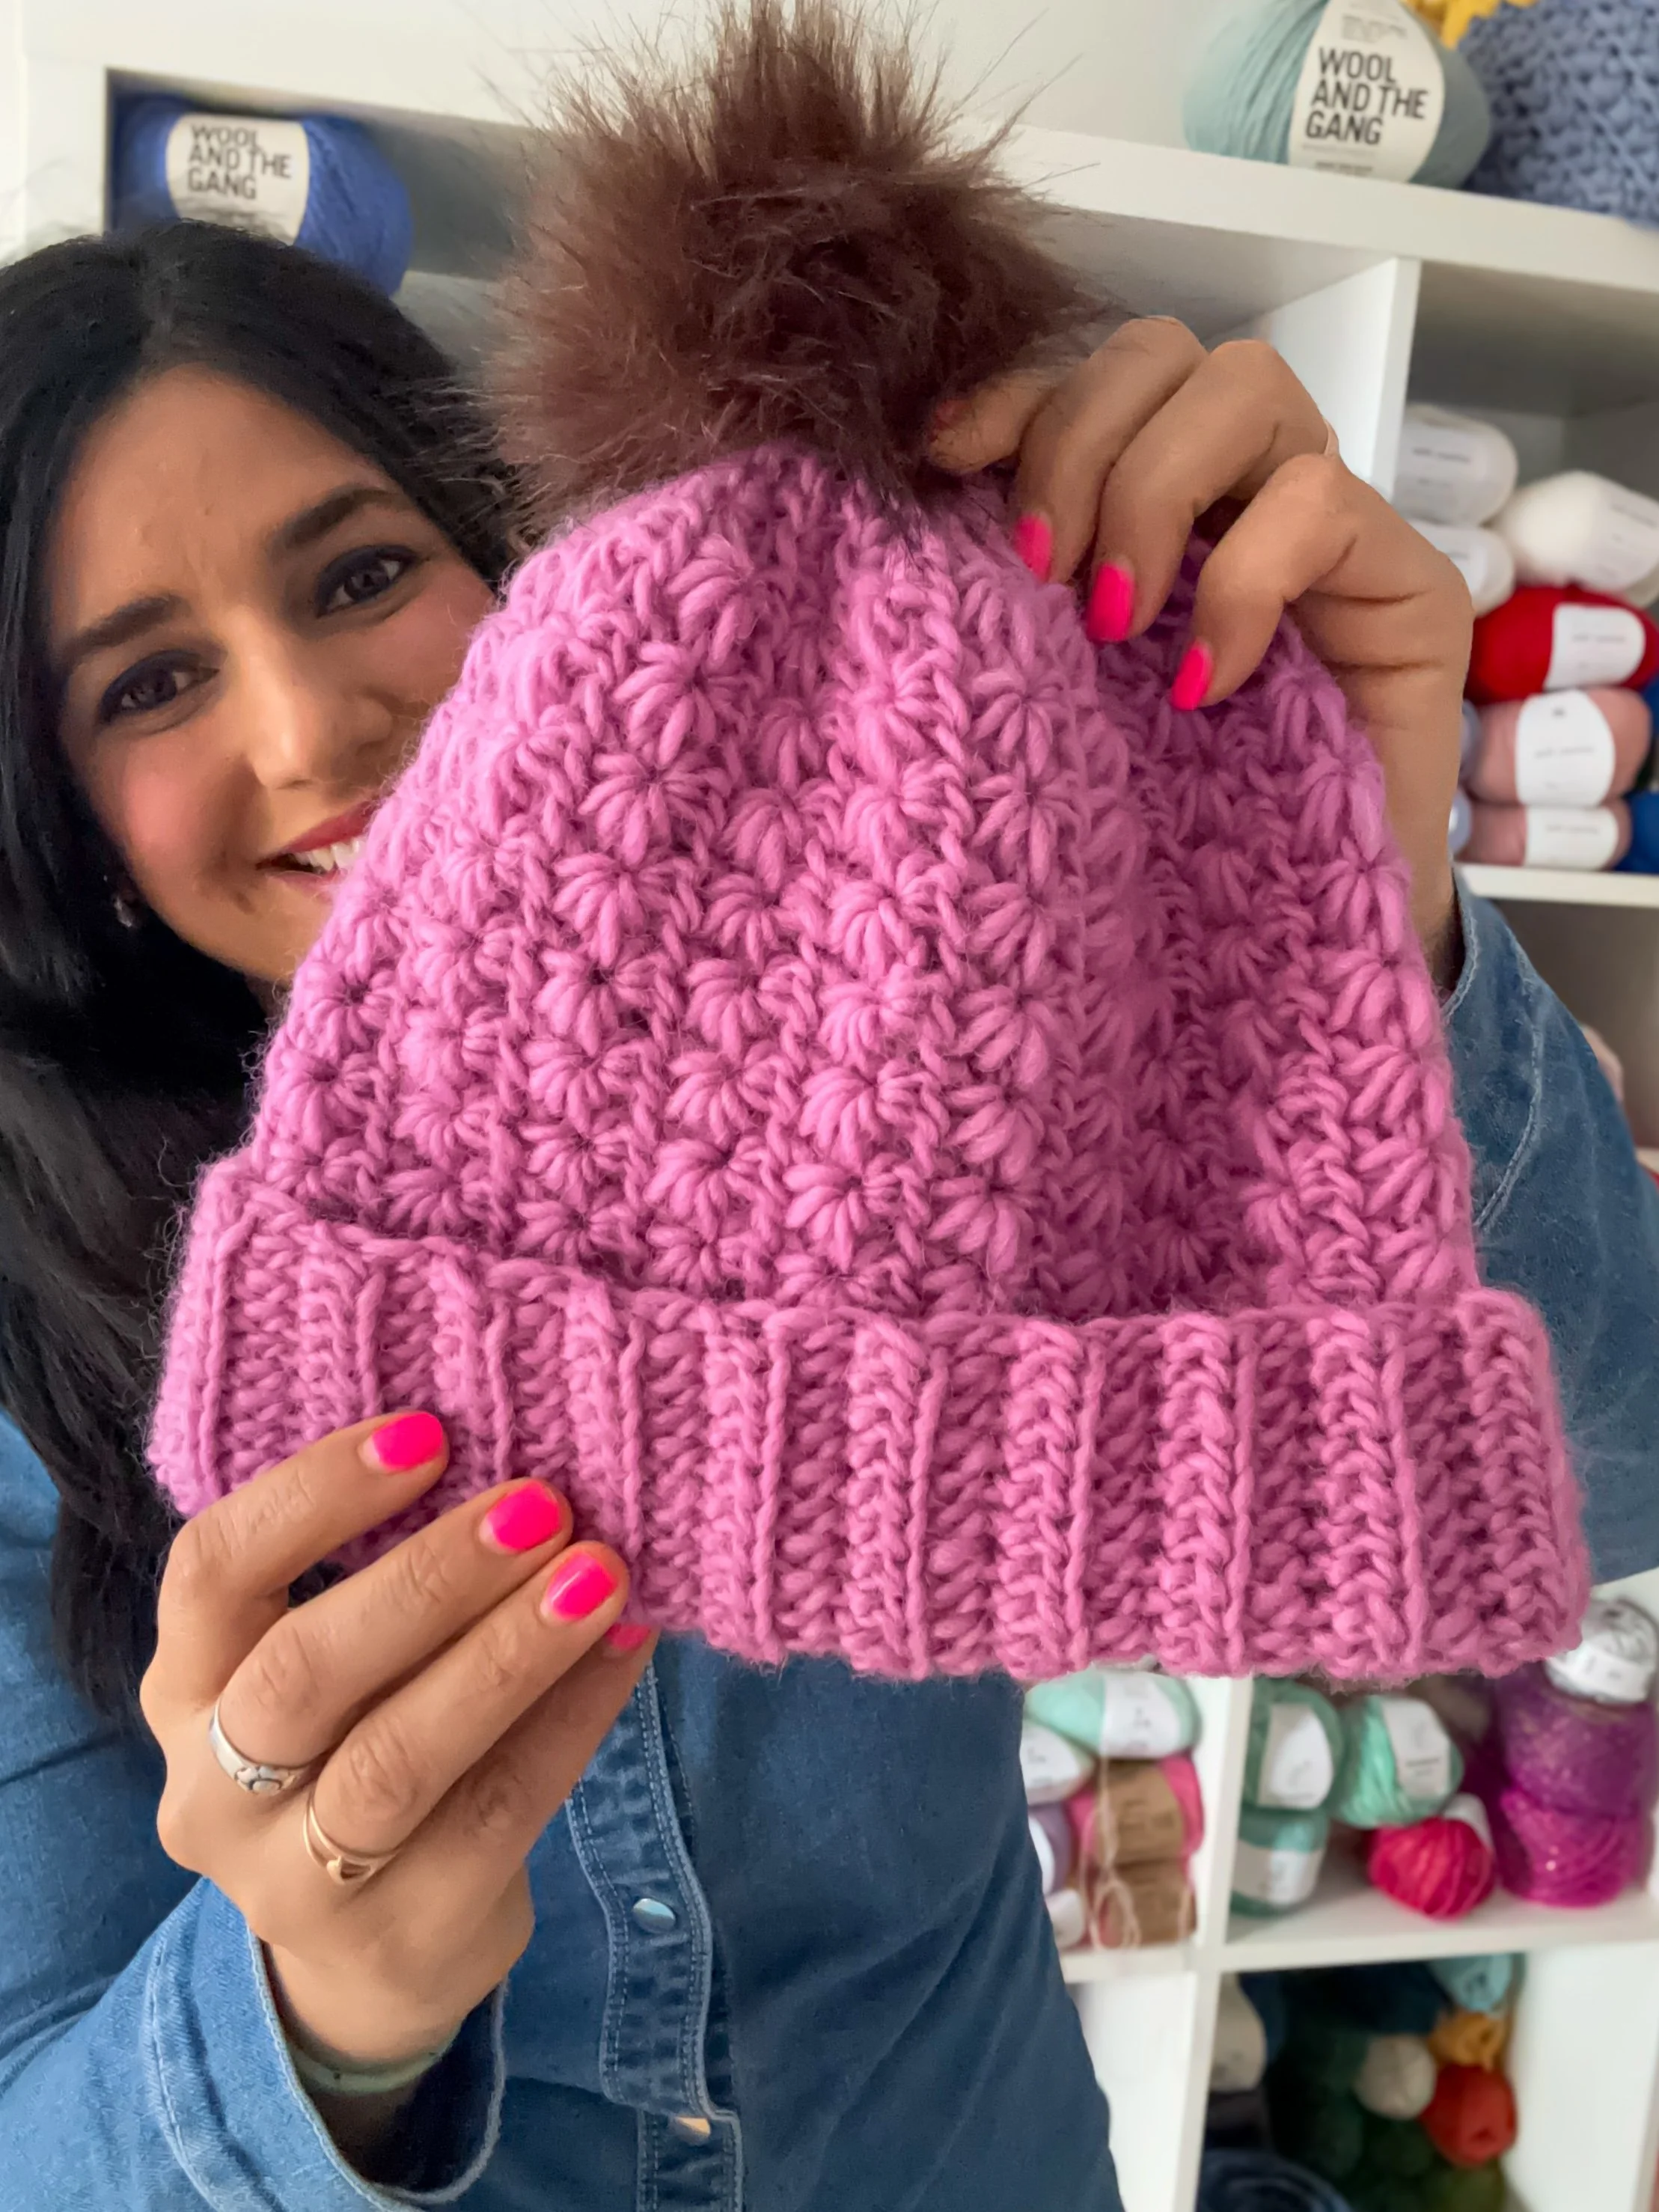
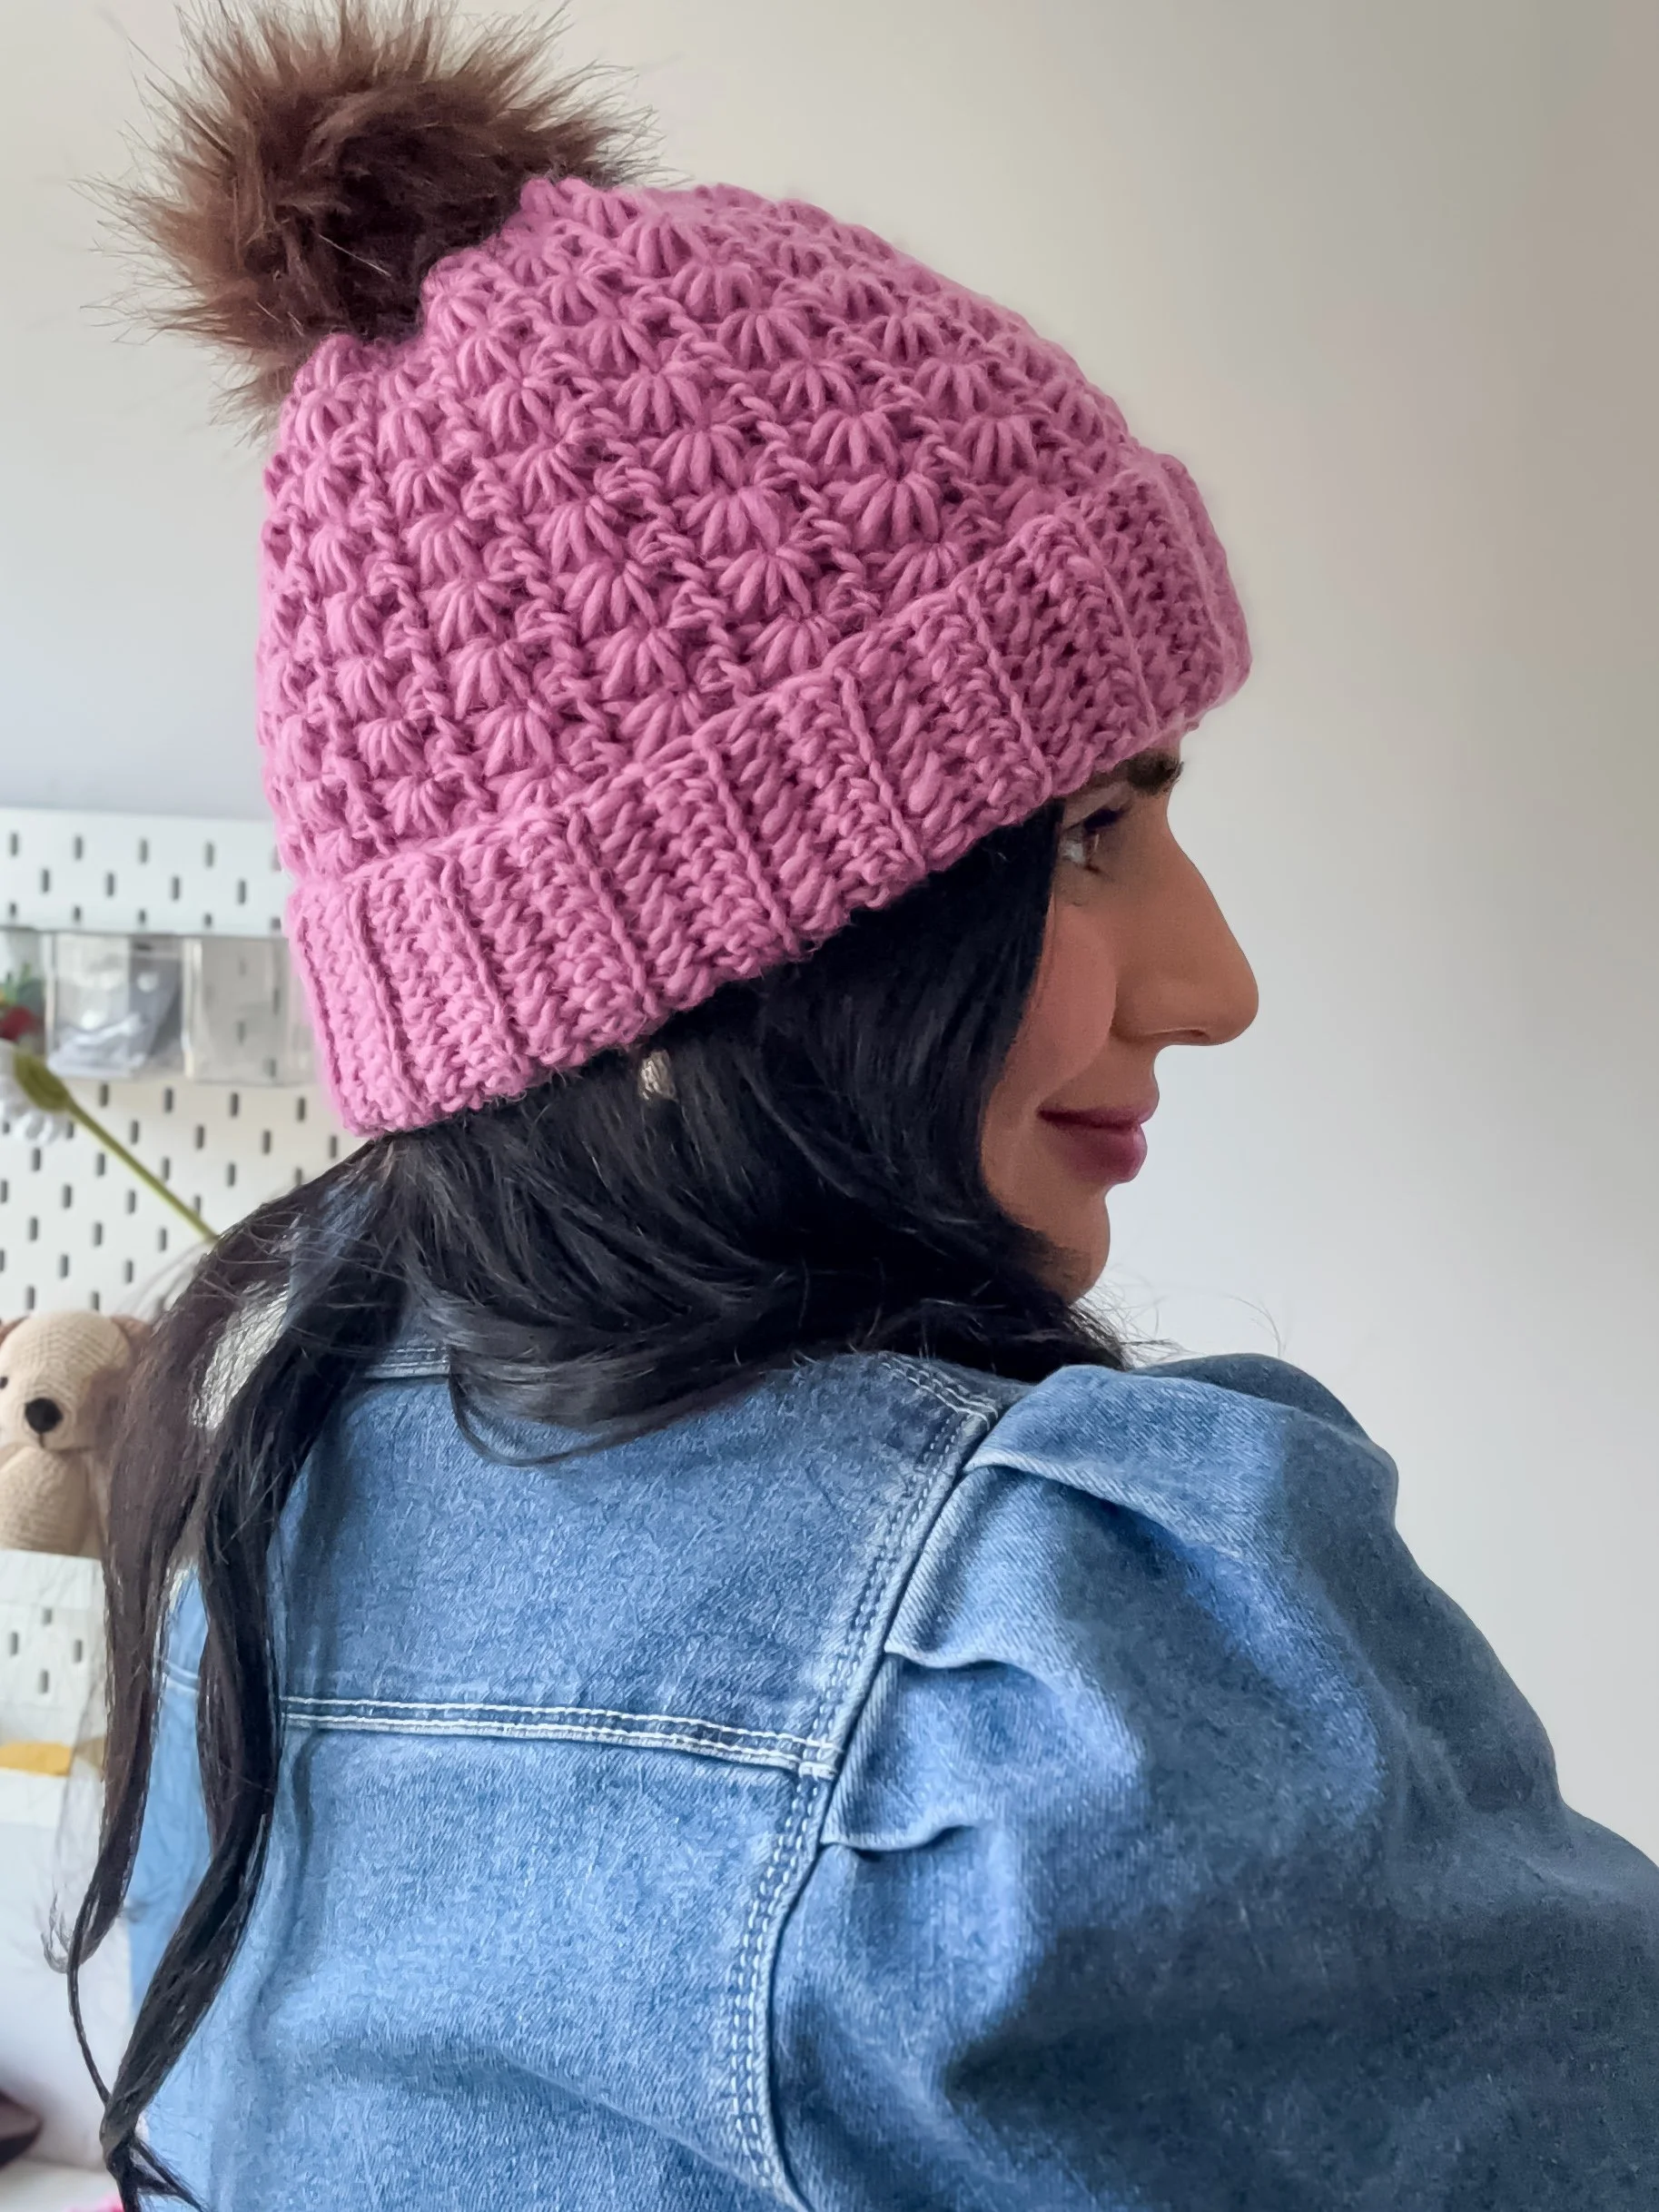
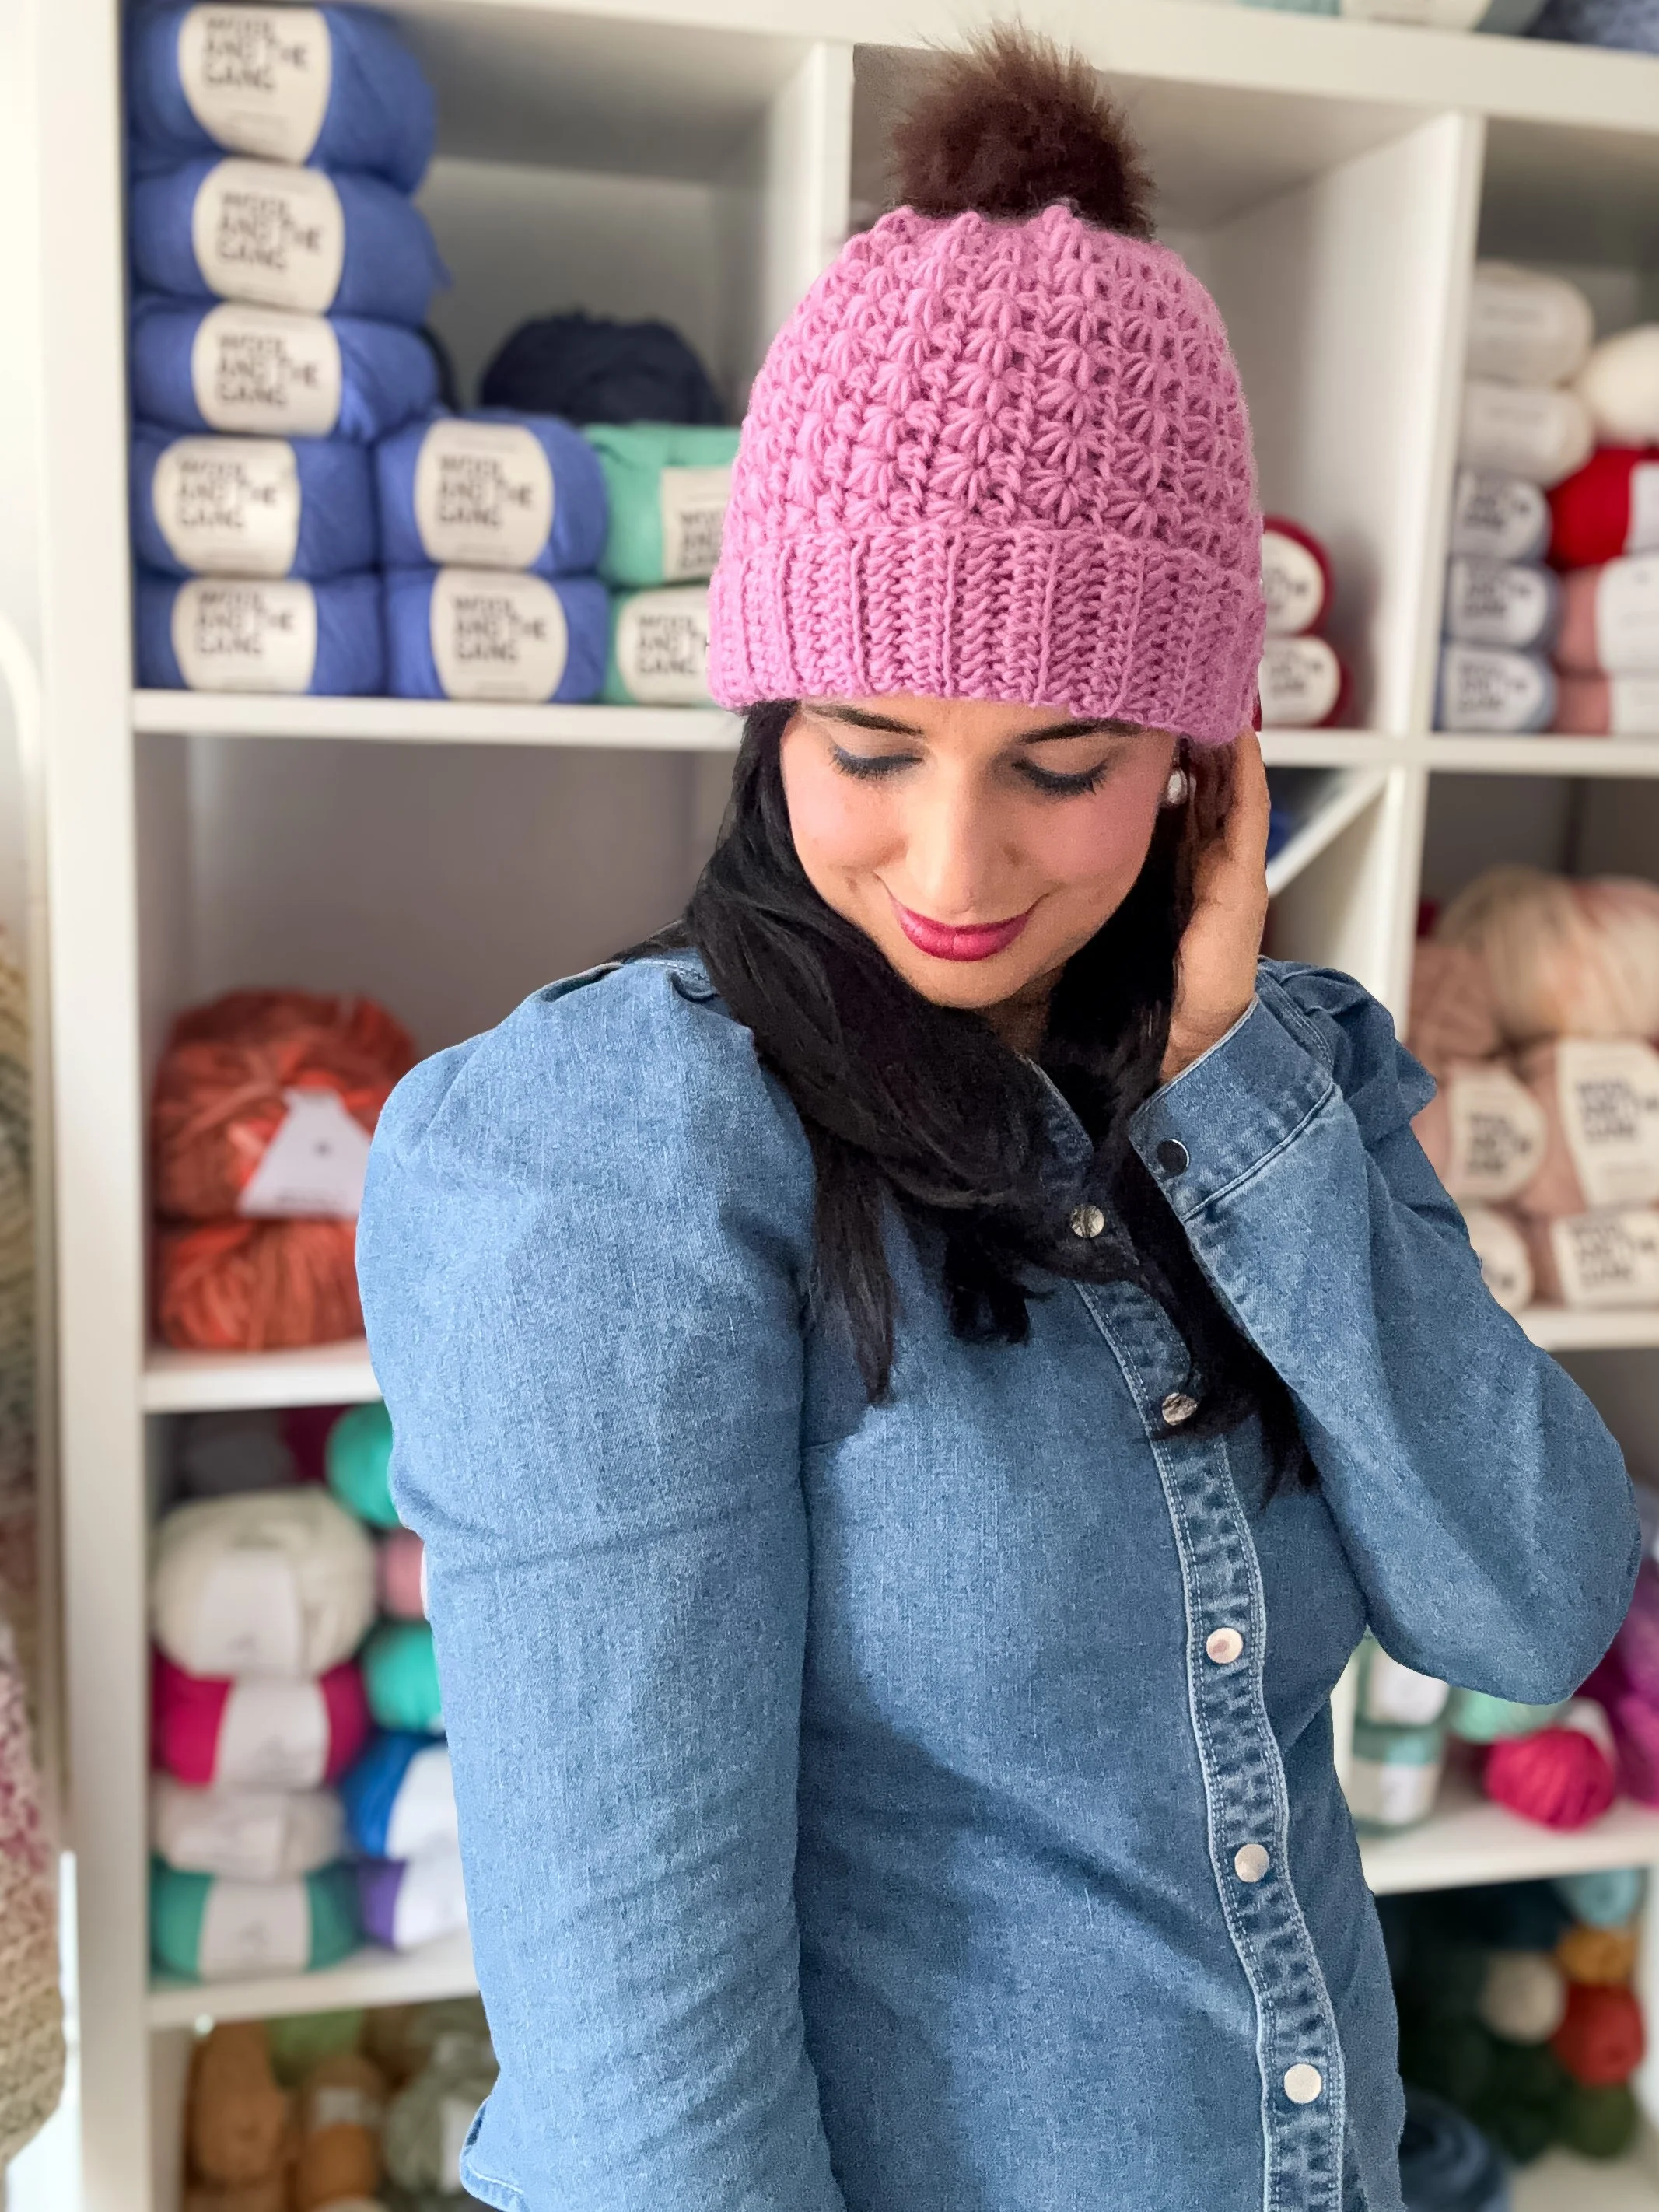
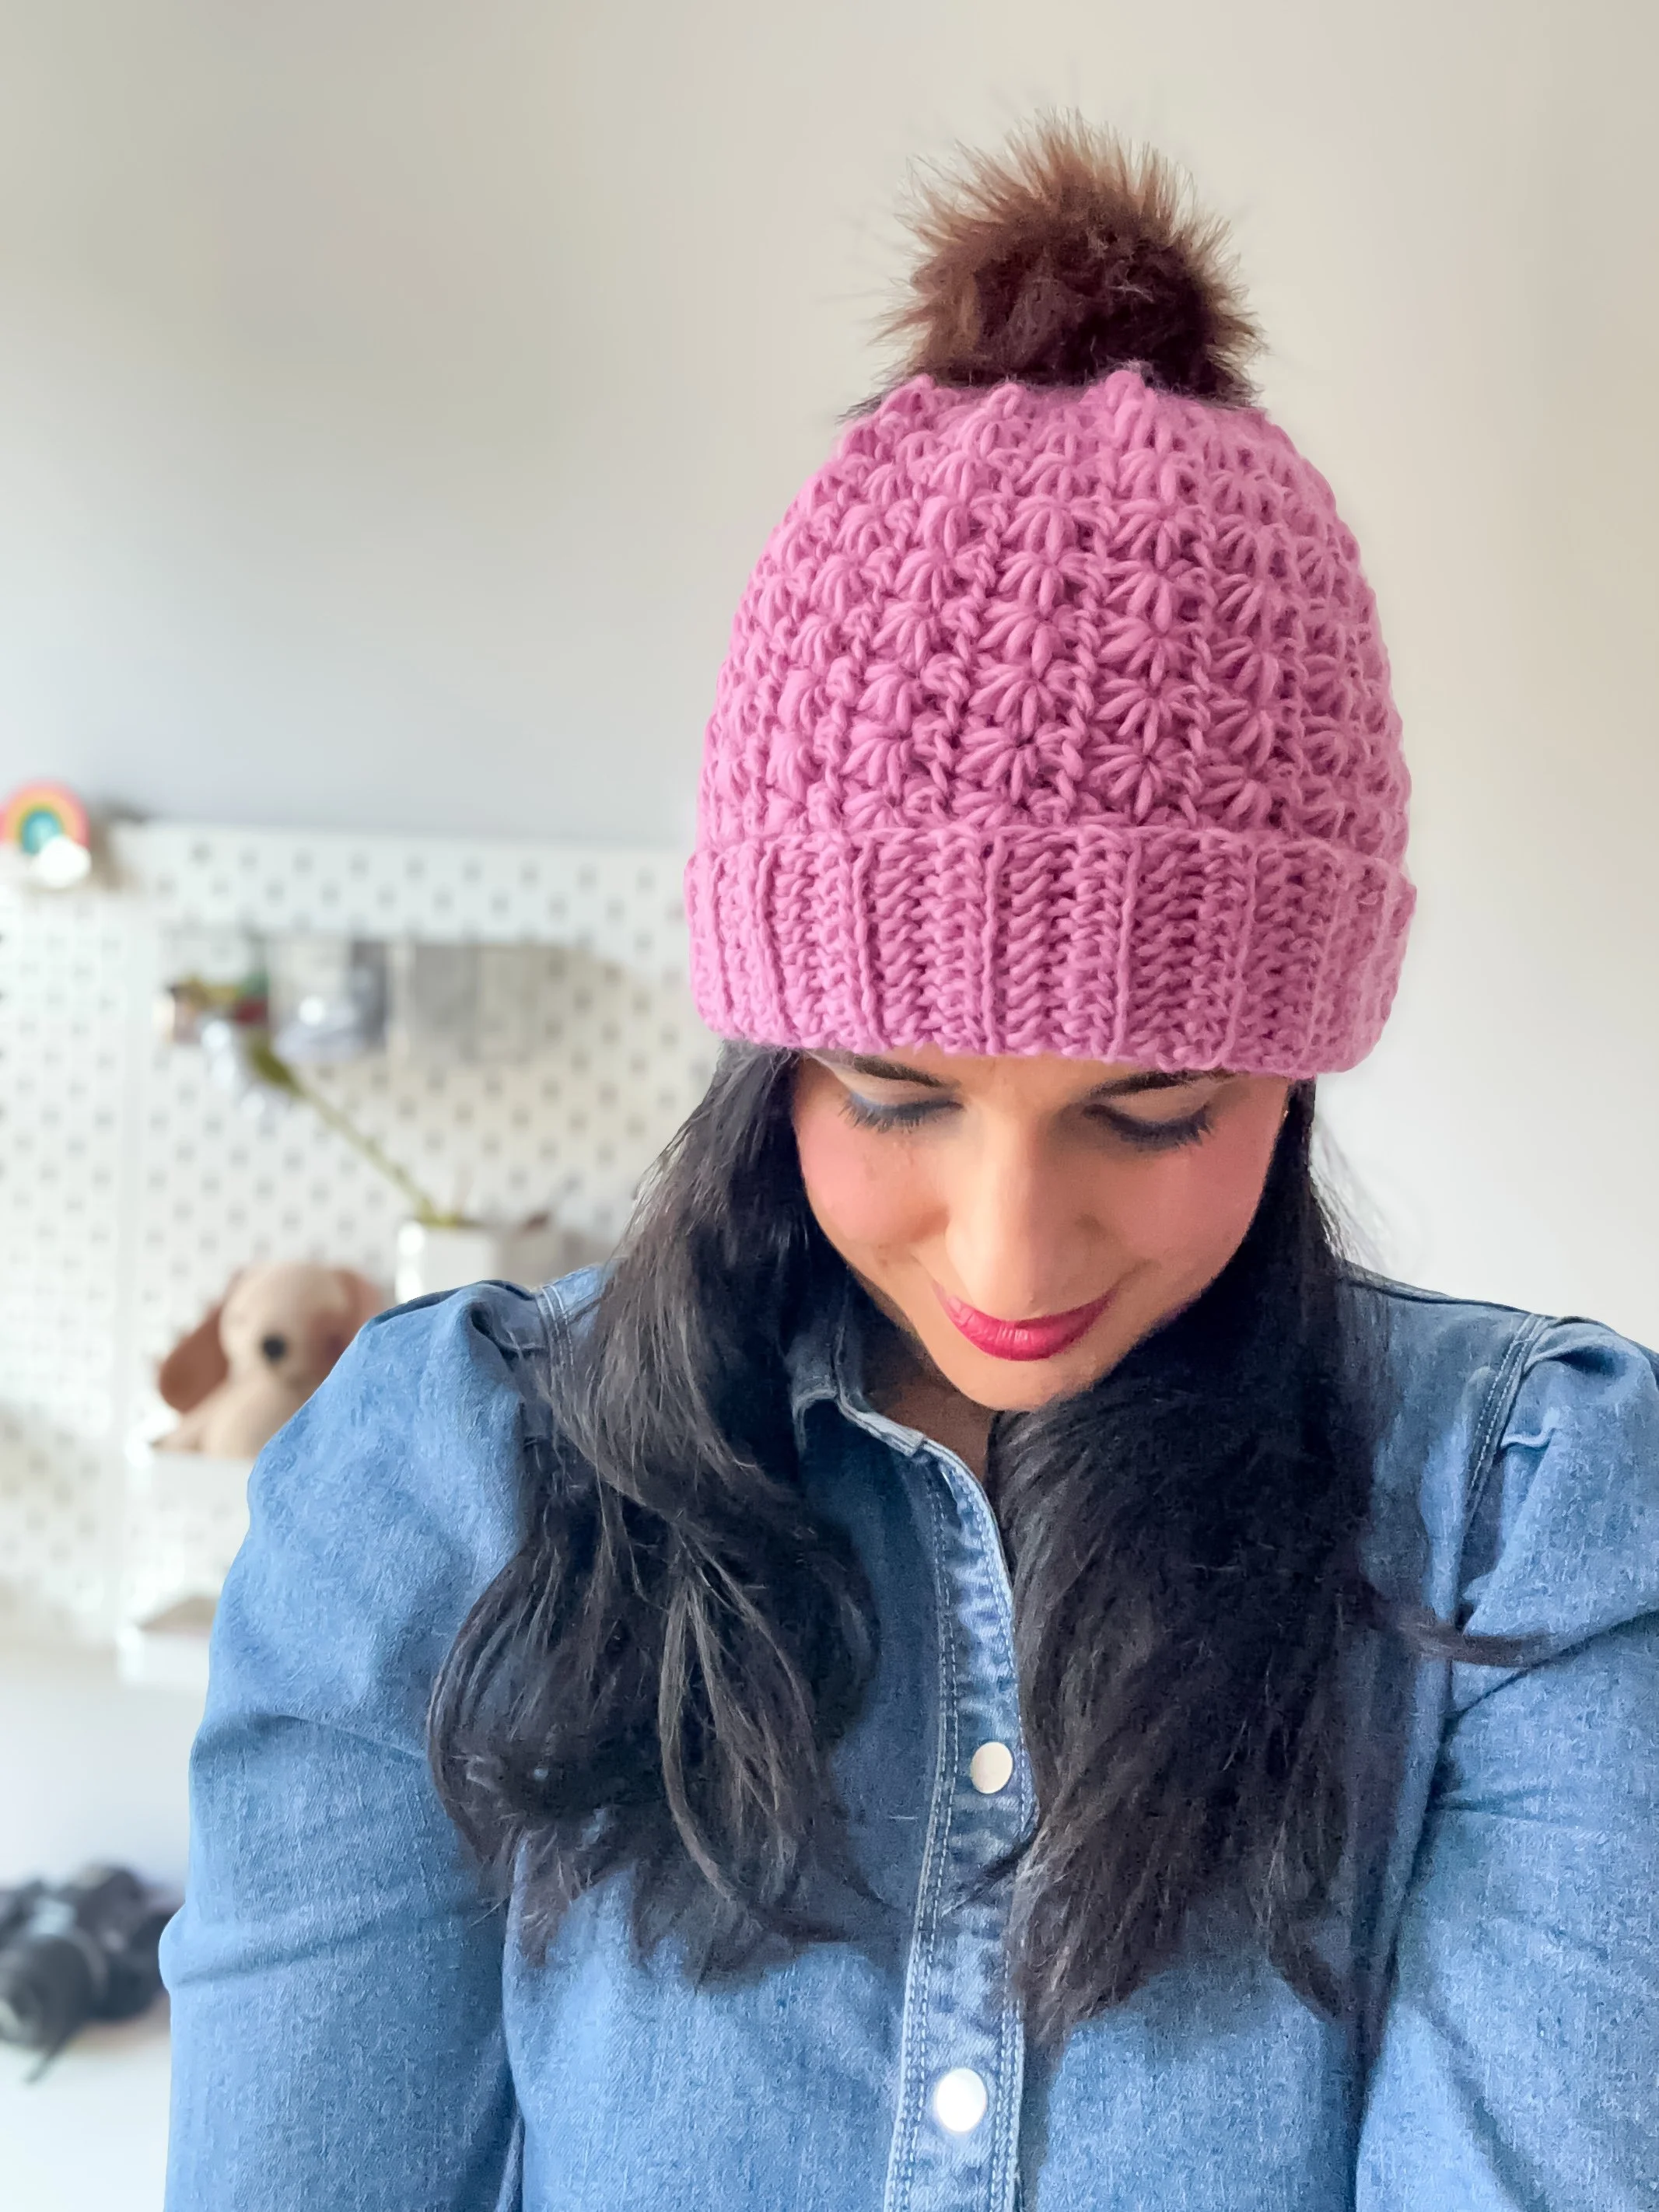
I chose Happy Sheep by Hobbii (you can find it now as Happy Sheep Woolpower) a soft, warm, and easy-to-care-for 100% wool yarn. It provides great stitch definition and just the right amount of warmth. This yarn is available in many lovely colors, by favorites for this hat have been Rose Pink (13) and Turquoise (19).
However, feel free to usut me any worsted-weight yarn that matches gauge.
HERE’S SOME SUGGESTIONS:
Fiber: 80% Acrylic, 20% Wool
Weight: Worsted/Medium (Category 4)
Why I Recommend It:
Easy-care yarn that's machine washable and durable.
Soft, warm, and comfortable to wear.
Excellent stitch definition, ideal for textured stitches like the Star Stitch.
Fiber: 100% Acrylic
Weight: Worsted/Medium (Category 4)
Why I Recommend It:
Smooth and soft texture gives a lovely drape and sheen.
Affordable, widely available, and easy to care for.
Offers excellent definition for intricate stitches while being gentle on sensitive skin.
Why You'll Love the Star Stitch Beanie
This hat isn't just another crochet beanie—it's a beautiful blend of texture, simplicity, and versatility. Here’s why it’s so special:
Beginner-Friendly: Even if you're new to crochet, you'll find this pattern easy and enjoyable. The Star Stitch looks impressive but uses simple techniques you'll quickly master.
Quick to Make: This project is fast and satisfying—ideal for a relaxing weekend project or thoughtful handmade gifts.
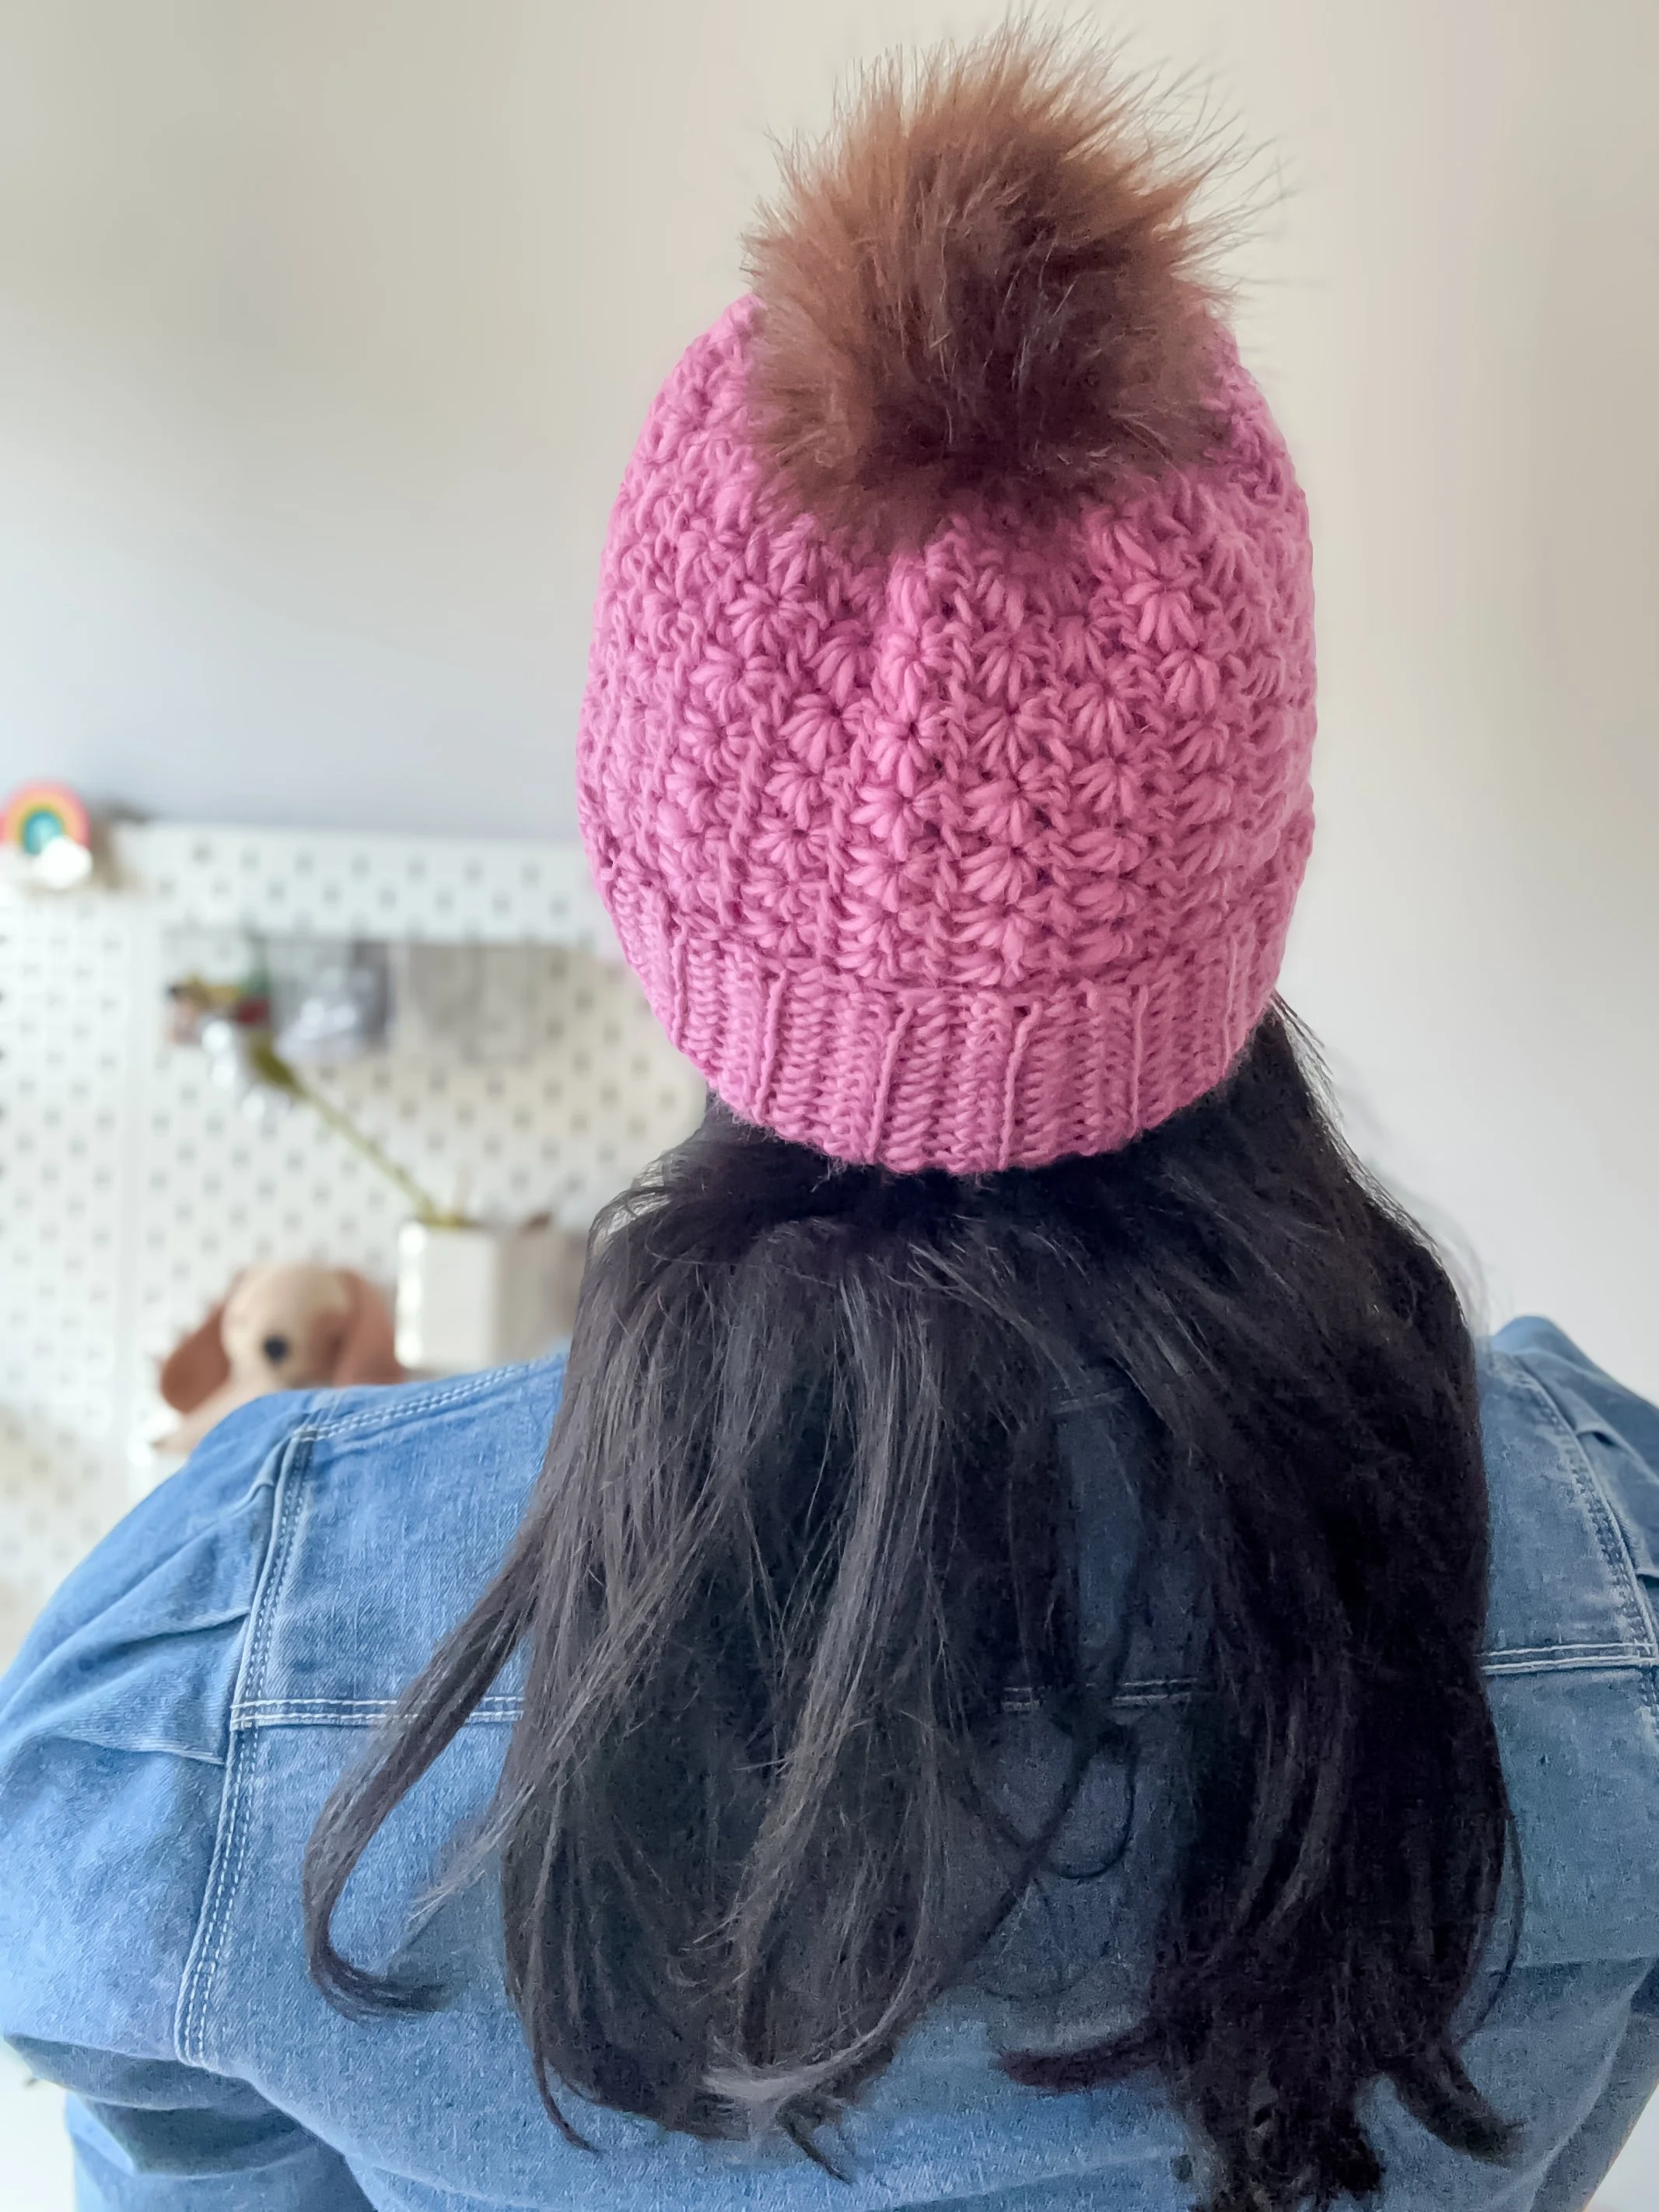
Minimal Seaming: The beanie is crocheted flat as one simple rectangle. Just one easy seam at the end transforms it into a cozy hat.
Perfect for All Ages: The pattern includes multiple sizes (Baby, Toddler, Child, Teen, Adult Small), ensuring the perfect fit for everyone you care about. The hat comfortably hugs your head thanks to its stretchy design with just the right amount of negative ease.
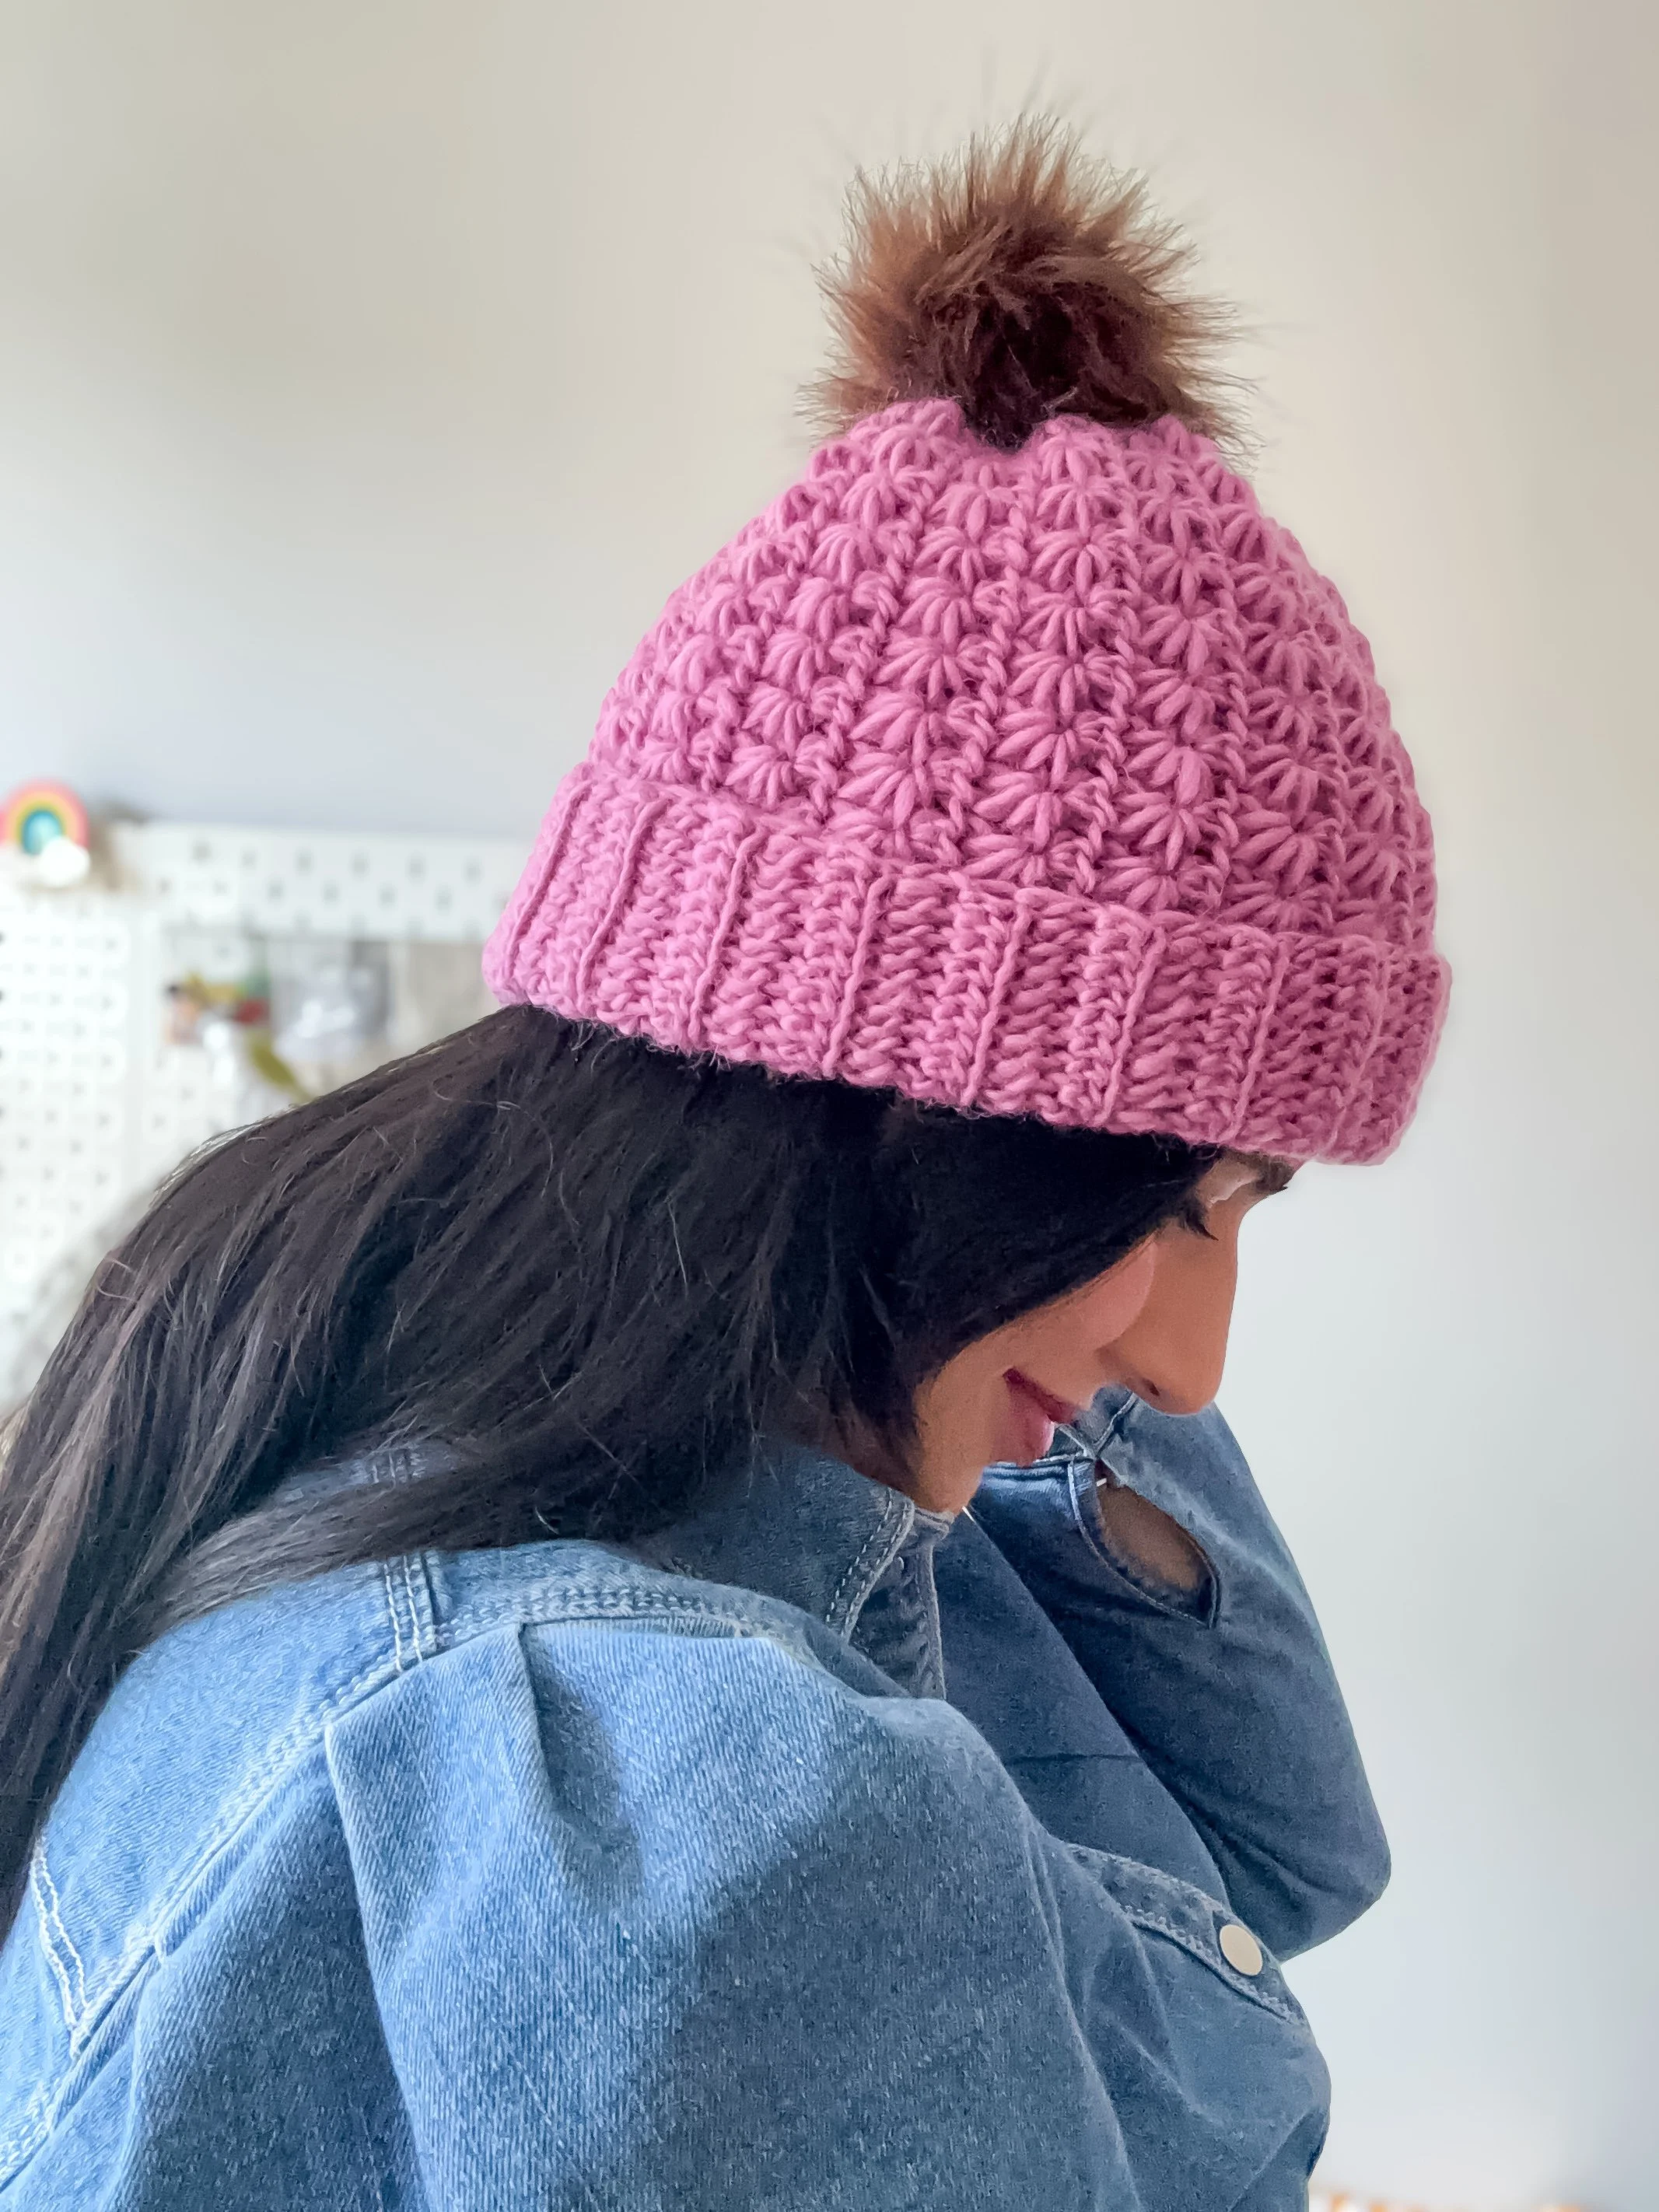
Eye-Catching Texture: The Star Stitch creates a knit-like look, giving your beanie a unique and stylish finish that stands out beautifully.
FOLLOW ALONG WITH THE VIDEO TUTORIAL
Sizing Guide
The Illusion Hat is designed with “negative ease,” meaning it’s slightly smaller than your head for a snug fit that stretches comfortably. Choose from FIVE sizes:
Baby- 13” (33 cm )7.5”
Toddler- 14.5” (37.5 cm)
Child- 16” (40 cm)9” (23 cm)
Teen- 17.5” (44.5 cm) 9.5”
Adult- 19.5” (49.5 cm)
To determine your size:
Measure your head circumference at its widest point (just above your ears).
Subtract 1–3 inches (2.5–7.5 cm) to account for stretch.
Choose the closest size for a perfect fit!
Let’s Get Started!
Ready to bring the Star Beanie to life? The step-by-step tutorial is simple to follow, making it a joy for beginners and a relaxing project for experienced crocheters. Grab your yarn, choose your favorite colors, and dive in!
Skill Level:
Beginner
You will need:
Any Worsted yarn (I used Happy Sheep by Hobbii; WORSTED; 160 m (175 yds) per 100 g (3.5 oz) ball; 100% wool)
*Rose Pink (13)- colour A x 1 (1, 1, 1, 1, 2) balls
5 mm crochet hook or size needed to obtain correct gauge
1 pom pom
TENSION:
12 sts x 8.5 rows= 10 x10 cm / 4 x 4 inches in stitch pattern.
If you have too many stitches on 10 cm = 4" switch to larger hook. If you have too few stitches on 10 cm = 4" switch to smaller hook.
Abbreviations American terms:
Ch- chain
Ch-sp- Chain space
St/s- Stitch/es
Beg- Beginning
Rnd- Round
RS- Right side
WS- Wrong side
Sl st- Slip stitch
Sl st in BLO- Slip stitch in the back loop only
Hdc- Single crochet
Hdc in BLO- Half double crochet in the back loop only
Tch- Starting chain (this will be beginning 2 ch from previous row)
stitch pattern + sample
Before you start working on your beanie, please take the time to crochet a sample using the stitch pattern below. After completing the sample, measure it to ensure that your tension matches the provided gauge. It is very important you do not skip this step as you will have time to familiarize with the stitch pattern and you can make sure your hat will have the same measurements given for each size.
SPECIAL TERMS AND STITCH
EYE: The small hole made after working 6 loops of Star together and ch 1.
LEG: One of the 6 loops of a Star stitch.
STAR: Working loosely throughout, draw up a loop in the eye just made , draw up back loop in last leg of Star just made, draw up loop in same hdc as last leg of Star just made, draw up loop in next 2 hdc, yarn over, draw through 6 loops, work 1 ch to close.
FOR SWATCH,
Holding colour A and 5 mm crochet hook, ch 13.
Row 1: Draw up a loop in back bump of 1st and 2nd ch from hook, draw up a loop in next 3 ch, yarn over, draw through 6 loops on hook, 1 ch for eye (Star made), *draw up loop in eye just made , draw up loop in last leg of Star just made, draw up loop in same ch as last leg of Star just made, draw up loop in next 2 ch, yarn over, draw through 6 loops on hook, 1 ch, rep from * across, 1 hdc in same ch as last leg of Star just made, 1 ch and turn. (Swatch has 5 Stars, 1 hdc)
Row 2: 1 hdc in hdc from previous row, 1 hdc in 1st eye, *2 hdc in next eye, rep from * across, 1 hdc in tch, turn.
Row 3: 2 ch, draw up loop in back bump of 1st and 2nd ch, draw up loop in next 3 hdc, yarn over, draw through 6 loops on hook, 1 ch, work Stars across, hdc in same hdc of last leg of last Star, 1 ch and turn.
Rep rows 2 and 3 for pattern. (Swatch has 5 rows in pattern)
The instructions and stitch counts are given for regular brim, with the fold-up brim in brackets ( ).
baby size
Chain 25 (30)
Working on the back bump of the chain.
Row 1: Starting in 2nd ch from, 1 hdc in next 4 (9) ch (this will be the ribbing), 2 ch, draw up a loop in 2nd ch from hook, draw up a loop in same space of last hdc worked in the ribbing, draw up a loop in back bump of next 3 ch, yarn over, draw through 6 loops on hook, 1 ch for eye (Star made), *draw up loop in eye just made , draw up loop in last leg of Star just made, draw up loop in same ch as last leg of Star just made, draw up loop in next 2 ch, yarn over, draw through 6 loops on hook, 1 ch, rep from * across until there are 3 ch left, 1 hdc in same ch as last leg of Star just made, (there are 8 stars for the body of the hat), 1 sl st in back bump of last 3 ch (this is the crown), 1 ch and turn. (There are 4 (9) hdc for the ribbing, 8 stars and 1 hdc for the body and 3 sl sts for the crown)
Row 2: 1 sl st in BLO in next 3 sts, *2 hdc in next eye, rep from * across all stars, 1 hdc in tch, 1 hdc in BLO in last 4 (9) hdc, 1 ch and turn. (3 sl sts for the crown, 17 hdc for the body and 4 (9) hdc for the ribbing)
Row 3: 1 hdc in BLO in next 4 (9) hdc, 2 ch, draw up a loop in 2nd ch from hook, draw up a loop in same space of last hdc worked in the ribbing, draw up a loop in next 3 hdc, yarn over, draw through 6 loops on hook, 1 ch for eye (Star made), *draw up loop in eye just made , draw up loop in last leg of Star just made, draw up loop in same st as last leg of Star just made, draw up loop in next 2 hdc, yarn over, draw through 6 loops on hook, 1 ch, rep from * across until there are 3 ch left, 1 hdc in same ch as last leg of Star just made, 1 sl st in BLO in last 3 sts, 1 ch and turn. (There are 4 (9) hdc for the ribbing, 8 stars and 1 hdc for the body and 3 sl sts for the crown)
Row 4: 1 sl st in BLO in next 3 sts, *2 hdc in next eye, rep from * across all stars, 1 hdc in tch, 1 hdc in BLO in last 4 hdc, 1 ch and turn. (3 sl sts for the crown, 17 hdc for the body and 4 (9) hdc for the ribbing)
Rows 5 to 28: Repeat rows 3 and 4.
TODDLER
Chain 25 (30)
Working on the back bump of the chain.
Row 1: Starting in 2nd ch from, 1 hdc in next 4 (9) ch (this will be the ribbing), 2 ch, draw up a loop in 2nd ch from hook, draw up a loop in same space of last hdc worked in the ribbing, draw up a loop in back bump of next 3 ch, yarn over, draw through 6 loops on hook, 1 ch for eye (Star made), *draw up loop in eye just made , draw up loop in last leg of Star just made, draw up loop in same ch as last leg of Star just made, draw up loop in next 2 ch, yarn over, draw through 6 loops on hook, 1 ch, rep from * across until there are 3 ch left, 1 hdc in same ch as last leg of Star just made, (there are 8 stars for the body of the hat), 1 sl st in back bump of last 3 ch (this is the crown), 1 ch and turn. (There are 4 (9) hdc for the ribbing, 8 stars and 1 hdc for the body and 3 sl sts for the crown)
🌺 MORE FREE CROCHET BEANIES YOU CAN MAKE 🌺
Row 2: 1 sl st in BLO in next 3 sts, *2 hdc in next eye, rep from * across all stars, 1 hdc in tch, 1 hdc in BLO in last 4 (9) hdc, 1 ch and turn. (3 sl sts for the crown, 17 hdc for the body and 4 (9) hdc for the ribbing)
Row 3: 1 hdc in BLO in next 4 (9) hdc, 2 ch, draw up a loop in 2nd ch from hook, draw up a loop in same space of last hdc worked in the ribbing, draw up a loop in next 3 hdc, yarn over, draw through 6 loops on hook, 1 ch for eye (Star made), *draw up loop in eye just made , draw up loop in last leg of Star just made, draw up loop in same st as last leg of Star just made, draw up loop in next 2 hdc, yarn over, draw through 6 loops on hook, 1 ch, rep from * across until there are 3 ch left, 1 hdc in same ch as last leg of Star just made, 1 sl st in BLO in last 3 sts, 1 ch and turn. (There are 4 (9) hdc for the ribbing, 8 stars and 1 hdc for the body and 3 sl sts for the crown)
Row 4: 1 sl st in BLO in next 3 sts, *2 hdc in next eye, rep from * across all stars, 1 hdc in tch, 1 hdc in BLO in last 4 hdc, 1 ch and turn. (3 sl sts for the crown, 17 hdc for the body and 4 (9) hdc for the ribbing)
Rows 5 to 32: Repeat rows 3 and 4.
CHILD
Chain 29 (34)
Working on the back bump of the chain.
Row 1: Starting in 2nd ch from, 1 hdc in next 4 (9) ch (this will be the ribbing), 2 ch, draw up a loop in 2nd ch from hook, draw up a loop in same space of last hdc worked in the ribbing, draw up a loop in back bump of next 3 ch, yarn over, draw through 6 loops on hook, 1 ch for eye (Star made), *draw up loop in eye just made , draw up loop in last leg of Star just made, draw up loop in same ch as last leg of Star just made, draw up loop in next 2 ch, yarn over, draw through 6 loops on hook, 1 ch, rep from * across until there are 3 ch left, 1 hdc in same ch as last leg of Star just made, (there are 10 stars for the body of the hat), 1 sl st in back bump of last 3 ch (this is the crown), 1 ch and turn. (There are 4 (9) hdc for the ribbing, 10 stars and 1 hdc for the body and 3 sl sts for the crown)
Row 2: 1 sl st in BLO in next 3 sts, *2 hdc in next eye, rep from * across all stars, 1 hdc in tch, 1 hdc in BLO in last 4 (9) hdc, 1 ch and turn. (3 sl sts for the crown, 21 hdc for the body and 4 (9) hdc for the ribbing)
Row 3: 1 hdc in BLO in next 4 (9) hdc, 2 ch, draw up a loop in 2nd ch from hook, draw up a loop in same space of last hdc worked in the ribbing, draw up a loop in next 3 hdc, yarn over, draw through 6 loops on hook, 1 ch for eye (Star made), *draw up loop in eye just made , draw up loop in last leg of Star just made, draw up loop in same st as last leg of Star just made, draw up loop in next 2 hdc, yarn over, draw through 6 loops on hook, 1 ch, rep from * across until there are 3 ch left, 1 hdc in same ch as last leg of Star just made, 1 sl st in BLO in last 3 sts, 1 ch and turn. (There are 4 (9) hdc for the ribbing, 10 stars and 1 hdc for the body and 3 sl sts for the crown)
Row 4: 1 sl st in BLO in next 3 sts, *2 hdc in next eye, rep from * across all stars, 1 hdc in tch, 1 hdc in BLO in last 4 hdc, 1 ch and turn. (3 sl sts for the crown, 21 hdc for the body and 4 (9) hdc for the ribbing)
Rows 5 to 34: Repeat rows 3 and 4.
TEEN
Chain 31 (38)
Working on the back bump of the chain.
Row 1: Starting in 2nd ch from, 1 hdc in next 5 (11) ch (this will be the ribbing), 2 ch, draw up a loop in 2nd ch from hook, draw up a loop in same space of last hdc worked in the ribbing, draw up a loop in back bump of next 3 ch, yarn over, draw through 6 loops on hook, 1 ch for eye (Star made), *draw up loop in eye just made , draw up loop in last leg of Star just made, draw up loop in same ch as last leg of Star just made, draw up loop in next 2 ch, yarn over, draw through 6 loops on hook, 1 ch, rep from * across until there are 4 ch left, 1 hdc in same ch as last leg of Star just made, (there are 10 stars for the body of the hat), 1 sl st in back bump of last 3 ch (this is the crown), 1 ch and turn. (There are 5 (11) hdc for the ribbing, 10 stars and 1 hdc for the body and 4 sl sts for the crown)
Row 2: 1 sl st in BLO in next 4 sts, *2 hdc in next eye, rep from * across all stars, 1 hdc in tch, 1 hdc in BLO in last 5 (11) hdc, 1 ch and turn. (4 sl sts for the crown, 21 hdc for the body and 5 (11) hdc for the ribbing)
Row 3: 1 hdc in BLO in next 5 (11) hdc, 2 ch, draw up a loop in 2nd ch from hook, draw up a loop in same space of last hdc worked in the ribbing, draw up a loop in next 3 hdc, yarn over, draw through 6 loops on hook, 1 ch for eye (Star made), *draw up loop in eye just made , draw up loop in last leg of Star just made, draw up loop in same st as last leg of Star just made, draw up loop in next 2 hdc, yarn over, draw through 6 loops on hook, 1 ch, rep from * across until there are 4 ch left, 1 hdc in same ch as last leg of Star just made, 1 sl st in BLO in last 4 sts, 1 ch and turn. (There are 5 (11) hdc for the ribbing, 10 stars and 1 hdc for the body and 4 sl sts for the crown)
Row 4: 1 sl st in BLO in next 4 sts, *2 hdc in next eye, rep from * across all stars, 1 hdc in tch, 1 hdc in BLO in last 5 (11) hdc, 1 ch and turn. (4 sl sts for the crown, 21 hdc for the body and 5 (11) hdc for the ribbing)
Rows 5 to 38: Repeat rows 3 and 4.
ADULT
Chain (34) 40.
Working on the back bump of the chain.
Row 1: Starting in 2nd ch from, 1 hdc in next 6 (12) ch (this will be the ribbing), 2 ch, draw up a loop in 2nd ch from hook, draw up a loop in same space of last hdc worked in the ribbing, draw up a loop in back bump of next 3 ch, yarn over, draw through 6 loops on hook, 1 ch for eye (Star made), *draw up loop in eye just made , draw up loop in last leg of Star just made, draw up loop in same ch as last leg of Star just made, draw up loop in next 2 ch, yarn over, draw through 6 loops on hook, 1 ch, rep from * across until there are 4 ch left, 1 hdc in same ch as last leg of Star just made, (there are 11 stars for the body of the hat), 1 sl st in back bump of last 4 ch (this is the crown), 1 ch and turn. (There are 6 (12) hdc for the ribbing, 11 stars and 1 hdc for the body and 4 sl sts for the crown)
Row 2: 1 sl st in BLO in next 4 sts, *2 hdc in next eye, rep from * across all stars, 1 hdc in tch, 1 hdc in BLO in last 6 (12) hdc, 1 ch and turn. (4 sl sts for the crown, 23 hdc for the body and 6 (12) hdc for the ribbing)
Row 3: 1 hdc in BLO in next 6 (12) hdc, 2 ch, draw up a loop in 2nd ch from hook, draw up a loop in same space of last hdc worked in the ribbing, draw up a loop in next 3 hdc, yarn over, draw through 6 loops on hook, 1 ch for eye (Star made), *draw up loop in eye just made , draw up loop in last leg of Star just made, draw up loop in same st as last leg of Star just made, draw up loop in next 2 hdc, yarn over, draw through 6 loops on hook, 1 ch, rep from * across until there are 4 ch left, 1 hdc in same ch as last leg of Star just made, 1 sl st in BLO in last 4 sts, 1 ch and turn. (There are 6 (12) hdc for the ribbing, 11 stars and 1 hdc for the body and 4 sl sts for the crown)
Row 4: 1 sl st in BLO in next 4 sts, *2 hdc in next eye, rep from * across all stars, 1 hdc in tch, 1 hdc in BLO in last 6 (12) hdc, 1 ch and turn. (4 sl sts for the crown, 23 hdc for the body and 6 (12) hdc for the ribbing)
Rows 5 to 42: Repeat rows 3 and 4.
SEAMING
Fold the hat to meet the seam (the first row with the last row worked) with the WS facing out. Insert your hook through the the first stitch closest to you, and then in the stitch of the side farthest from you. Yarn over and sl st to join. Continue working all the stitches down the row until they are all joined.
FINISHING TOUCHES
Using the long tail and your yarn needle, loop through each point (every two rows) of the hat all the way around. Pull closed and weave in end. Place a pompom on hat if desired, and wear!

Wearing something made by hand feels like a warm hug on a chilly day. It’s the perfect way to stay stylish, comfortable, and connected to the joy of creating!
Try making the Blossom Cardigan or the Rory Hat- both are perfect additions to any wardrobe!
Cheers, and happy crocheting!

🌺🌺🌺🌺
Well That Was Fun! What's Next?
📌 PIN THIS POST - Don't lose this project; save it to your Pinterest crochet board so you can quickly come back to it again.
💌 SHARE - Share your yarn choice, in-progress, or finished projects on Facebook or Instagram and use the hashtag #leoneladiy
🥂 JOIN - Join our small community on Facebook: Dublin Bay Crochet