

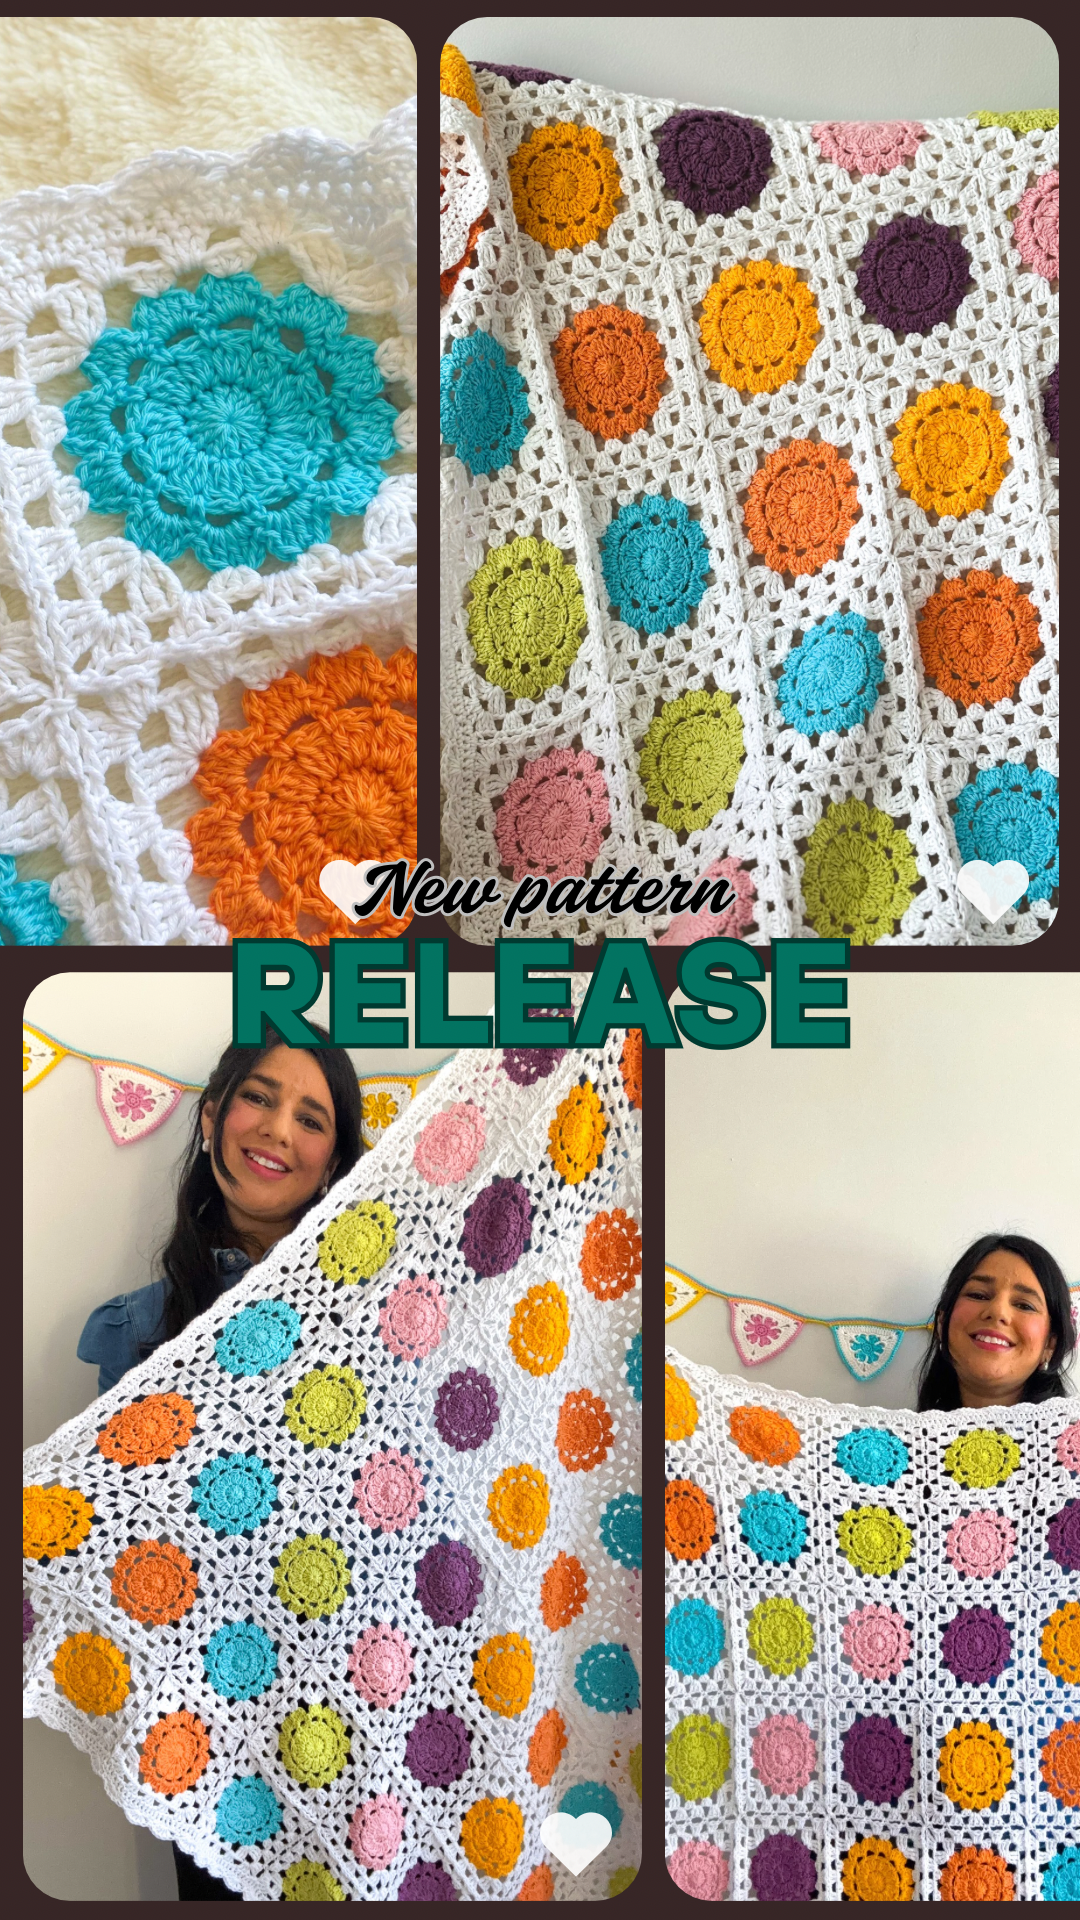
Granny Square Flower Blanket- Free Crochet Pattern
Create a stunning Flower Granny Square Blanket that combines delicate floral motifs with endless color possibilities—perfect for welcoming a new baby or adding a splash of handmade joy to your home.
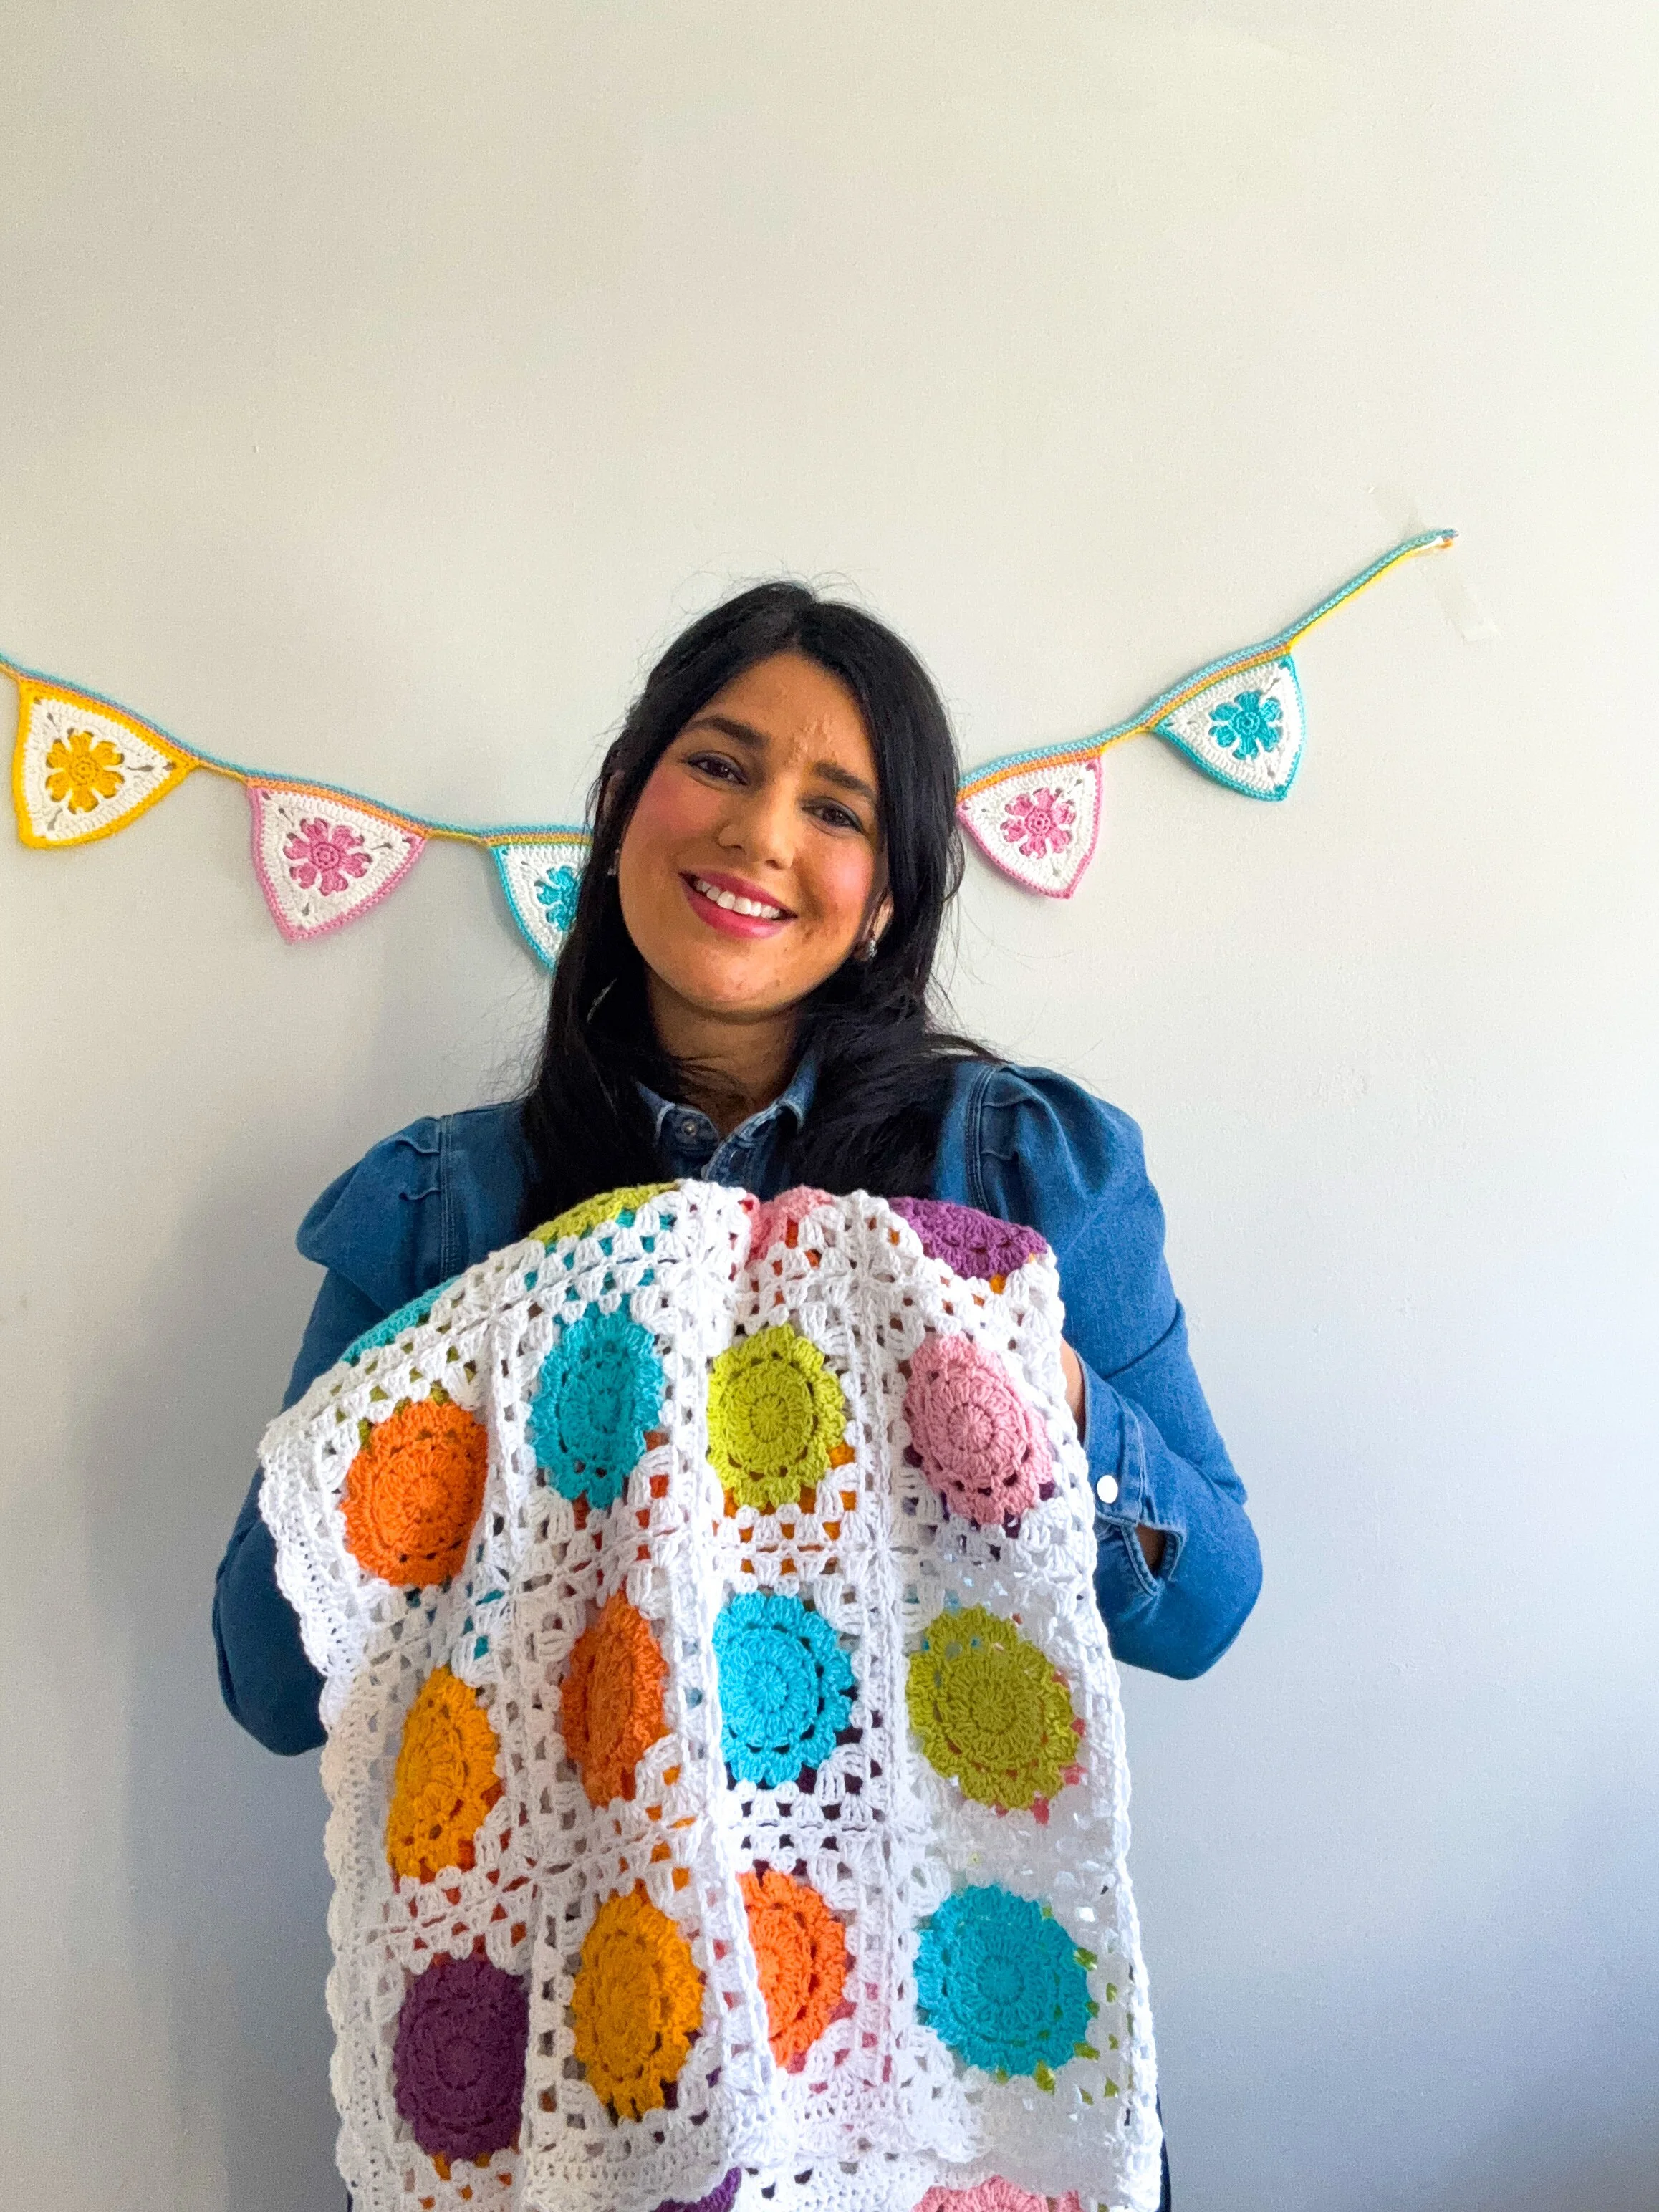
The Granny Square Spring Blanket is a radiant and inviting crochet pattern that combines the beauty of Flower granny squares with a traditional granny stitch. The result is a piece that exudes a light and airy vibe, perfect for summertime.
There’s something truly magical about crafting a handmade baby blanket—especially one that’s destined to become a treasured heirloom. The Spring Day Blanket was born out of a desire to capture the joyful, blossoming spirit of spring in every stitch. With its delicate floral motifs, lacy texture, and radiant color palette, this crochet baby blanket is a celebration of new beginnings, warmth, and love.
Designed with 4-ply cotton yarn, this lightweight blanket is perfect for warmer months, offering a soft and breathable finish that feels gentle against baby’s skin. But the beauty of this pattern lies in its incredible versatility—whether you want to stick to soft pastels, go bold with bright hues, or embrace timeless simplicity with a single color, the choice is yours. From DK yarn to chunky yarn, the Spring Day Blanket adapts beautifully to your creative vision. The possibilities are truly endless.
Get the Spring Day Blanket
FREE PATTERN: Keep scrolling for the FREE version of the Spring Day Blanket + Helpful video tutorial (coming soon).
PRINTABLE PDF: Pick up the beautifully formatted, ad-free PDF version of the Spring Day Blanket from Ravelry or My Etsy Shop + you will receive Printable coloring sheet of the blanket layout to plan your own custom color combinations! Perfect for visualizing your dream palette..
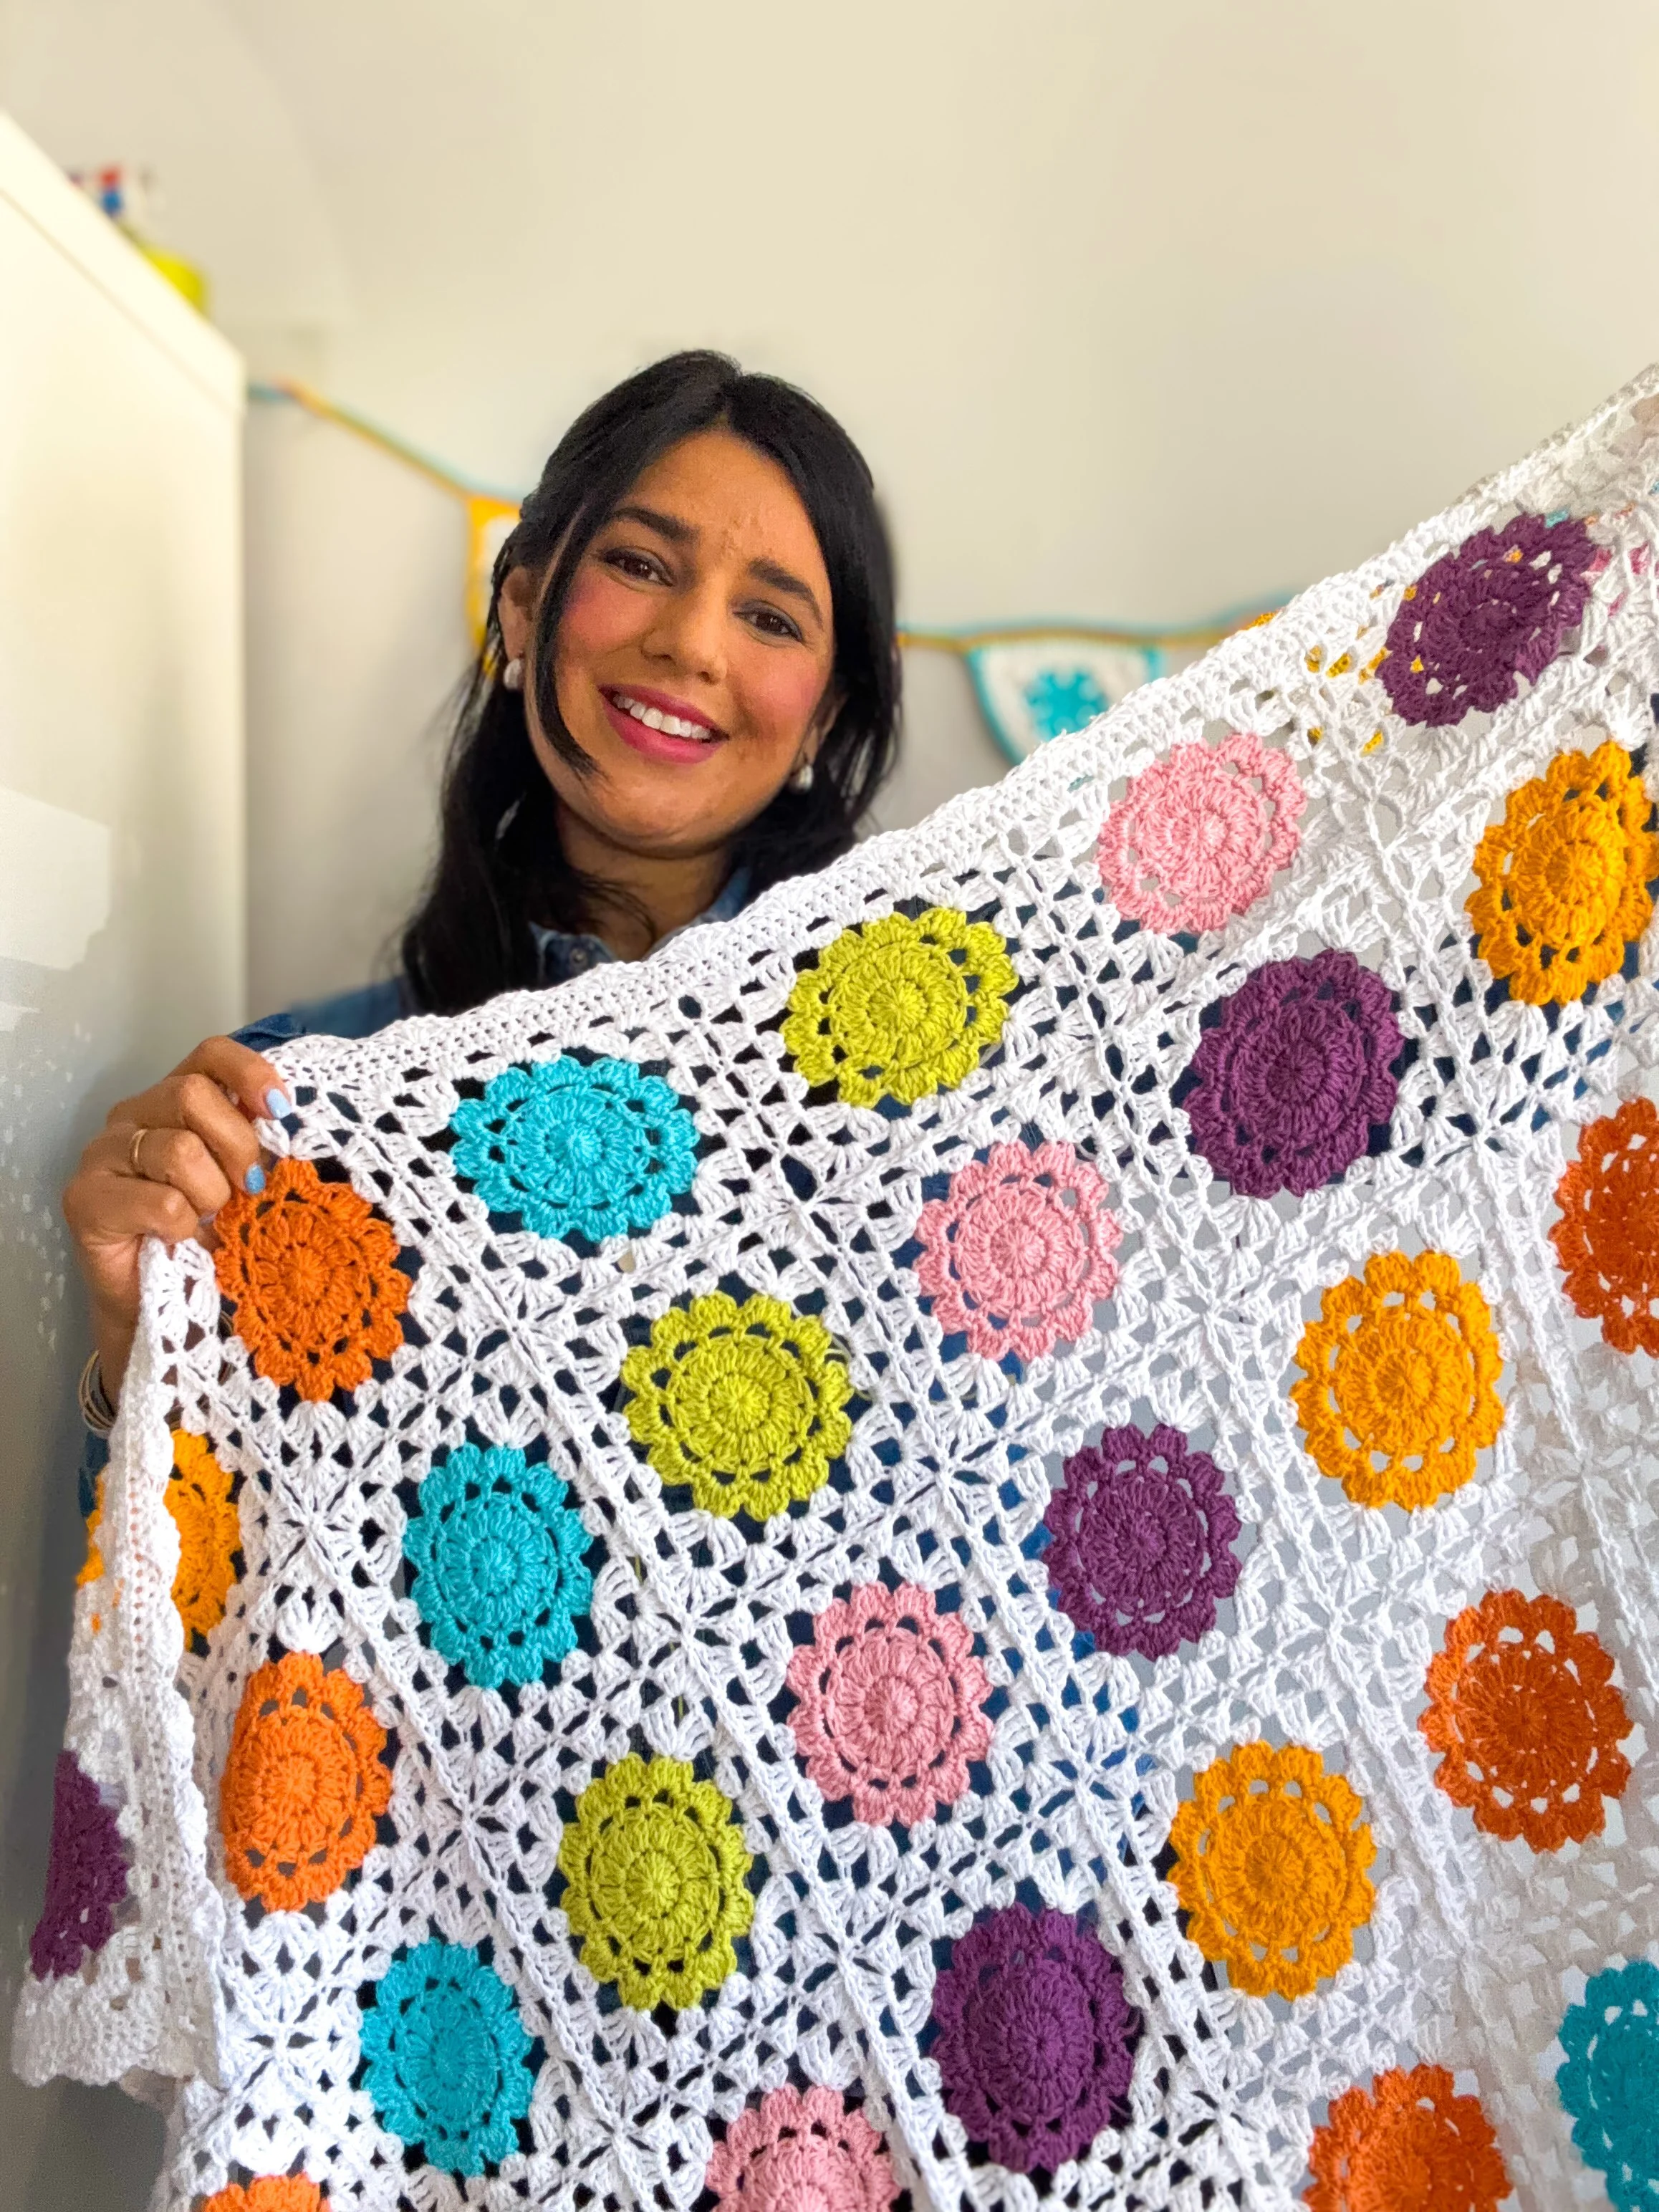
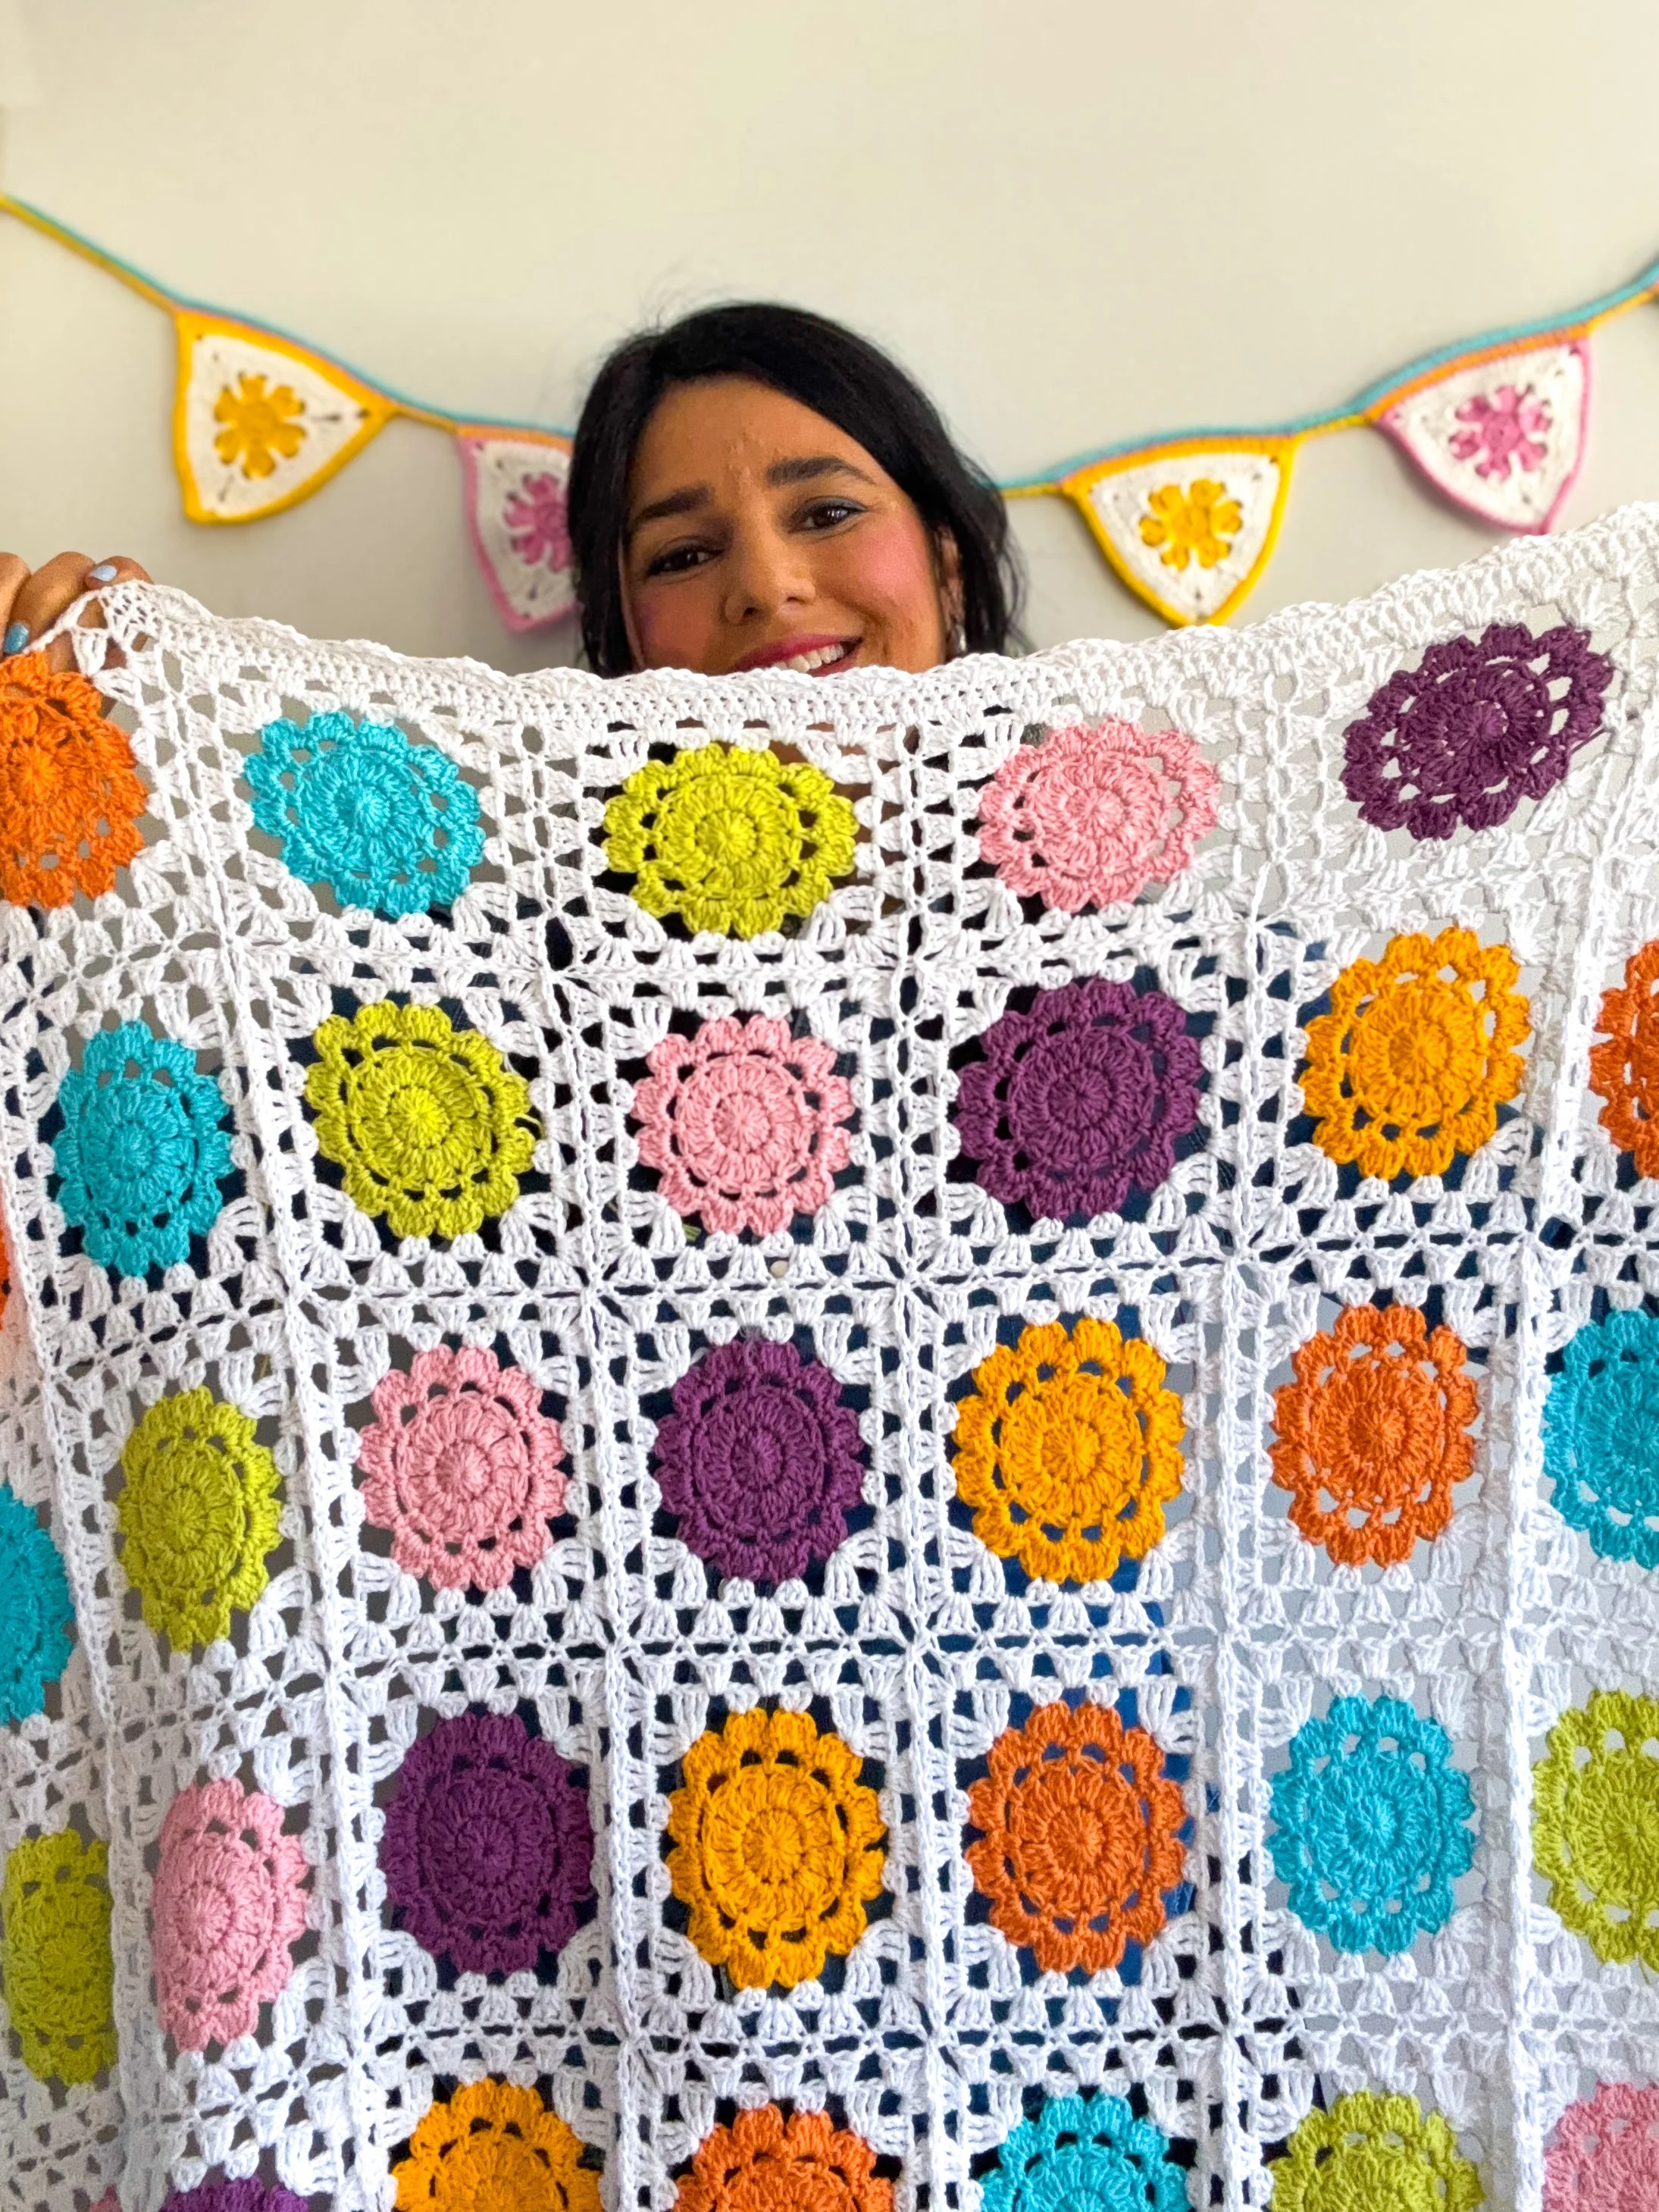
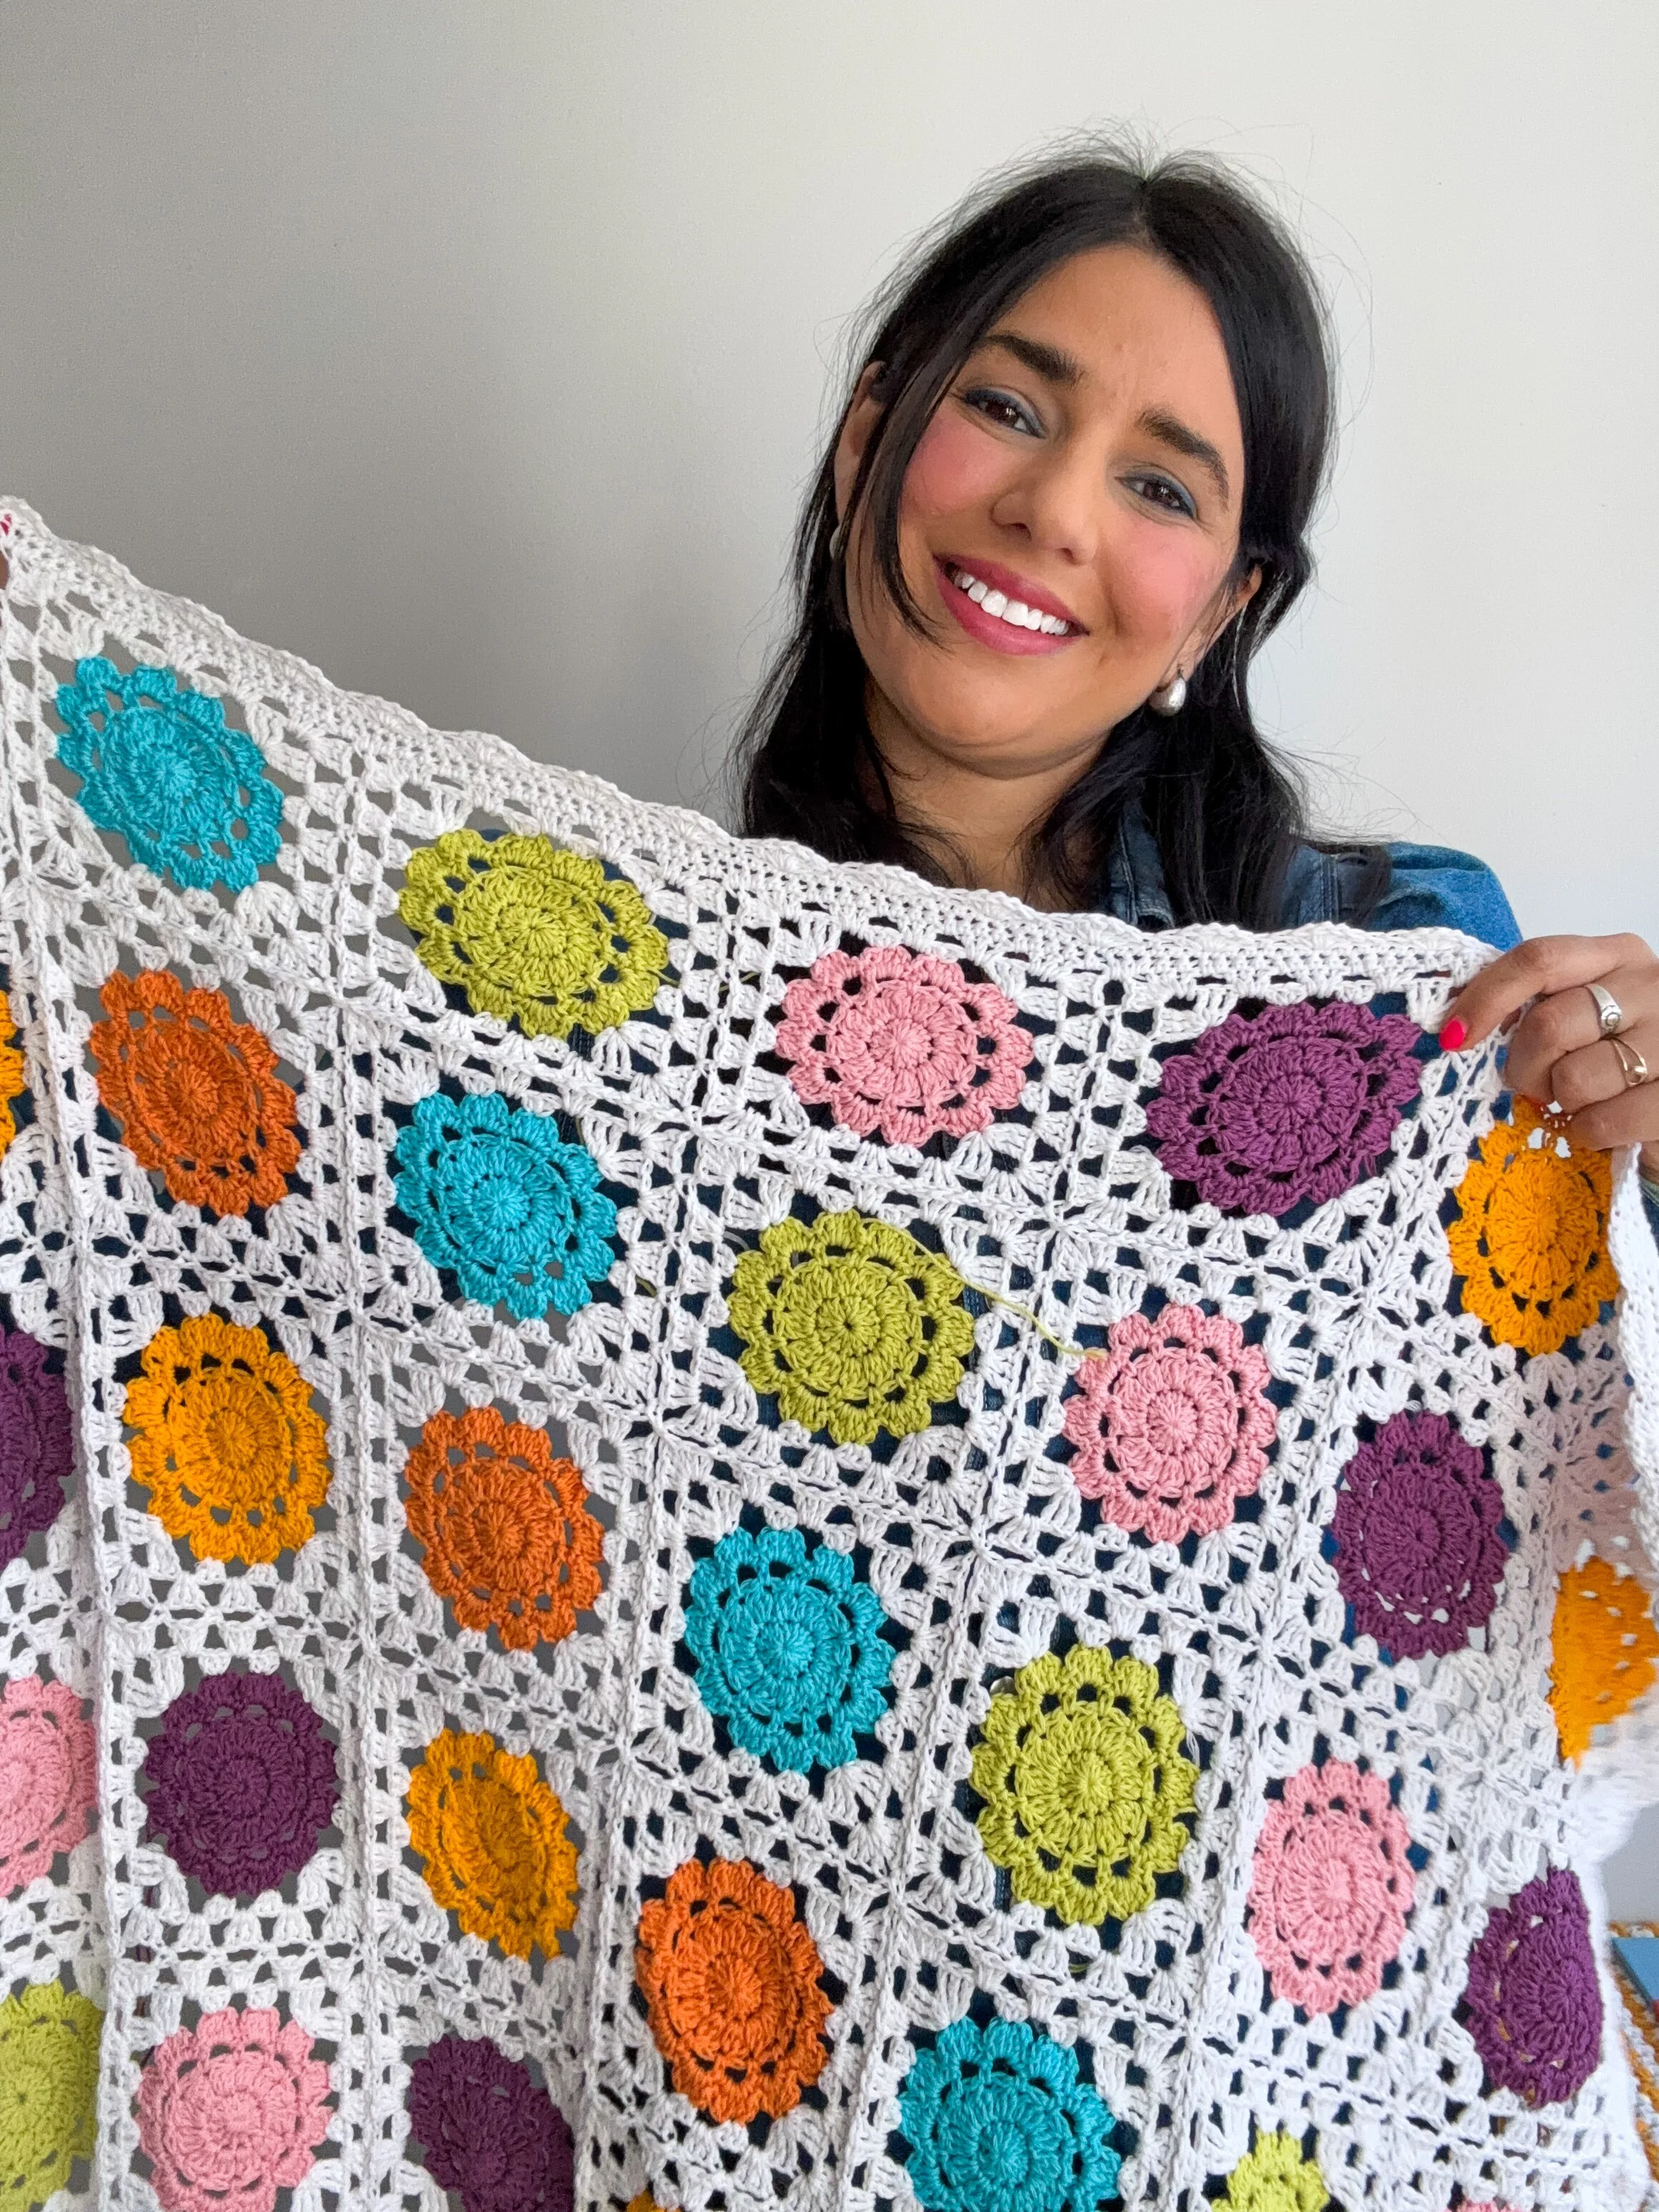
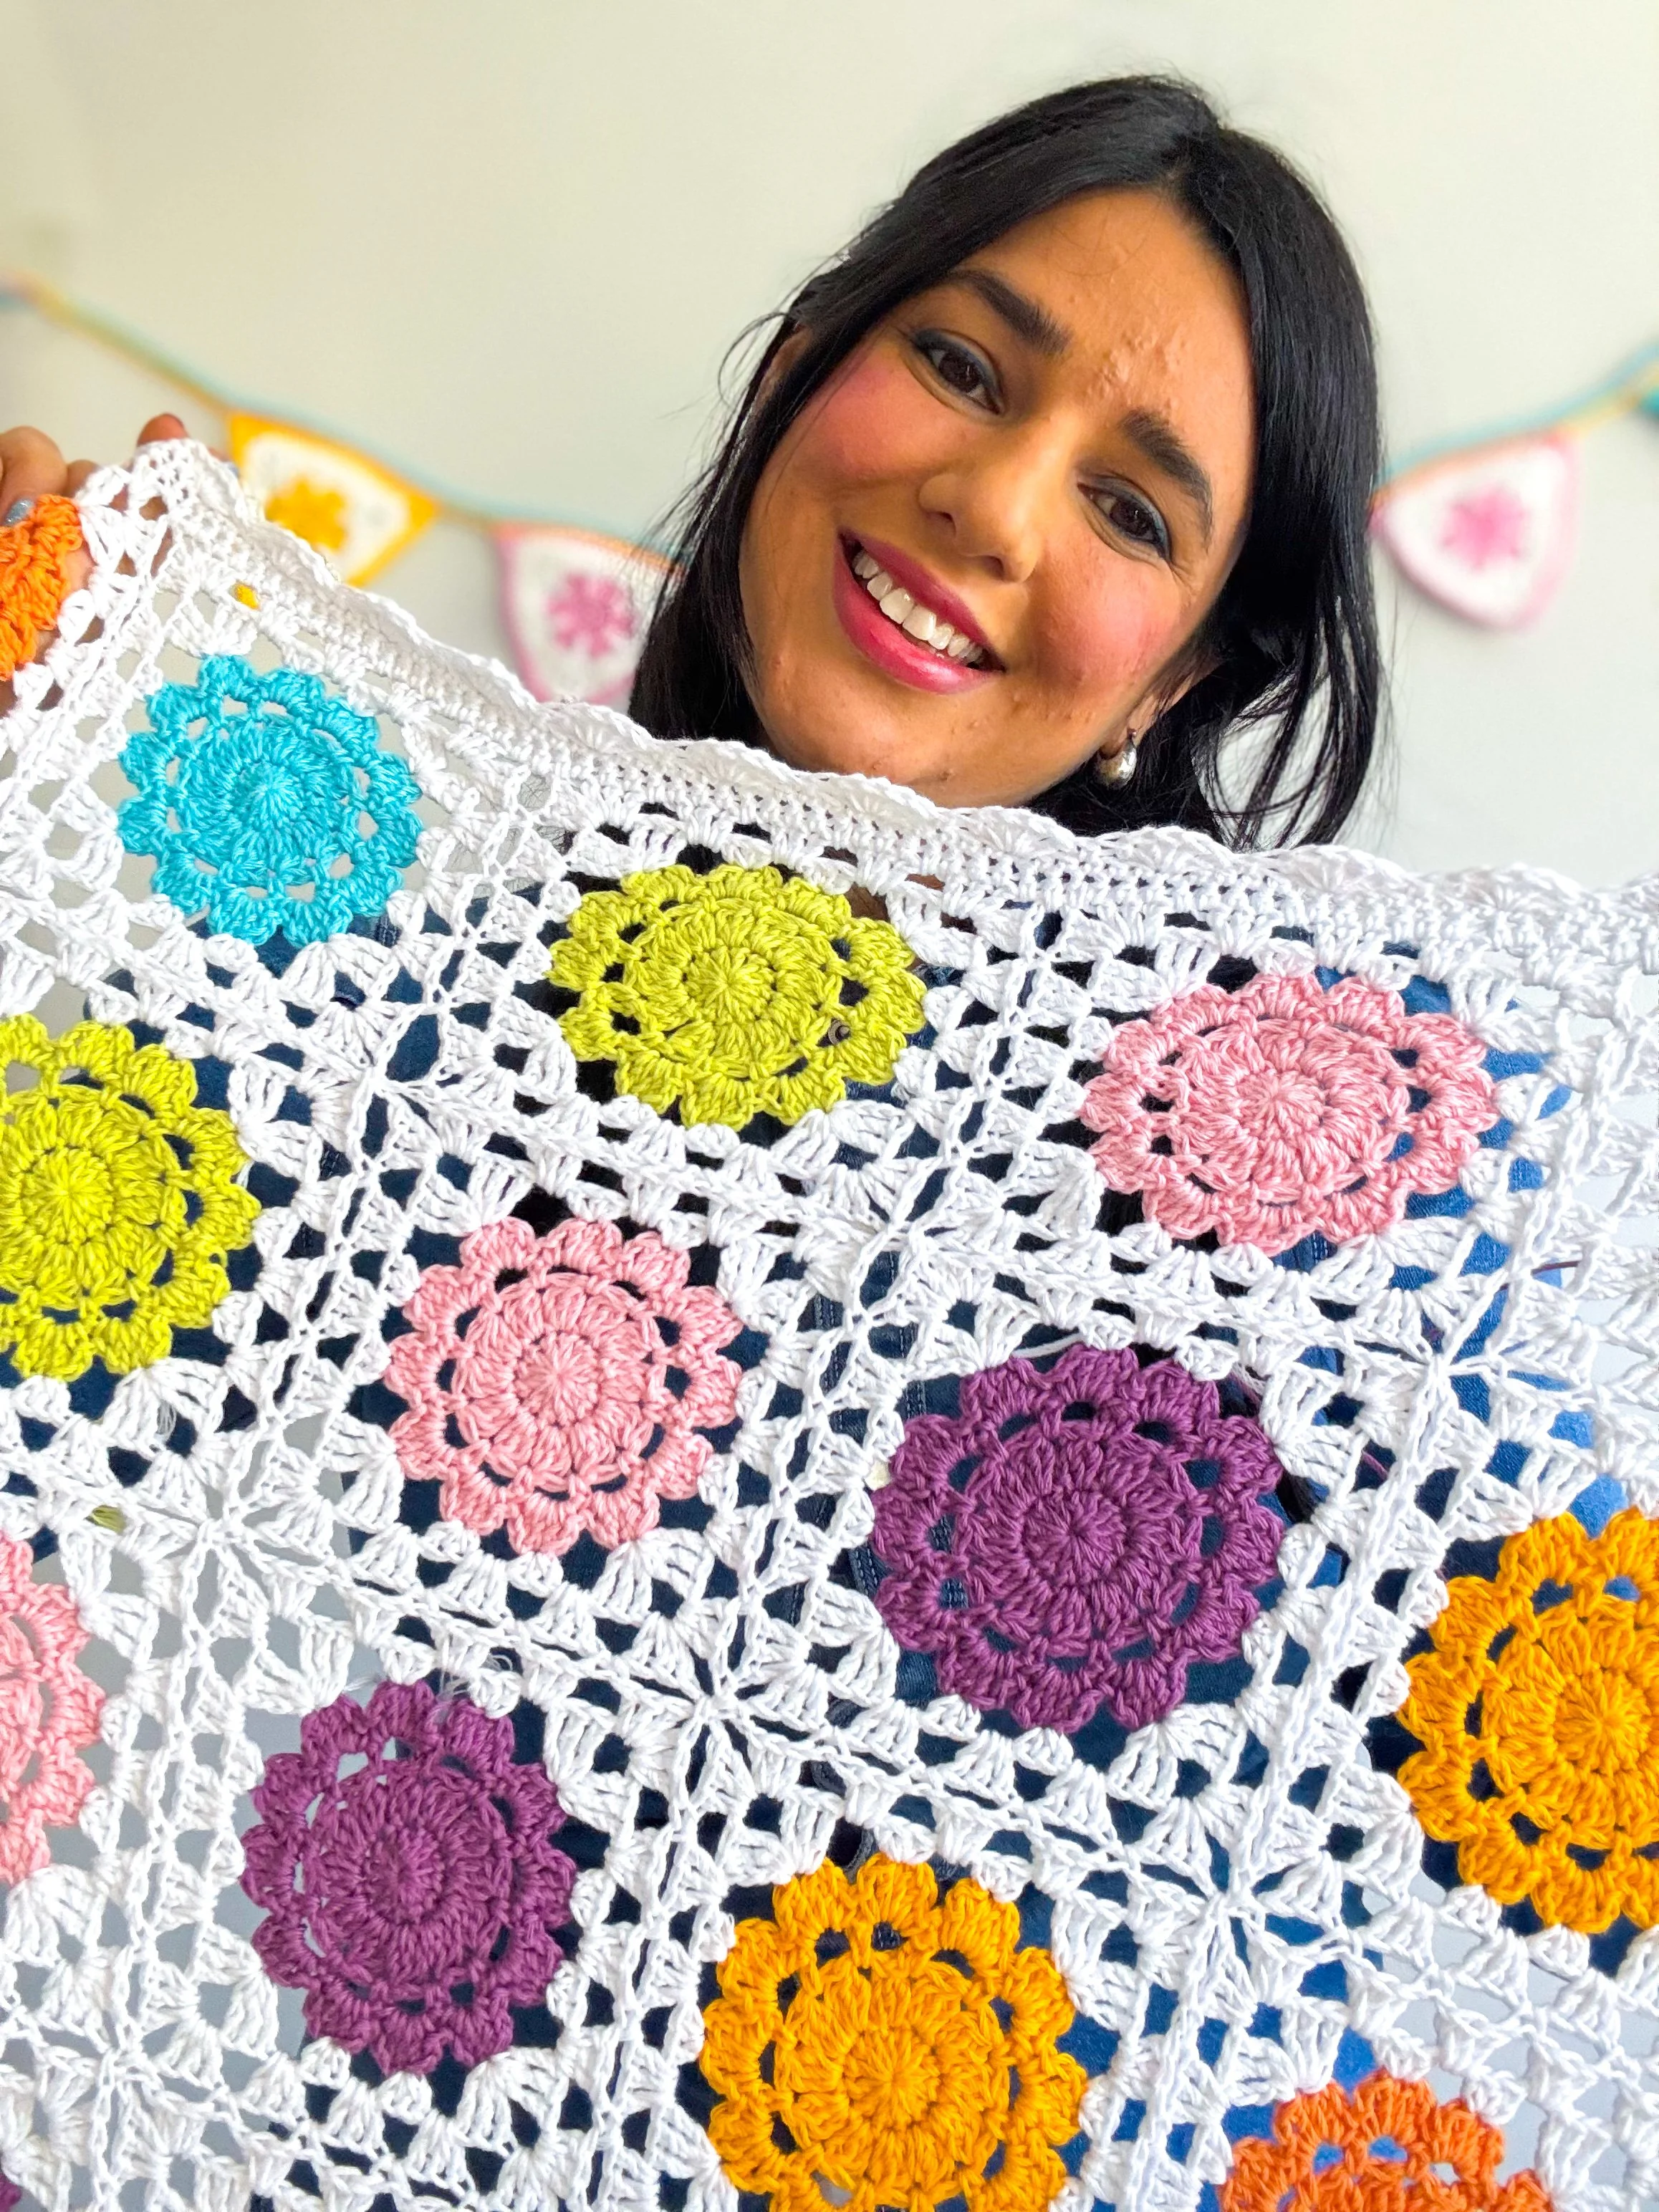
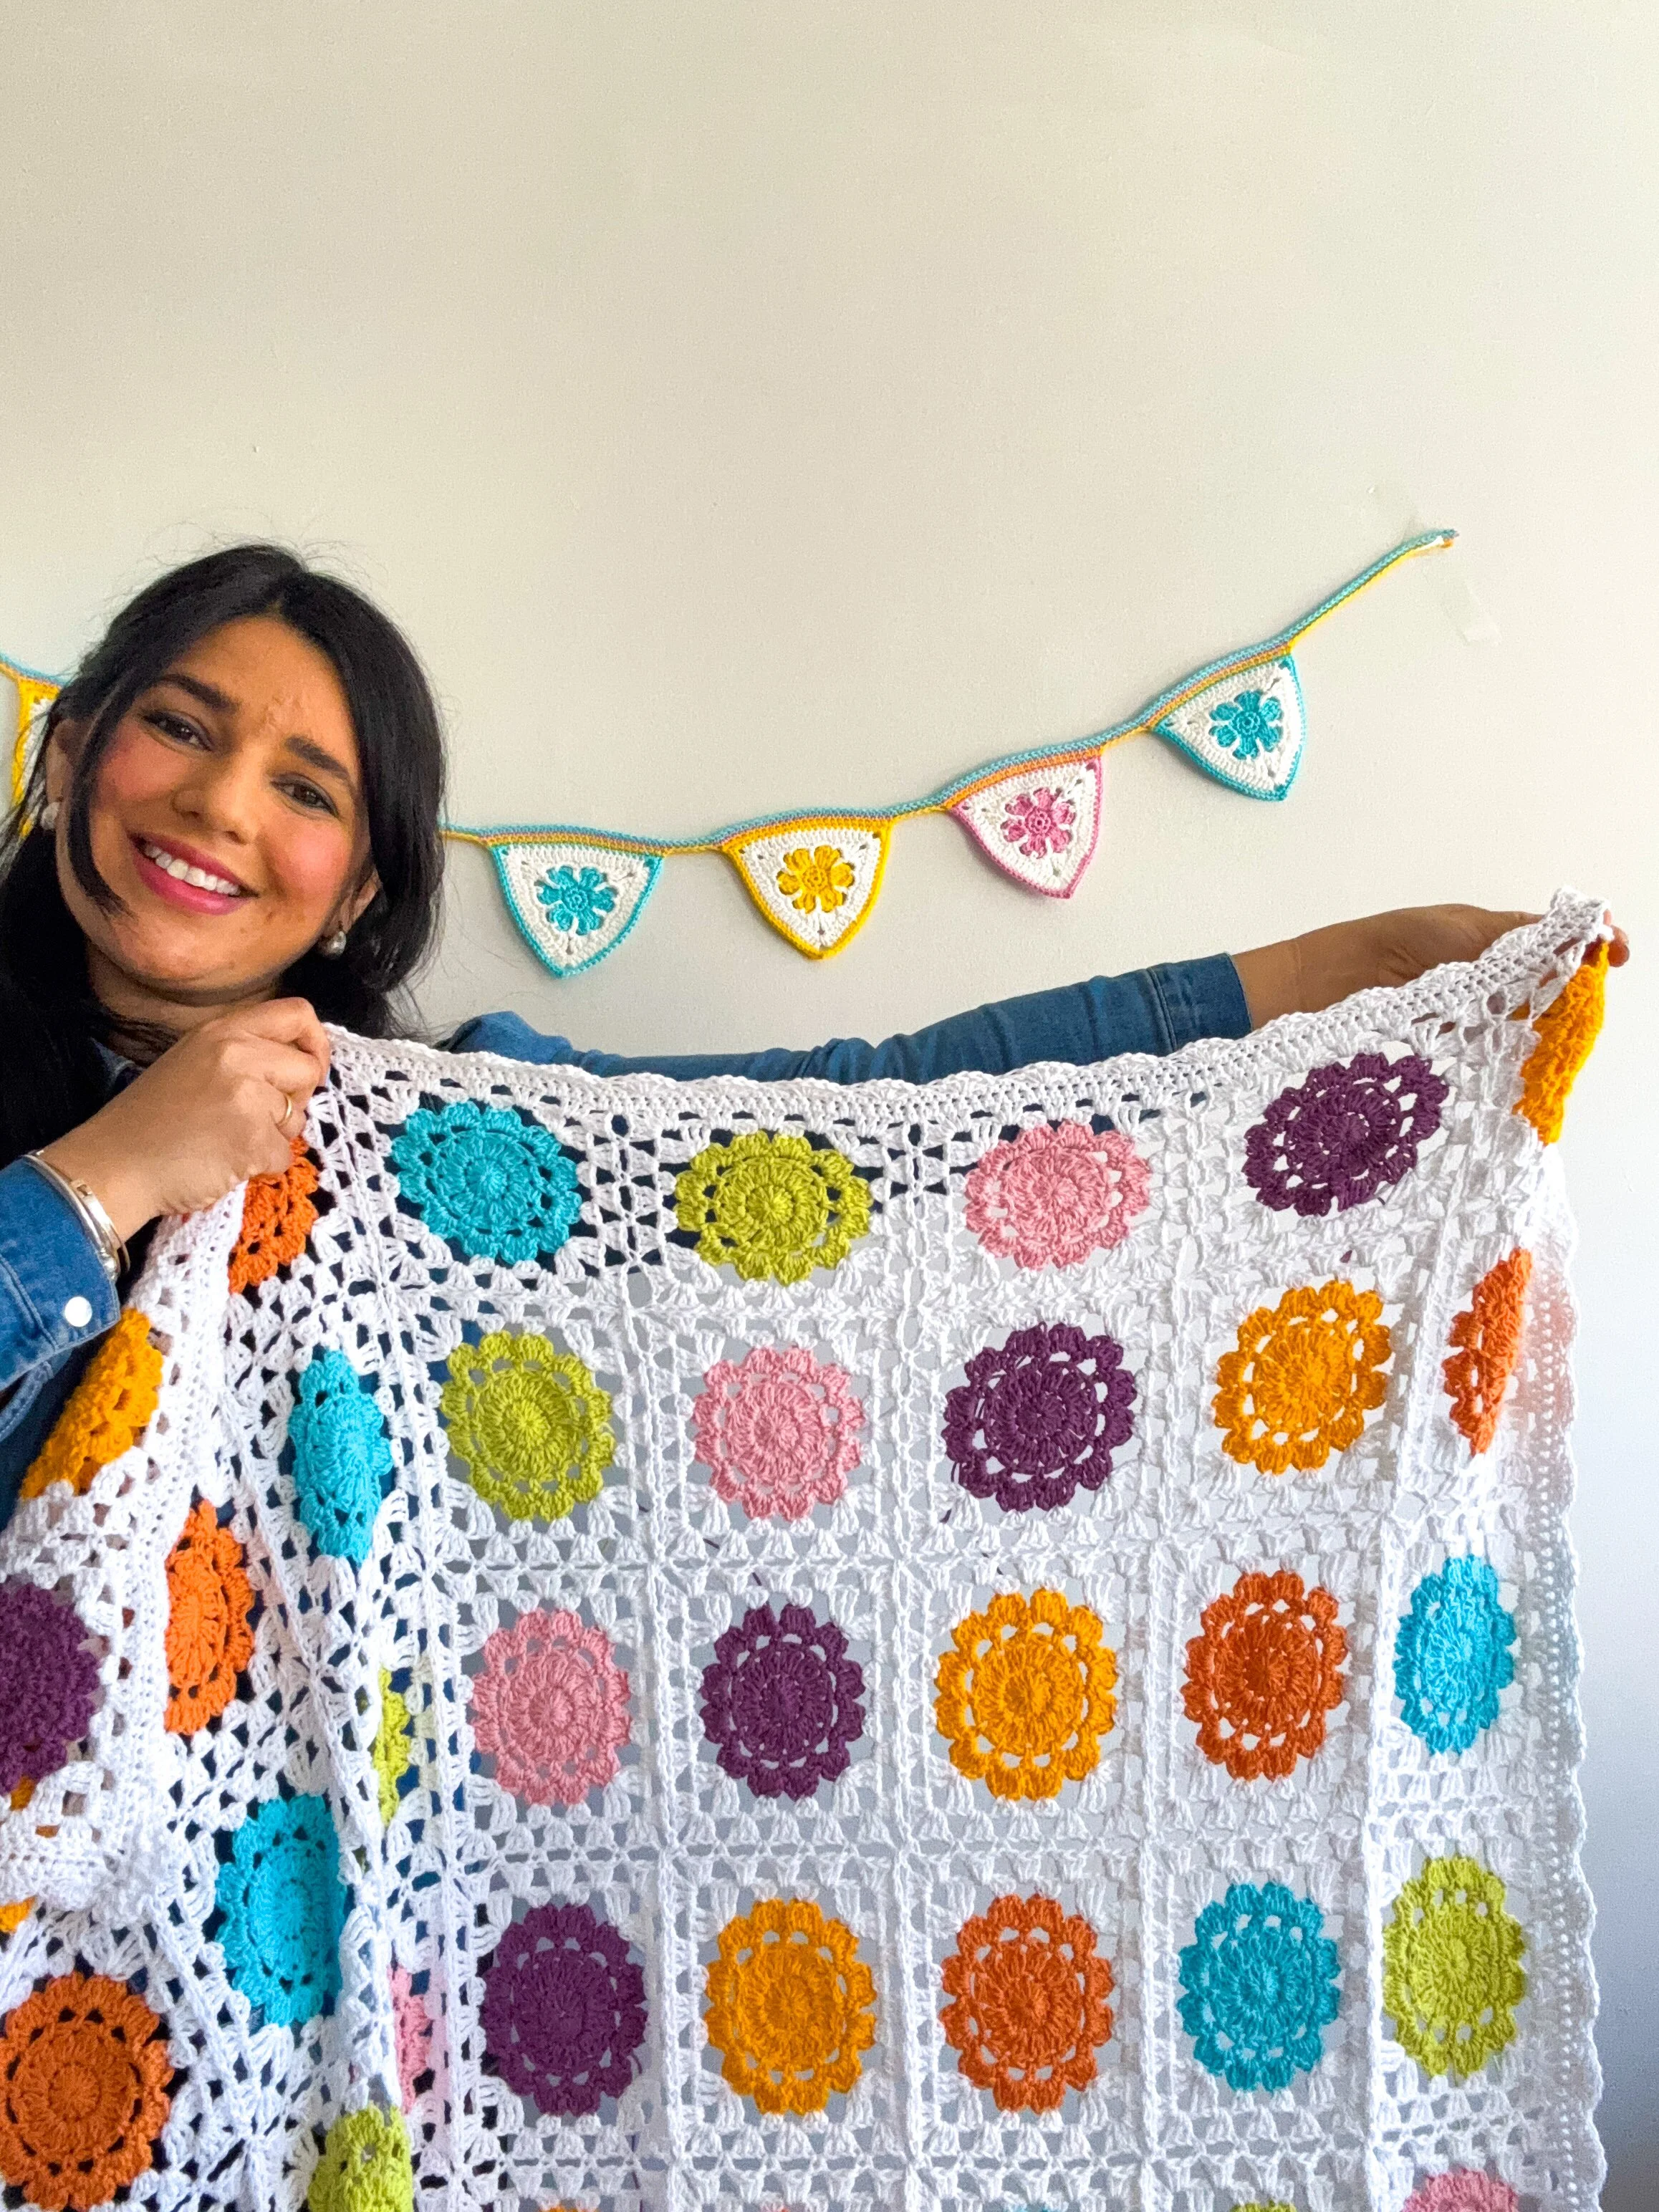
This beginner-friendly crochet pattern is worked up in charming flower squares, each bordered in crisp white for that clean, modern touch. Once joined together, the squares create a stunning grid of color that dances across the blanket, finished with a delicate shell border that adds just the right amount of whimsy.
🎨 Colour Layout
Each square was carefully placed using a colour layout plan to create a balanced and flowing arrangement of colour throughout the blanket. Rather than using random placement, the squares were intentionally positioned to avoid colour repetition in any single row or column. This gives the blanket a cohesive yet spontaneous look—with the colours appearing to “dance” across the surface.
The 8x8 grid alternates warm tones (like Light Orange and Candyfloss) with cooler shades (like Turquoise and Moors), softened by fresh pastels like Yellow and Light Green. This thoughtful placement ensures the eye keeps moving across the blanket, creating a sense of visual rhythm and harmony.
Each floral square is edged in white, helping every colour pop while maintaining a clean and modern finish.
The blanket showcases eight bold springtime colours:
☀️ Yellow
🌿 Light Green
🌸 Candyfloss (pink)
🍊 Light Orange
💜 Moors (purple)
🌊 Turquoise
🧁 White (background)
CONSTRUCTION
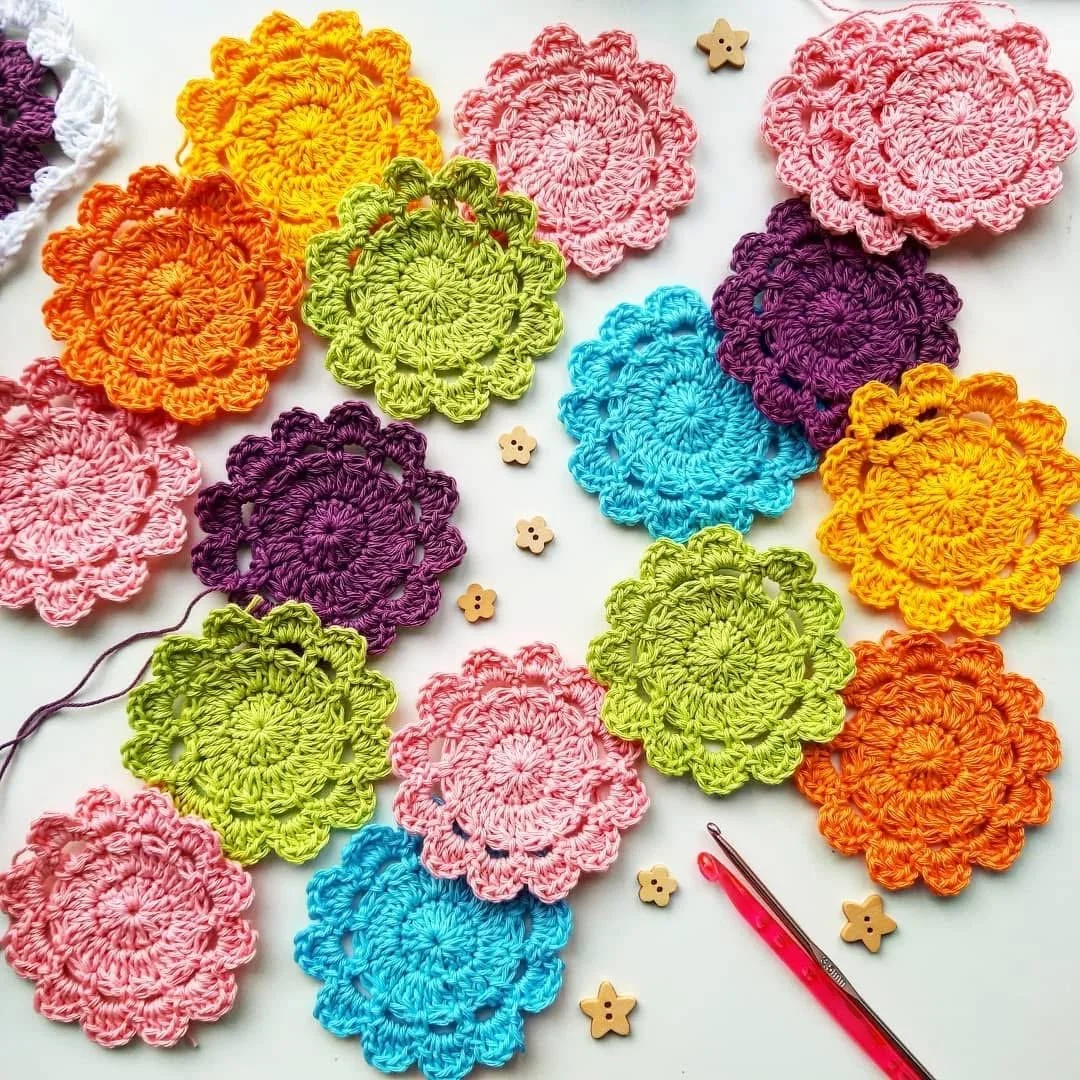
The construction of the Spring Day Blanket begins with a beautiful floral center—each square starts as a simple flower motif worked in the round. Once the flower is complete, it blossoms into a classic granny square shape, transforming into a soft, lacy square with beautiful definition. You'll create all your squares first, and then join them together to build the full blanket. This modular approach makes it easy to work at your own pace and gives you full control over the layout and color balance. The final result is a lightweight, textured blanket that feels as good as it looks—fresh, handmade, and full of love.
INSPIRATION BEHIND THE SPRING DAY BLANKET
I designed the Spring Day Blanket because I wanted something simple, cheerful, and satisfying to make—especially during those in-between months when you're itching to crochet but not ready to commit to a big, heavy project. It started with the floral center; I was playing around with different shapes and loved how turning a flower into a granny square gave the blanket a soft, playful feel. From there, it just made sense to build it out as a modular project that could be done one square at a time—ideal for picking up whenever you have a spare moment.
I also had a bunch of 4-ply cotton left over from other projects, so it felt like a great way to use up stash yarn without the final result looking like a scrap blanket. I designed it with beginners in mind too, so it’s approachable even if you’re newer to crochet. It’s relaxing, easy to customize with any colors or yarn weight you have on hand, and it makes a lovely baby gift or home accessory that feels thoughtful and handmade.
Designed in lightweight 4-ply cotton yarn, the Spring Day Blanket is lacy, breathable, and perfect for warmer days or layering in any season. But don’t let that limit you—this pattern works beautifully in any yarn weight, from DK to chunky. Whether you want a soft baby blanket, a bold statement throw, or a colorful scrap-buster project, the possibilities are endless.
Make it in one color for a clean, modern look or mix and match your favorite shades to create your own patchwork of joy. This is the kind of blanket that becomes a keepsake—something to be gifted, treasured, and passed down for years.
👉 Scroll down for the full pattern, helpful tips, and all the details you need to start stitching your own Spring Day Blanket. And when you finish yours, don’t forget to tag me @leonela.diy and use #SpringDayBlanket—nothing makes me happier than seeing your creations come to life.
Materials
You will need:
Any 4-ply yarn (I used Scheepjes Cotton 8
100 % cotton; 50 gr= 170m)
*Yellow (551) - color A - 1 ball
* Light Turquoise (622) - color B- 1 ball
*Light Orange (639)- colour C- 1 ball
*Light Green (642)- colour D- 1 ball
*Candy floss (649)- colour E- 1 ball
*Moors (726)- colour F- 1 ball
*White (502) colour G- 7 balls
Remember you can use any yarn you have at home and play with different color combinations! This blanket is perfect for stash busting.
4 mm and 3.50 mm crochet hook or size needed to obtain gauge.
Tapestry Needle, Stitch Markers,
Scissors and Measuring Tape
TENSION:
Tension is not crucial for this pattern but if you want to achieve the same measurements of the Spring day blanket follow the dimension below:
Each square measures approximately 12 x 12 cm/ 4.5 x 4.5 inches
Abbreviations-
Pattern is written using American terms:
Ch- Chain
Ch-sp- Chain space
St/s- Stitch/es
Rnd- Round
RS- Right side
WS- Wrong side
Sl st- Slip stitch
Sc- Single crochet
Hdc- Half double crochet
Dc- Double crochet
Tr- Treble
Dc2tog- Double Crochet two stitches together
Dc3tog- Double Crochet three stitches together
SHELL- 5 dc in designated stitch
SIZE
One Size but you can make your blanket bigger by adding more squares. If you do add more squares, you will need extra yarn.
MEASUREMENTS
100 X 100 cm // 39 X 39 Inches
RIGHT SIDE
Each FLOWER square is worked in the round without turning at the end of each round. The right side of your work will be always facing you.
CONSTRUCTION
This blanket is constructed by making 64 squares worked in the same way using different colour patterns. You will first make the flower and then you will work around it to create the square. Each full square is worked in 6 rounds, 4 rounds for the flower and 2 rounds for the actual square.
After making the squares, you will join them together and will work three rounds to make the border. The last round will create a delicate shell stitch border that adds the perfect touch of elegance and whimsy.
HELP & SUPPORT- CLICK HERE TO SUBSCRIBE.
I’ll be releasing a step-by-step YouTube video tutorial showing exactly how to make this blanket Subscribe to my YouTube channel so you don’t miss it.
START HERE…
With colour A and 4 mm crochet hook
Start by making a magic ring
Working in rounds:
Rnd 1: 2 ch (do not count as a st here and throughout) work 12 dc into the ring, pull the yarn tail to close the ring and sl st to first dc. 12 dc
Rnd 2: 2 ch, dc2tog (2 ch + dc2tog count as 1st dc3tog) into same space, [2 ch, dc3tog in next space] 11 times, 2 ch, sl st on top of dc2tog to close the round. 12 clusters separated by 2ch-sp
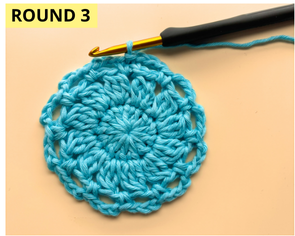
Rnd 3: Move with sl st to next 2ch-sp, 1 ch, 1 sc in same sp, 3 ch, [1 sc in next 2ch-sp, 3 ch] repeat the steps between [...] 11 times, sl st to 1st sc to close the rnd. 12 sc separated by 3 ch.
Rnd 4: Move with sl st to next 3ch-sp, 1 ch [1 sc, 1 ch, 3 dc, 1 ch, 1 sc all in same ch-sp] repeat the steps between [...] 12 times in total, sl st to 1st sc to close the rnd. 12 petals.
Cut yarn and weave in ends.
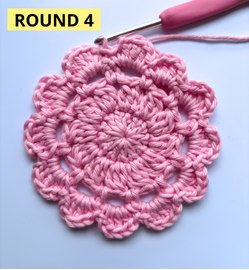
This is the flower completed. I recommend making all the flowers needed to make the blanket and weave in any remaining ends. This way you can save time and avoid having lots of yarn ends to hide when you are finished!

Making the Squares
Attach colour G to 2nd dc from any petal from round 4. You will be working on the 2nd dc of each petal for the entire rnd.
With a 3.50 mm crochet hook.
Rnd 1: 4 ch (count as 1st tr), (2 tr, 3 ch, 3 tr) all in same sp, 1 ch, (3 dc in next petal, 1 ch) twice, [(3 tr, 3 ch, 3 tr) in next petal, 1 ch, (3 dc in next petal, 1 ch) twice] repeat the steps between [...] three times in total, sl st in 4th ch from intial 4 ch to close the rnd. 4 corner spaces (3 tr, 3 ch, 3 tr) separated by 2 groups of 3 dc.
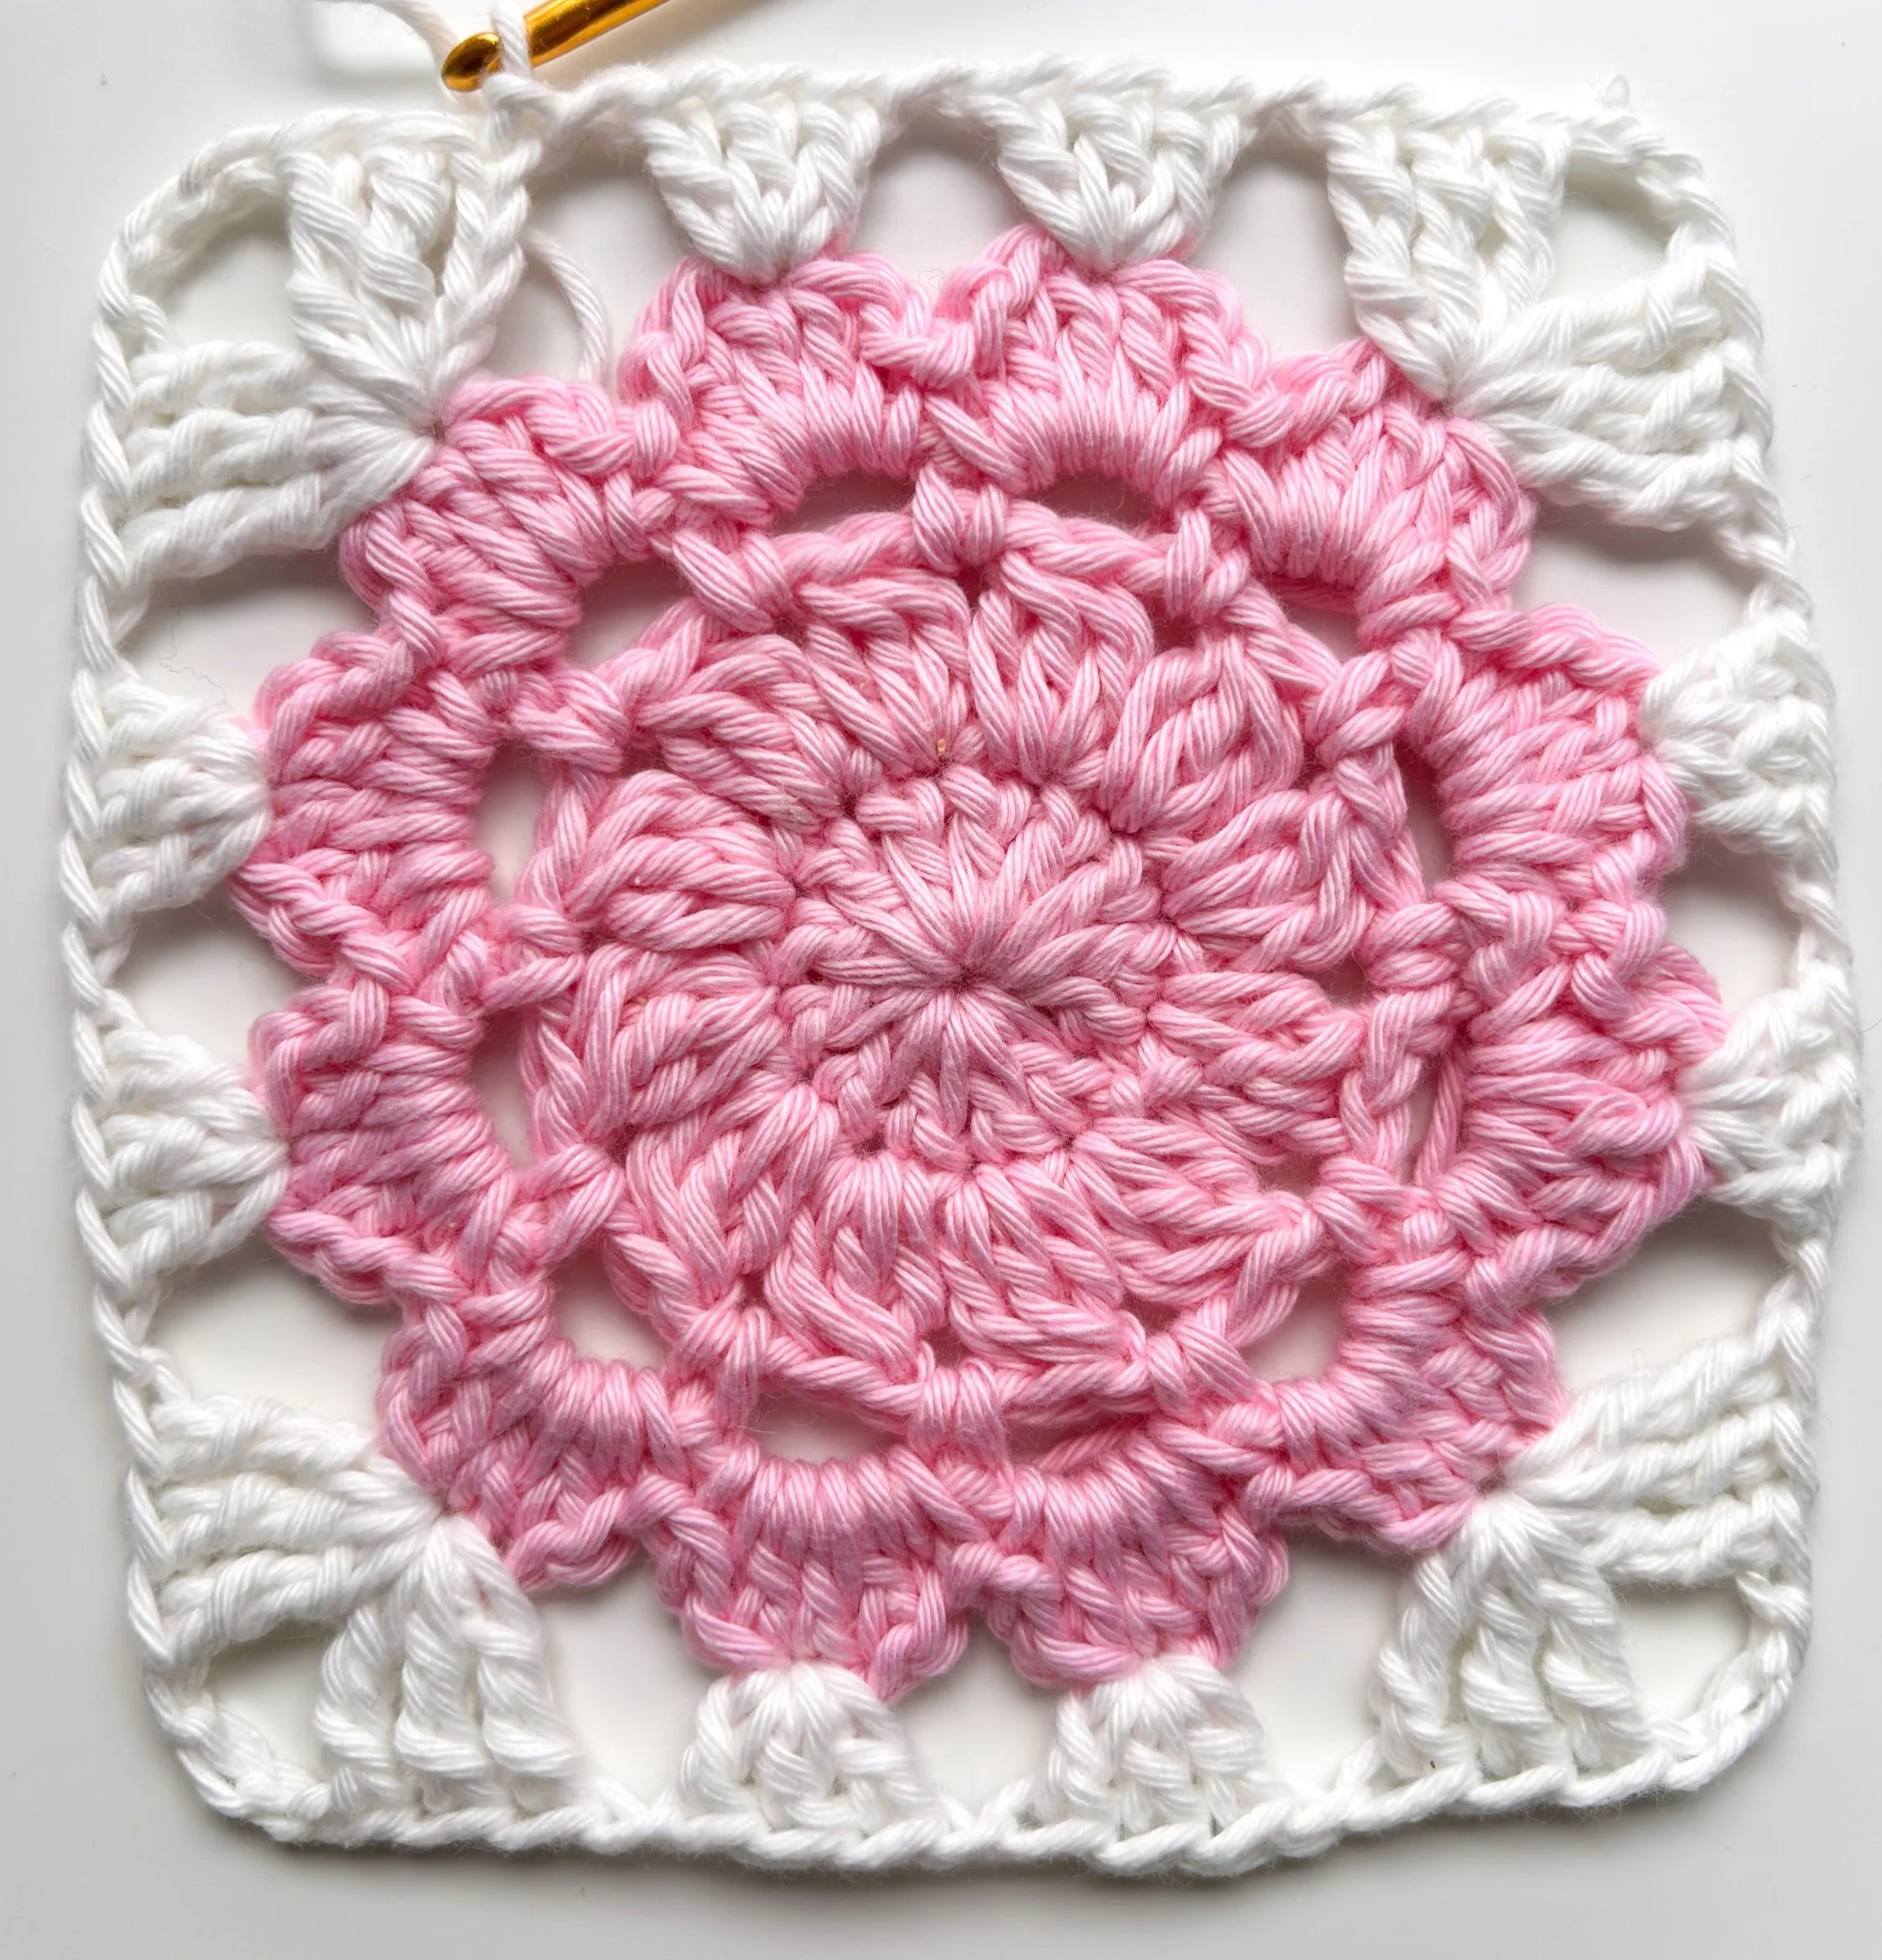
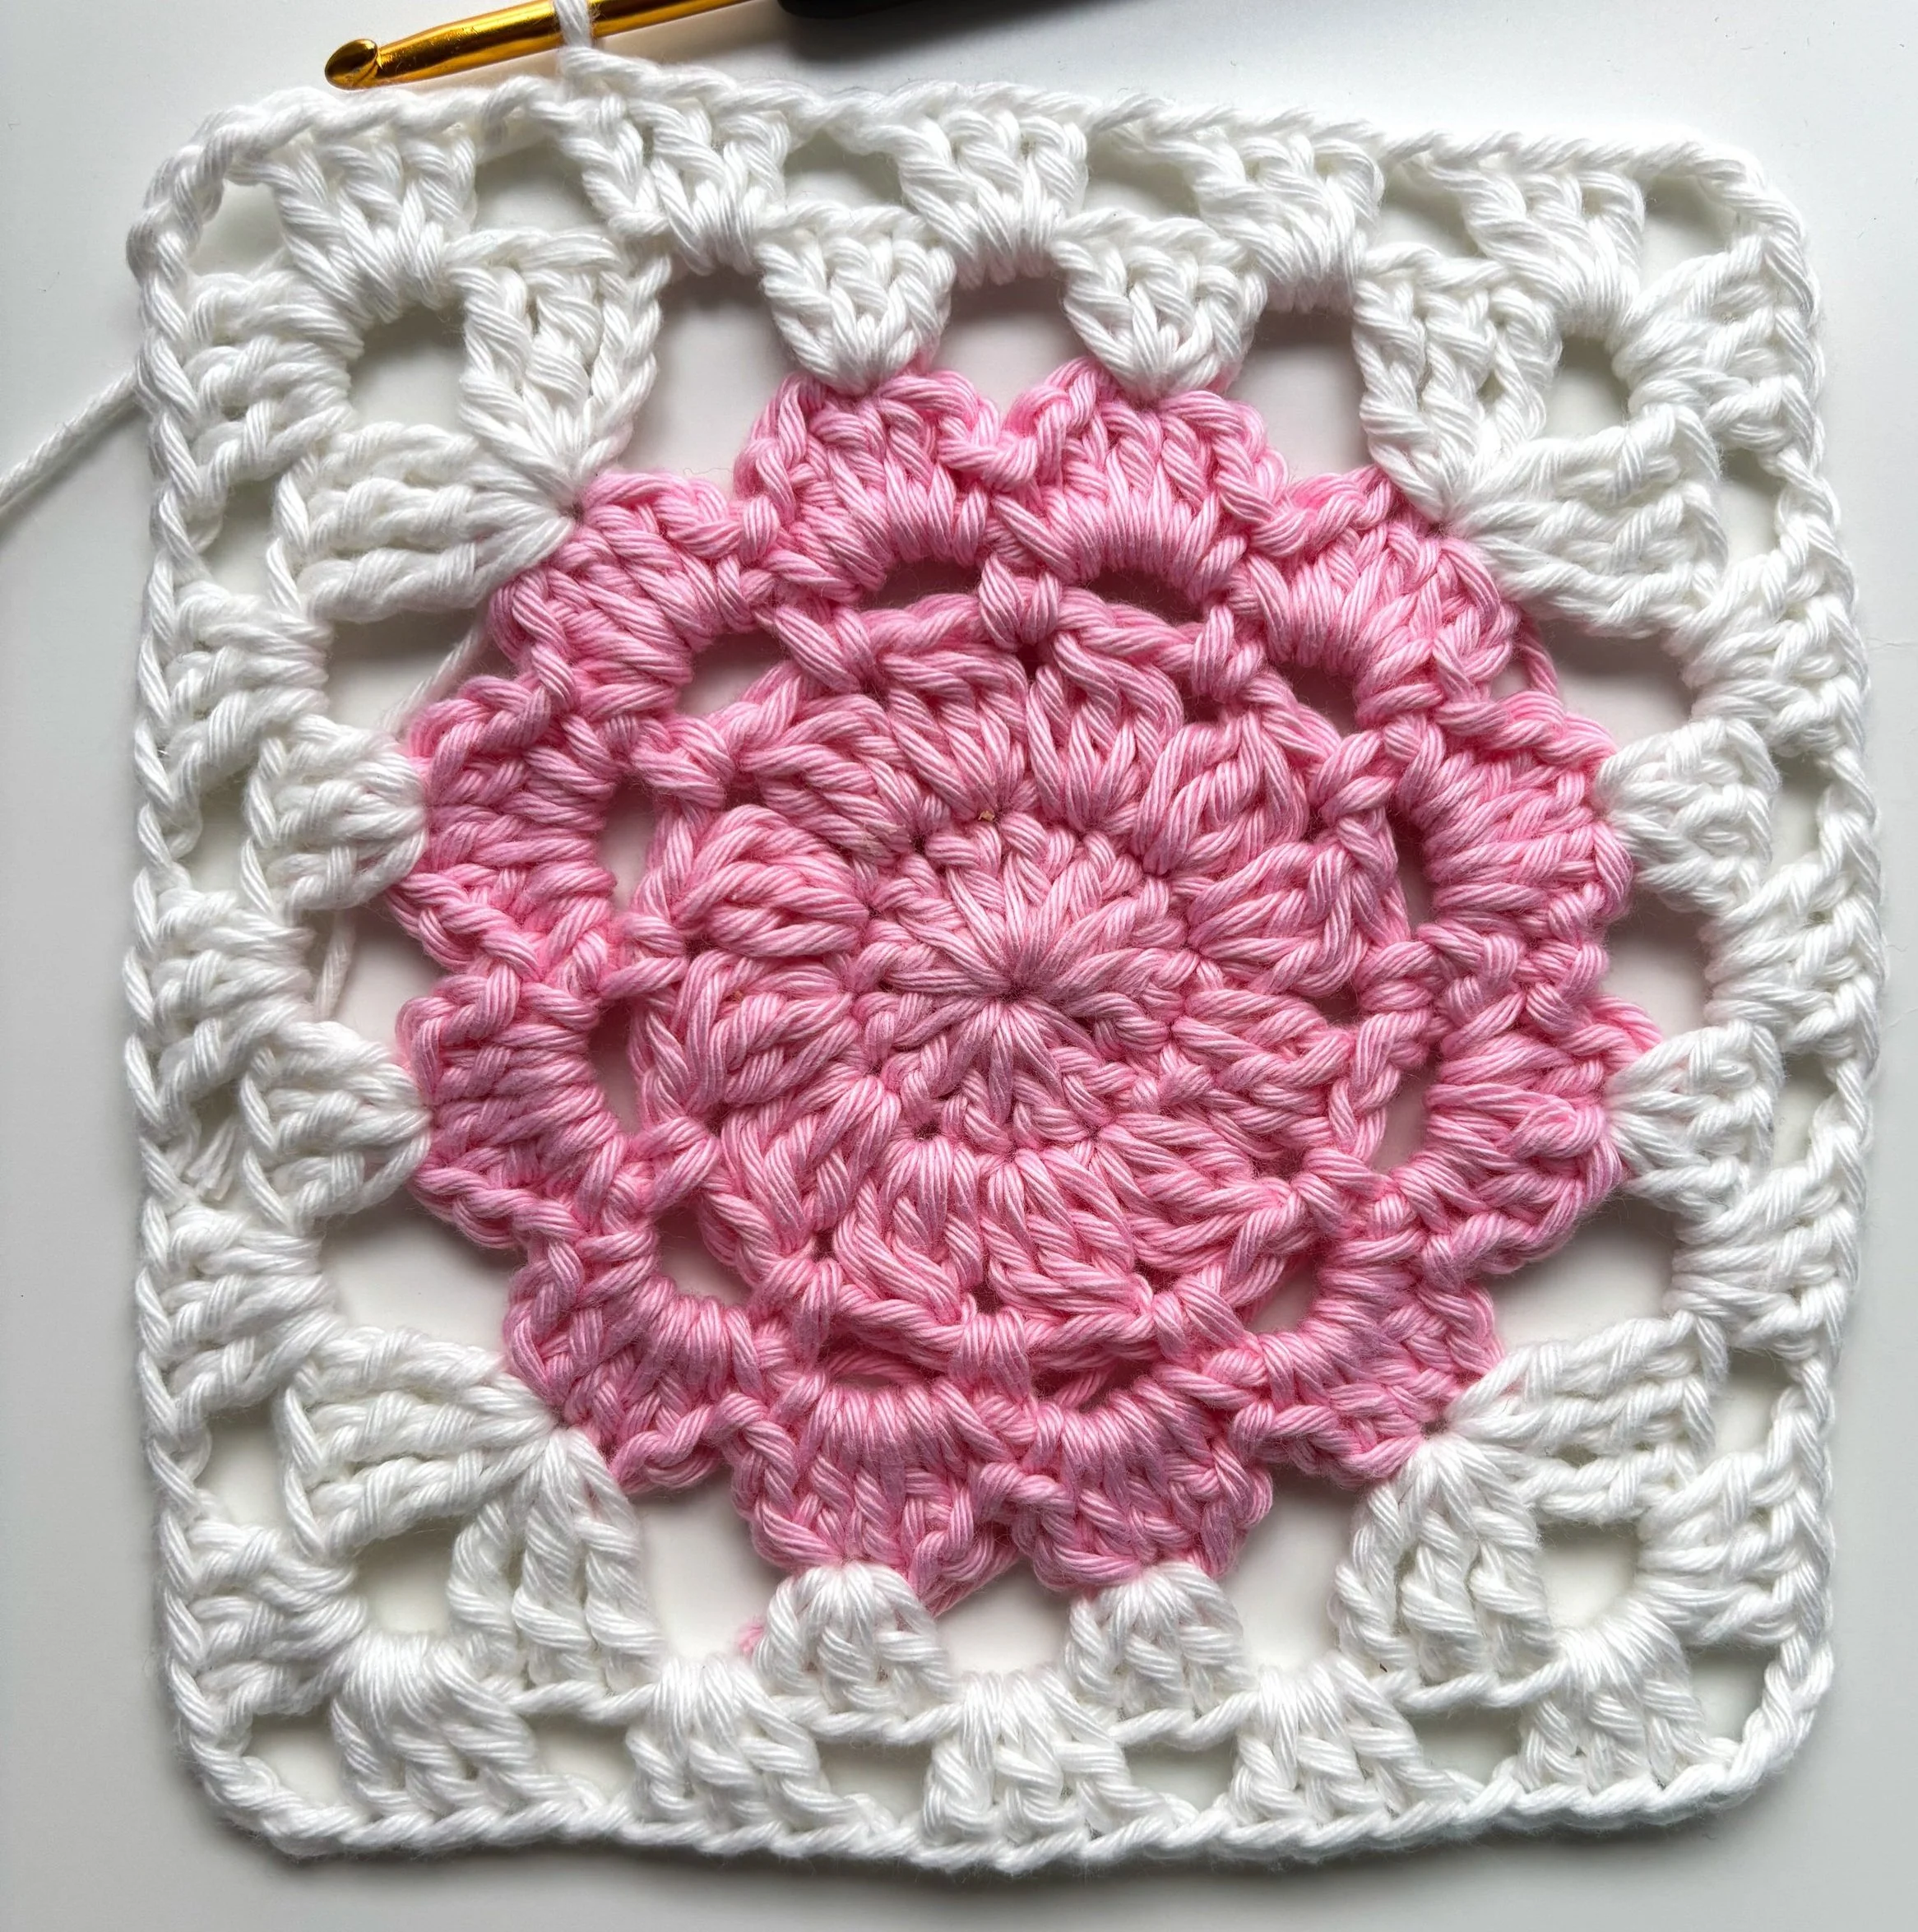
Rnd 2: 4 ch (count as 1st dc+ 1 ch), [(3 dc, 3 ch, 3 dc)** in next corner-sp, 1 ch, (3 dc in next ch-sp, 1 ch) three times] repeat the steps between [...] 4 times in total finishing last repeat at **, 1 ch, (3 dc in next ch-sp, 1 ch) twice, 2 dc in last ch-sp, sl st in 3rd ch from initial 4 ch to close the rnd. Cut yarn and weave in ends. 4 corner spaces (3 dc, 3 ch, 3 dc) separated by 3 groups of 3 dc.
Tip: A full BLANKET LAYOUT is included in the printable version of the pattern — perfect for helping you choose the right size and make any custom adjustments!
MAKING THE BLANKET
How to join the squares?
Following the Blanket Layout diagram, with colour H and using whip stitch join the squares together, working horizontal joins first, then vertical ones.
To do this, you will need to make one long column of 8 squares, which are joined on the sides, horizontally. Follow the black arrows and connect from 1- 8 as in the picture. Repeat this 8 times, so you will have 8 columns of squares.
Then, attach them together following the vertical purple lines. You will repeat this 8 times.
Border
Attach colour G to any blanket corner space. With a 3.50 mm crochet hook.
Rnd 1: 3 ch (count as 1st dc), 1 dc in same corner space, * [1 dc in next 20 sts- this includes each dc and each ch-sp- ), 1 dc in join between two squares] repeat the steps between [...] 7 more times** or until you reach the next corner, omitting working 1 dc in join between squares, (2 dc, 2 ch, 2 dc) in next corner space; repeat, from * 3 more times, finishing last repeat at ** 2 dc in last blanket corner space, 2 ch, join with sl st to 3rd ch from initial 3 ch. 171 dc on each side of the blanket and 4 corner spaces.
Rnd 2: 1 ch, *1 hdc in each st across** (2 hdc, 2 ch, 2 hdc)* repeat from * to * 4 times, finishing last repeat at **, 2 hdc in last corner space, 2 ch and sl st to 1st hdc from round. 175 hdc in each side of the blanket and 4 corner spaces.
Rnd 3: *[Miss 2 hdc, SHELL in next hdc, miss 2 hdc, 1 sc in next hdc] repeat the steps in [...] 29 times, miss 1 hdc, (1 sc, SHELL, 1 sc) in next corner space, repeat from * 3 more times, sl st to 1st dc from 1st shell of rnd. Cut yarn and weave in ends. 29 SHELLS on each side of the blanket and (1 sc, SHELL, 1 sc) in each corner space.
🌺🌺🌺🌺
Well That Was Fun! What's Next?
📌 PIN THIS POST - Don't lose this project; save it to your Pinterest crochet board so you can quickly come back to it again.
💌 SHARE - Share your yarn choice, in-progress, or finished projects on Facebook or Instagram and use the hashtag #leoneladiy
🥂 JOIN - Join our small community on Facebook: Dublin Bay Crochet