

FREE CROCHET BANDANA
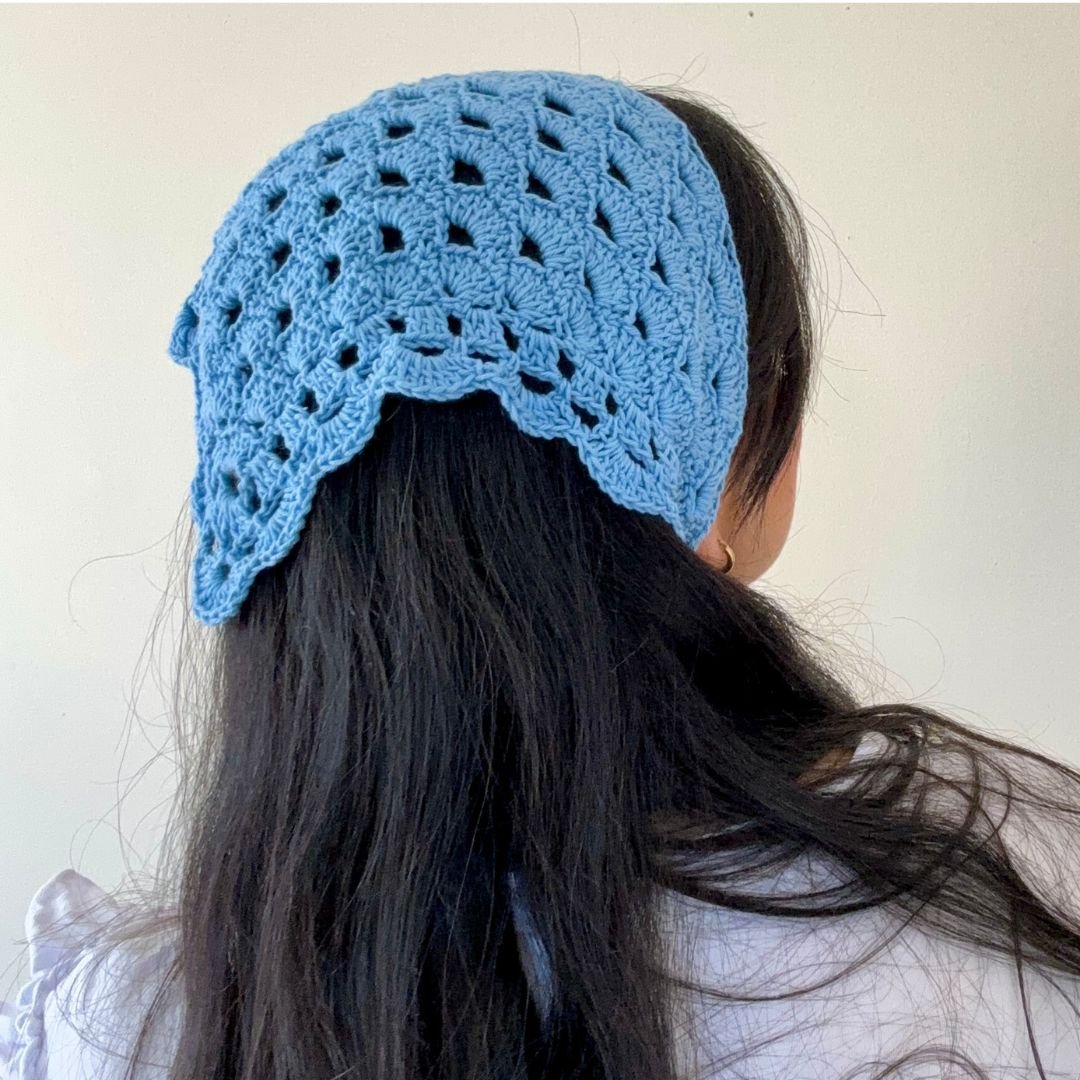
Hello crochet friends! It’s been a while but I’m finally back with a new tutorial :) If you’re on the hunt for a fun and quick project that's perfect for summer, you're in the right place. This easy crochet bandana is exactly what you need to add a stylish touch to your summer wardrobe. Featuring a lovely arch stitch, this bandana is light, airy, and ideal for those warm, sunny days when you want to stay cool and looking good.
What makes this project truly awesome is its simplicity and efficiency. You only need one ball of yarn, making it super budget-friendly. Plus, you can finish it in just a few hours, which is great if you’re short on time or looking for a last-minute gift idea. Whether you’re heading to a picnic, a festival, or just enjoying a day out, this bandana will be your go-to accessory.
To make things even easier, I’ve included detailed step-by-step instructions with plenty of pictures to guide you through the process. And for those of you who prefer a more hands-on approach, there’s a comprehensive video tutorial available too. No matter your skill level, you’ll find this pattern straightforward and enjoyable.
So, grab your favorite yarn and hook, and let’s get started on this delightful summer bandana. It’s a fantastic project to relax with and you’ll love how quickly it comes together. Happy crocheting!

video tutorial
If you are new to crochet, I have created a step-by-step video tutorial to help you out with the written pattern. Just click on the video below and start making the perfect summer accessory!
🩷print and crochet offline 🩷
Love to crochet on the couch? You can always find a low-cost printable PDF version of all my free patterns. Perfect for printing out or viewing offline on your tablet or phone. The printable pdf is a super useful upgrade that makes it even easier to crochet.

materials
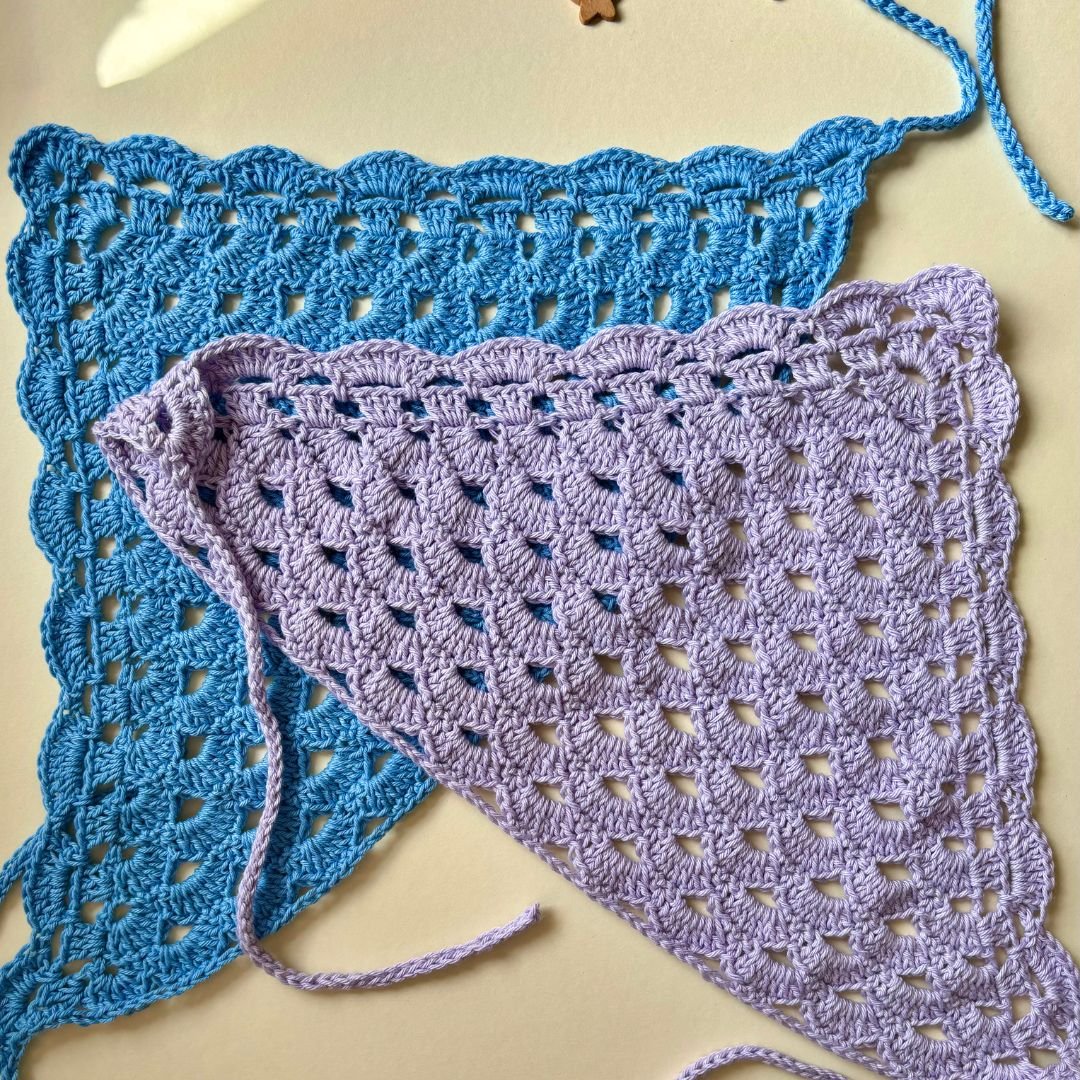
What I love the most about this design is that you only need 1 ball of yarn! And even though I’ve chosen a thinner yarn than usual, this is a really quick project. Cotton is always my preferred option when making hair accessories, but you could also use merino or wool yarn if you are looking for a winter bandana :)
Disclaimer: As an Amazon Associate I earn from qualifying purchases. This means that, at zero cost to you, I will earn an affiliate commission if you click through the link and finalize a purchase. Thank you for your support!
you will need:
Any 4-ply or Sport weight yarn (I used Rainbow Cotton 8/4 by Hobbii Yarns
100 % cotton; 50 g (1.75 oz) = 160 m (175 yds)
*Pastel Purple (041)- Color A (1 ball)
You can also use the following brands of yarn:
*Safran by Drops
*Organic Cotton by Anchor Yarns
4 mm crochet hook or size needed to obtain gauge
Tapestry needle
Scissors and Measuring Tape
PATTERN NOTES
CONSTRUCTION
The Bandana is worked in rows, turning at the end of each row, from the bottom up. Once you have completed the main body of the bandana, proceed to work on the border and the ties.
The chain 3 worked at the end of each row counts as 1 double crochet and the chain 4 counts as 1 sc and 3 ch-space for all rows.
Finally, to achieve a better look, you can steam block your project after finishing.
TENSION:
3.5 shells x 13 rows = 10 cm/ 10 inches
Abbreviations American terms:
Ch- Chain
Ch-sp- Chain space
St/s- Stitch/es
Beg- Beginning
Rnd- Round
RS- Right side
WS- Wrong side
Sl st- Slip stitch
Sc- Single crochet
Dc- Double crochet
Special Stitches:
SHELL: 7 dc in designated space
SIZE
One Size but you can work extra rows to create a larger size.
MEASUREMENTS
Length: 26 cm / 10 inches
Width: 46 cm / 18 inches
START HERE
With your favorite colour and 4 mm crochet hook.
Start by making a magic ring and chain 6 (counts as first dc and 3 ch), 1 dc in 6th ch from hook to form a ring, 3 ch and turn your work.

Working in rows:
Row 1: 6 dc into the ring, 4 ch and turn your work. 1 shell

Row 2: Miss next 2 dc, 1 sc in next st, 3 ch, miss 2 dc, 1 sc in top of beg 3 ch, 3 ch and turn your work. Two 2ch-sps or arches

Row 3: 6 dc in first 3ch-sp (counts as 1st shell here and throughout), 1 sc in next sc, 1 Shell in next 3ch-sp, 4 ch and turn your work. 2 shells

Row 4: Miss next dc, 3 sc, 3 ch, miss [2 dc, 1 sc, 2 dc], 1 sc in next 3 sts , 3 ch, miss 1 dc, 1 sc in top of beg 3 ch, 3 ch and turn your work. Three 3ch-sps or arches

Row 5: 6 dc in first 3ch-sp, *miss next sc, 1 sc in next sc, miss next sc, 1 SHELL in next 3ch-sp; rep from * to end, 4 ch and turn your work. 3 shells

Row 6: Miss next dc, *1 sc in next 3 sts, 3 ch, miss [2 dc, 1 sc, 2 dc]; rep from * to last SHELL, 1 sc in next 3 sts from last shell, 3 ch, miss 1 dc, 1 sc in top of beg 3 ch, 3 ch and turn your work. Four 3ch-sps or arches
Row 7: 6 dc in first 3ch-sp, *miss next sc, 1 sc in next sc, miss next sc, 1 SHELL in next 3ch-sp; rep from * to end, 4 ch and turn. 4 shells
Rows 8 to 25: Repeat rows 6 and 7 nine times.
You can work extra rows here if you would like to make your bandana bigger.
Here’s how many shells you should have by the end of each row:
Row 9: 5 shells in total
Row 11: 6 shells
Row 13: 7 shells
Row 15: 8 shells
Row 17: 9 shells
Row 19: 10 shells
Row 21: 11 shells
Row 23: 12 shells
Row 25: 13 shells
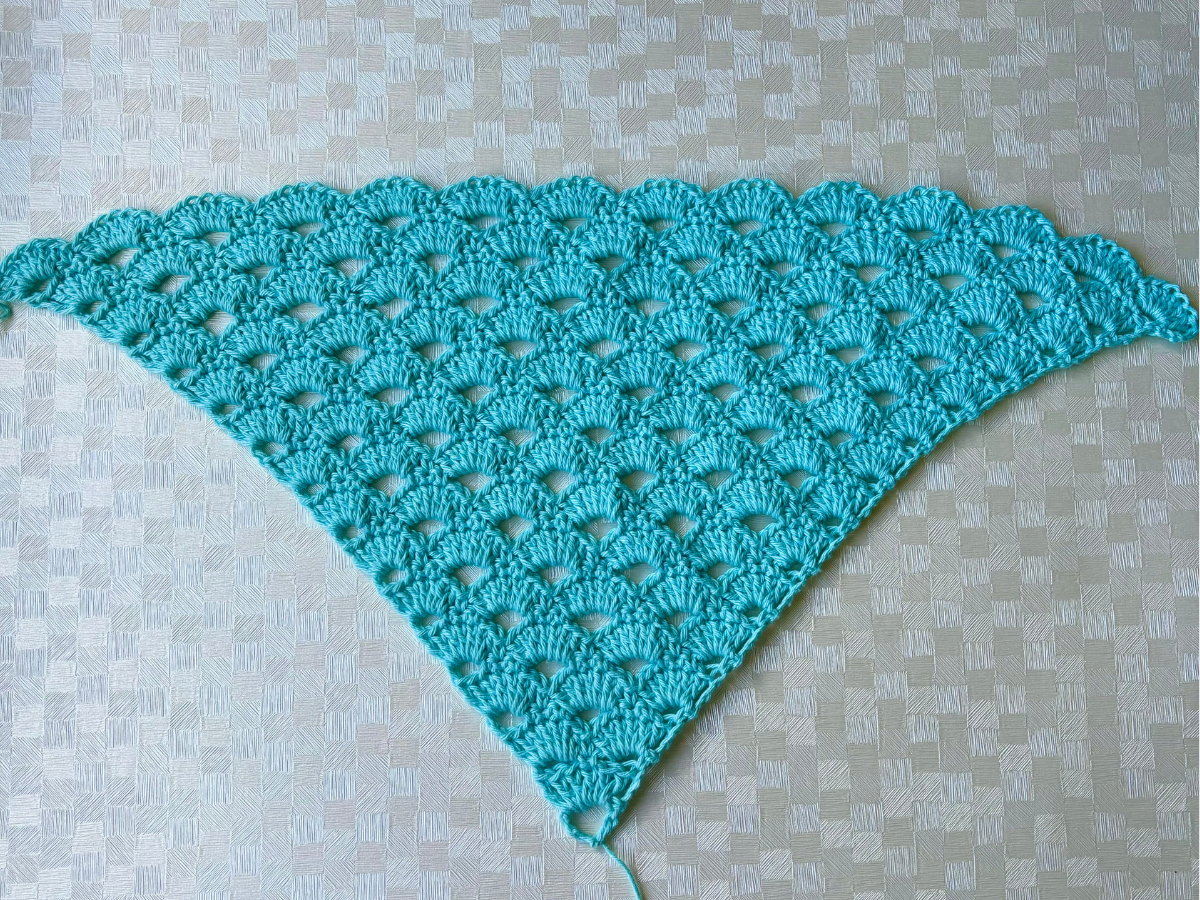
This is how your bandana should look like after working 25 rows:
border
After working the last row of the bandana, make 3 ch to start working on the border. You will be working groups of 3 dc over the last dc of the SHELL on the 1st side of the border and over the initial 3 ch on the other side.
Working in rows:
Row 1: 3 ch (count as the 1st dc here and throughout), 2 dc, 1 ch, [3 dc in next space, 1 ch] repeat the steps between [...] 12 times in total, (3 dc, 3 ch, 3 dc) in corner space of the bandana, [1 ch, 3 dc in next space] repeat the steps between [...] 13 times in total, 1 ch and turn your work. 13 groups of 3 dc separated by 1 ch space on each side and 2 groups of 3 dc separated by 3 ch on the corner of the bandana


Row 2: 1 sc in same space, miss 2 dc, 1 sc in next 1ch-sp, [4 ch, miss 3 dc, 1 sc in next 1ch-sp] repeat the steps between [..] 12 times, 4 ch, 1 sc in 3ch-sp from corner, 4 ch, 1 sc in same space, [4 ch, miss 3 dc, 1 sc in next 1ch-sp] repeat the steps between [..] 13 times, 4 ch, miss 2 dc, 1 sc on top of initial 3 ch from previous row, 3 ch and turn your work. Fourteen 4ch-sps separated by 1 sc and 1 corner space.


Row 3: 6 dc in first 4ch-sp, 1 sc in next 4ch-sp, [SHELL in next 4ch-sp, 1 sc in next 4ch-sp] repeat the steps between [...] 6 times, 9 dc in corner 4ch-sp, [1 sc in next 4ch-sp, SHELL in next 4ch-sp] repeat the steps between [...] 7 times. 7 shells on each side and one shell of 9 dc in corner of the bandana

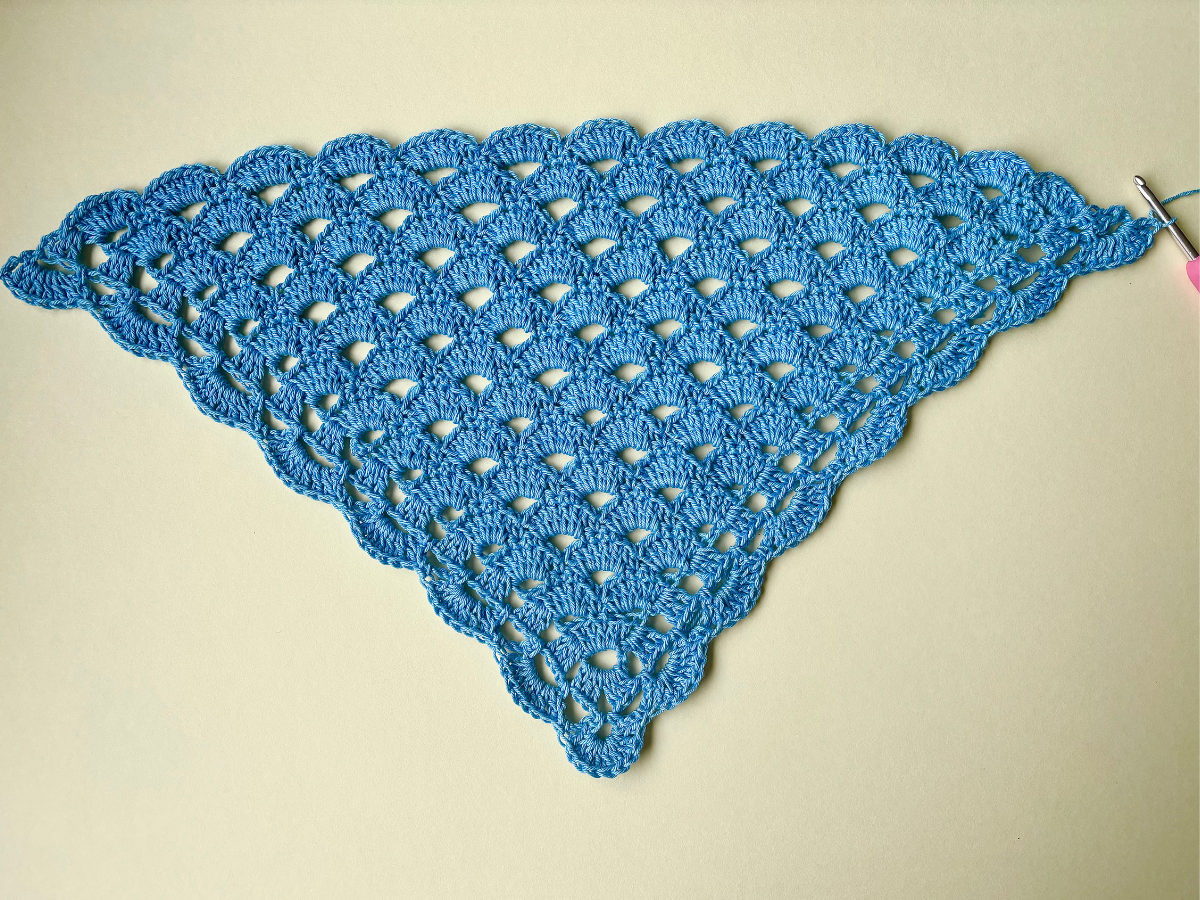
The picture below shows the 3 rows of the border completed. We will now continue working on the ties, so do not fasten off.
making the ties
With the RS of your working facing you, work 51 ch, loosely sl st in 2nd ch from hook and in each ch across. 51 sl sts


When you reach the main body of the bandana (this will be the long horizontal side) work as follow:
Evenly distribute 5 sc over the sts worked for the border that are now lying horizontally, 3 ch, miss 1 st, [1 sc in next 3 sts, miss 5 sts, 3 ch] repeat steps between [...] 13 times, miss 1 dc from last shell and evenly distribute 5 sc over the sts worked for the border that are now lying horizontally, work 51 ch, loosely sl st in 2nd ch from hook and in each ch across.


SL ST into the top corner of the bandana and tie off yarn. Weave in ends. And you’re all done!
I really hope you enjoy this pattern and I would love to see your work!
Tag me on Instagram @leonela.diy